Step 8. Attach Power Cord
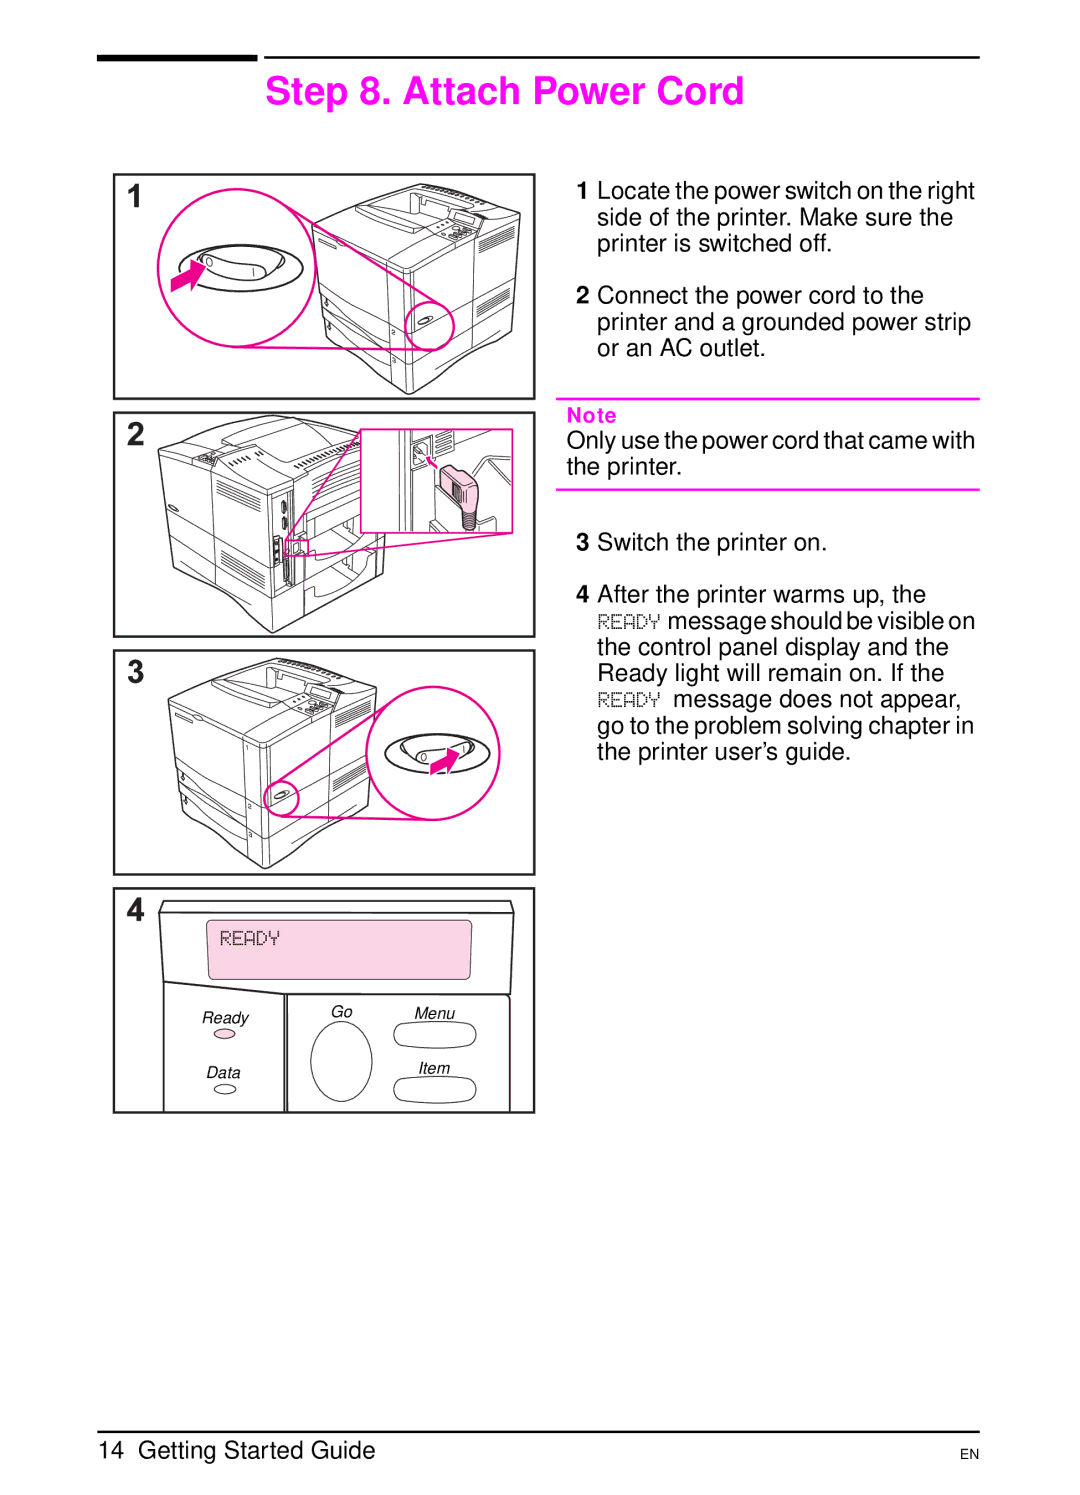
1 Locate the power switch on the right
side of the printer. Make sure the printer is switched off.
2 Connect the power cord to the printer and a grounded power strip or an AC outlet.
Note
Only use the power cord that came with the printer.
3 Switch the printer on.
4 After the printer warms up, the READY message should be visible on the control panel display and the Ready light will remain on. If the READY message does not appear, go to the problem solving chapter in the printer user’s guide.
READY |
|
|
Ready | Go | Menu |
Data |
| Item |
14 Getting Started Guide
EN