Addendum to D Class Enterprise Servers System Installation Guide
Installation
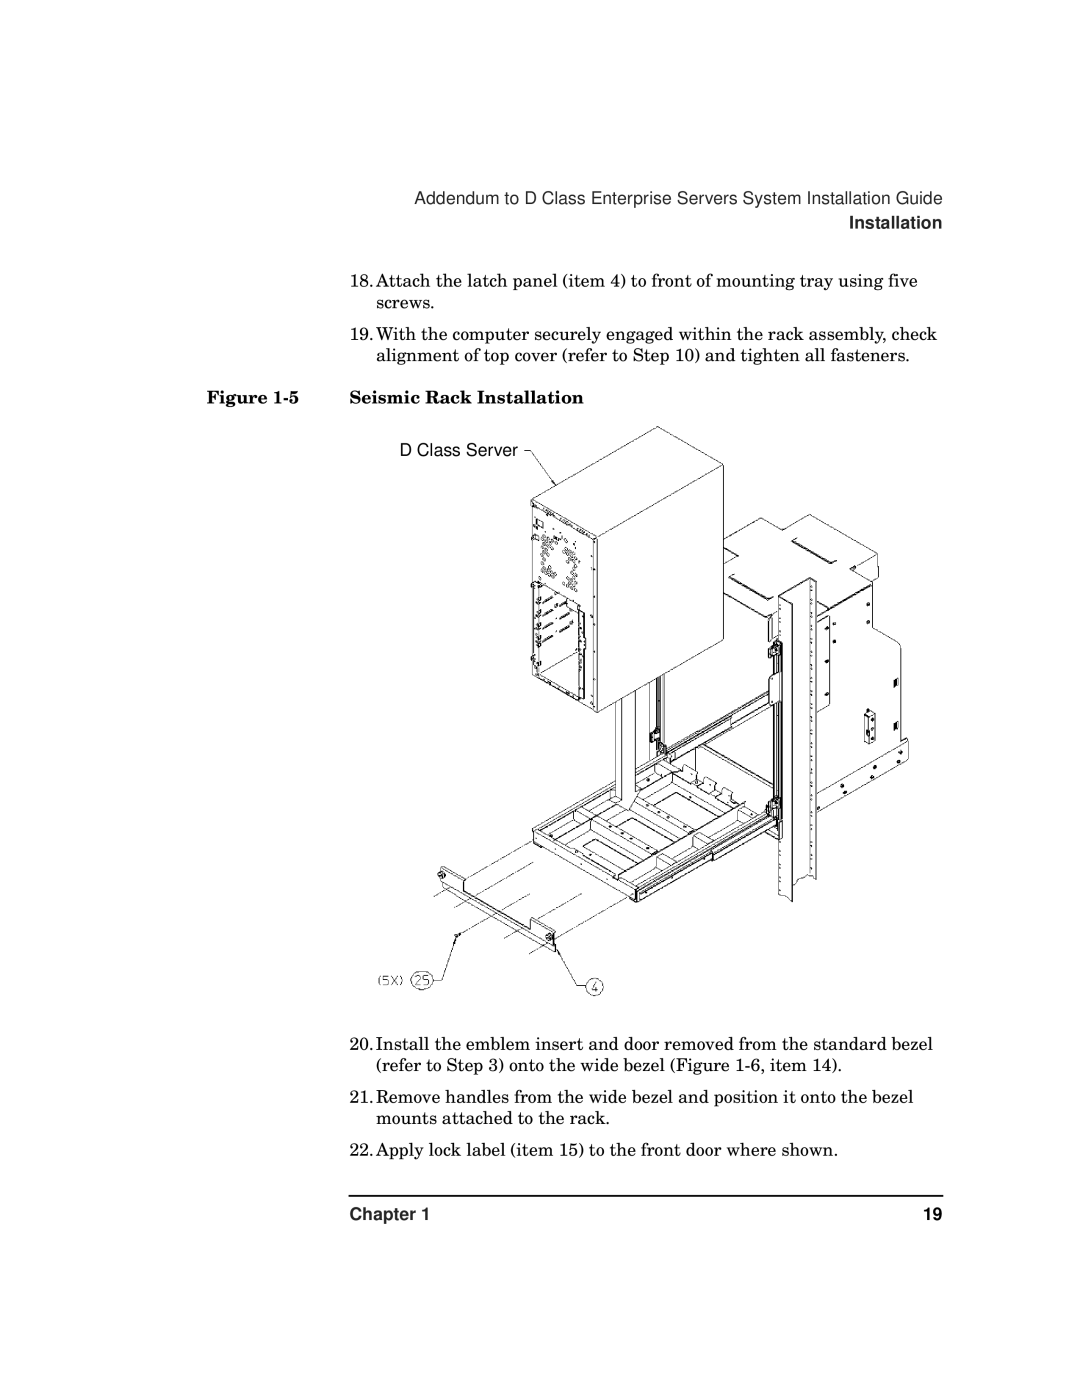
18.Attach the latch panel (item 4) to front of mounting tray using five screws.
19.With the computer securely engaged within the rack assembly, check alignment of top cover (refer to Step 10) and tighten all fasteners.
Figure 1-5 Seismic Rack Installation
D Class Server
20.Install the emblem insert and door removed from the standard bezel (refer to Step 3) onto the wide bezel (Figure
21.Remove handles from the wide bezel and position it onto the bezel mounts attached to the rack.
22.Apply lock label (item 15) to the front door where shown.
Chapter 1 | 19 |