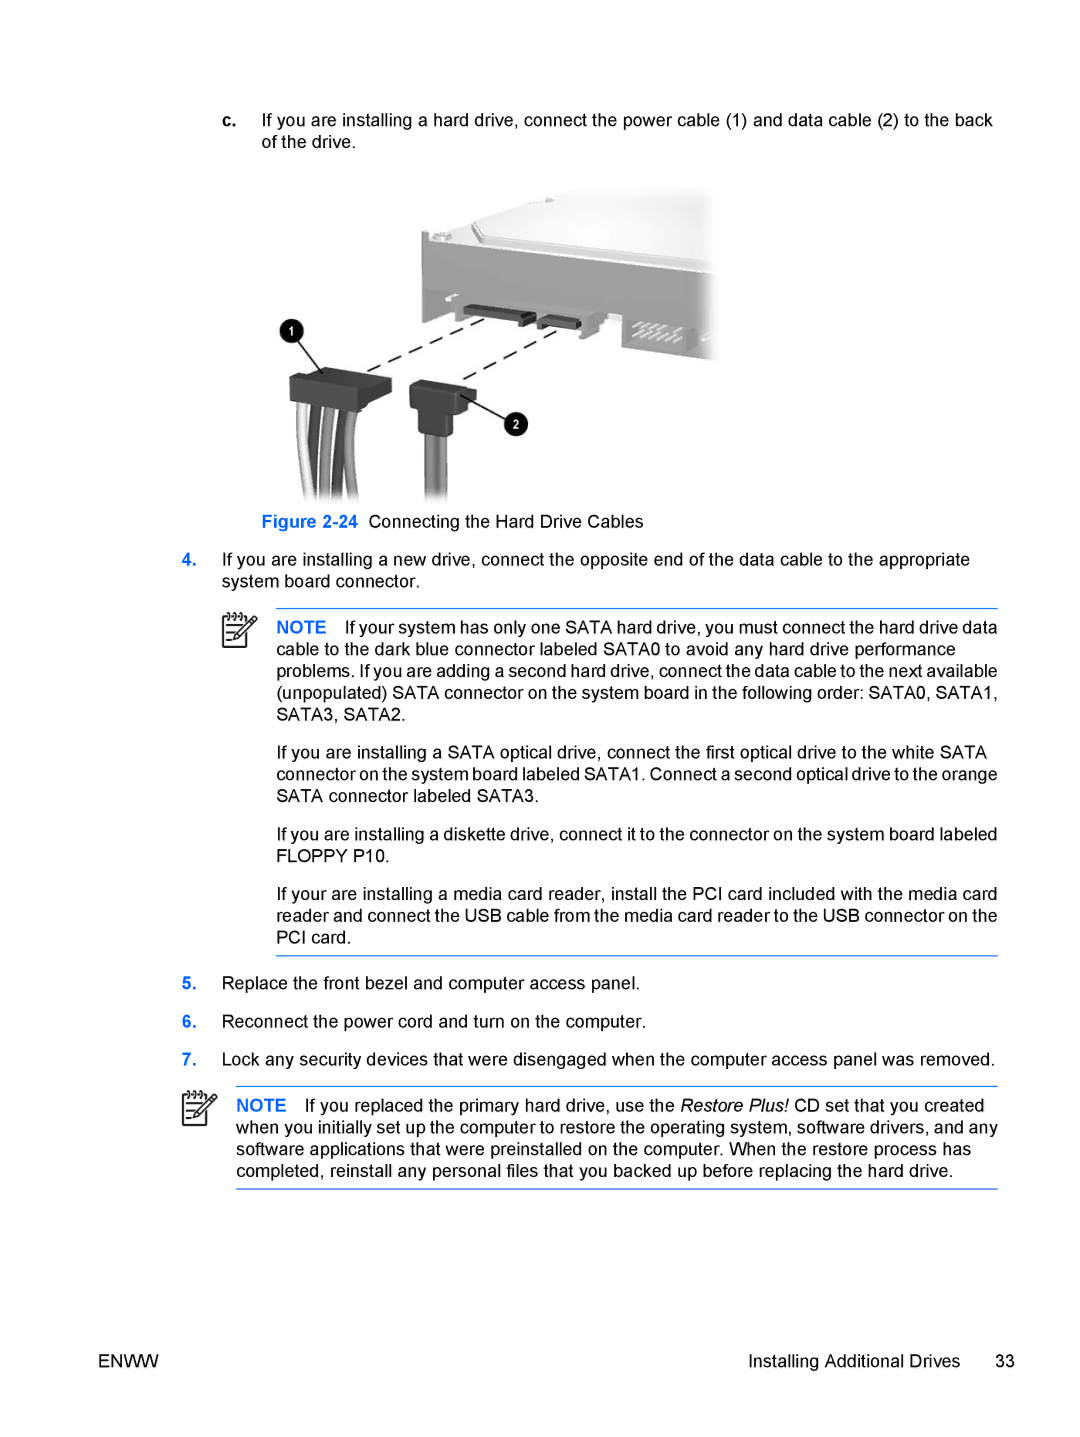
c.If you are installing a hard drive, connect the power cable (1) and data cable (2) to the back of the drive.
Figure 2-24 Connecting the Hard Drive Cables
4.If you are installing a new drive, connect the opposite end of the data cable to the appropriate system board connector.
NOTE If your system has only one SATA hard drive, you must connect the hard drive data cable to the dark blue connector labeled SATA0 to avoid any hard drive performance problems. If you are adding a second hard drive, connect the data cable to the next available (unpopulated) SATA connector on the system board in the following order: SATA0, SATA1, SATA3, SATA2.
If you are installing a SATA optical drive, connect the first optical drive to the white SATA connector on the system board labeled SATA1. Connect a second optical drive to the orange SATA connector labeled SATA3.
If you are installing a diskette drive, connect it to the connector on the system board labeled FLOPPY P10.
If your are installing a media card reader, install the PCI card included with the media card reader and connect the USB cable from the media card reader to the USB connector on the PCI card.
5.Replace the front bezel and computer access panel.
6.Reconnect the power cord and turn on the computer.
7.Lock any security devices that were disengaged when the computer access panel was removed.
NOTE If you replaced the primary hard drive, use the Restore Plus! CD set that you created when you initially set up the computer to restore the operating system, software drivers, and any software applications that were preinstalled on the computer. When the restore process has completed, reinstall any personal files that you backed up before replacing the hard drive.
ENWW | Installing Additional Drives 33 |