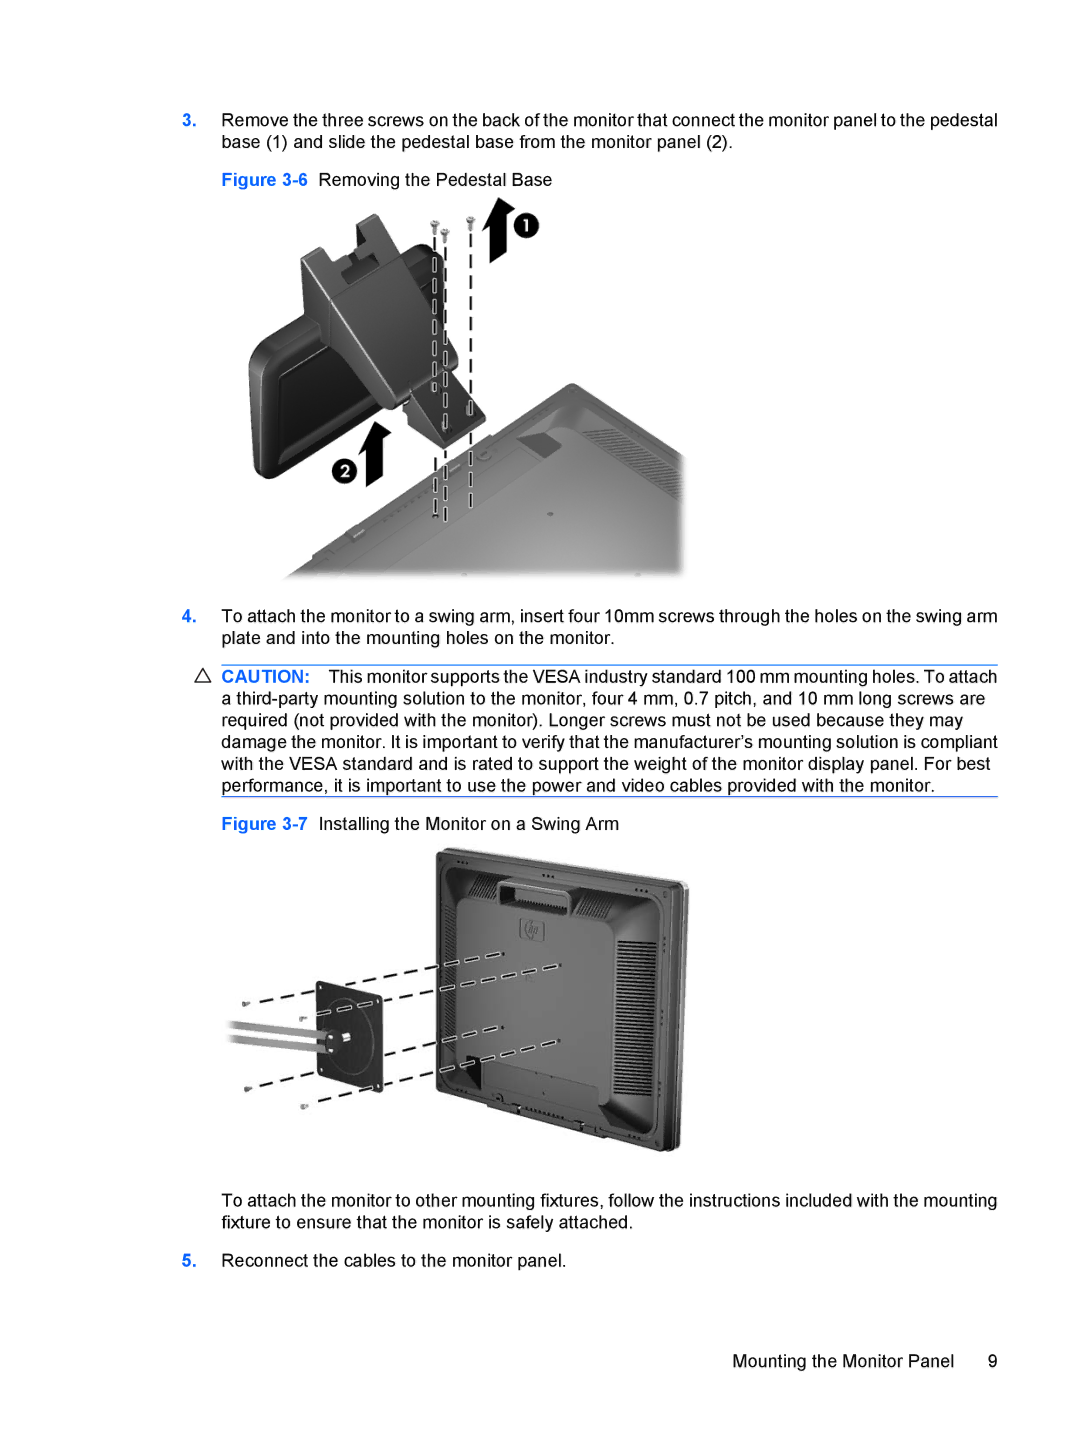
3.Remove the three screws on the back of the monitor that connect the monitor panel to the pedestal base (1) and slide the pedestal base from the monitor panel (2).
Figure 3-6 Removing the Pedestal Base
4.To attach the monitor to a swing arm, insert four 10mm screws through the holes on the swing arm plate and into the mounting holes on the monitor.
CAUTION: This monitor supports the VESA industry standard 100 mm mounting holes. To attach a
Figure 3-7 Installing the Monitor on a Swing Arm
To attach the monitor to other mounting fixtures, follow the instructions included with the mounting fixture to ensure that the monitor is safely attached.
5.Reconnect the cables to the monitor panel.
Mounting the Monitor Panel | 9 |
