Installing the Fibre Loop Switch
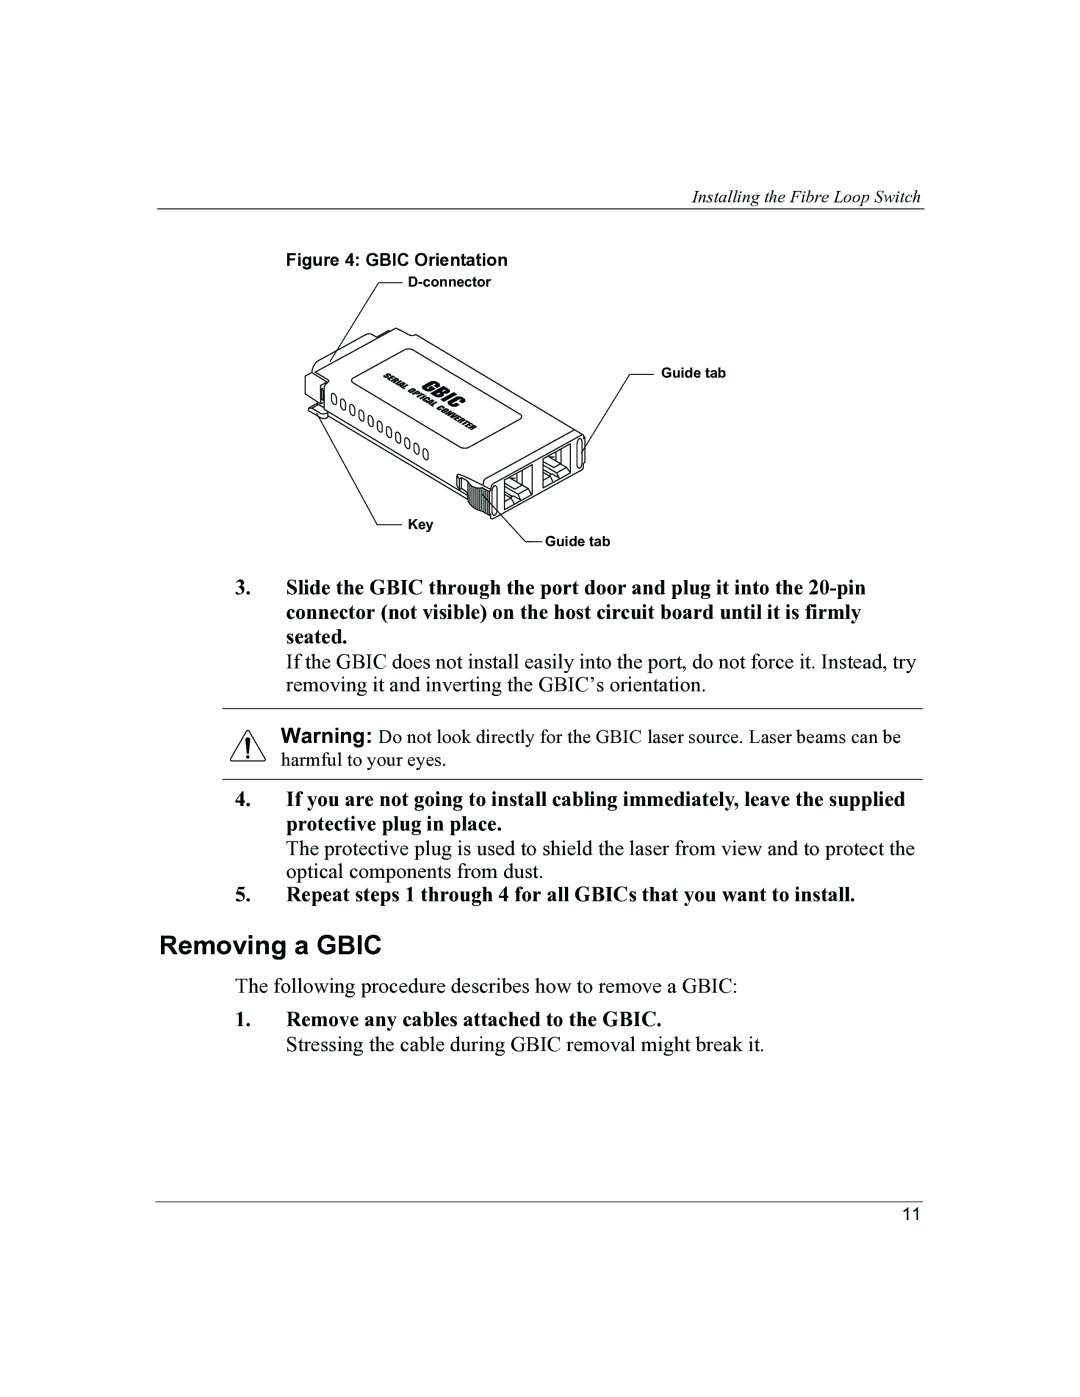
Figure 4: GBIC Orientation
Guide tab
Key
Guide tab
3.Slide the GBIC through the port door and plug it into the
If the GBIC does not install easily into the port, do not force it. Instead, try removing it and inverting the GBIC’s orientation.
Warning: Do not look directly for the GBIC laser source. Laser beams can be harmful to your eyes.
4.If you are not going to install cabling immediately, leave the supplied protective plug in place.
The protective plug is used to shield the laser from view and to protect the optical components from dust.
5.Repeat steps 1 through 4 for all GBICs that you want to install.
Removing a GBIC
The following procedure describes how to remove a GBIC:
1.Remove any cables attached to the GBIC.
Stressing the cable during GBIC removal might break it.
11