TOOL INSTALLATION
Your Paslode tool comes ready for immediate use and can be installed by following these steps:
1.SAFETY - All tool operators and their immediate supervisors must become familiar with the operator safety instructions before operating the tool. The instructions are on page 2 of this manual.
2.Included wuth each tool are one copy of this Safety and Maintenance manual and one copy of the Tool Schematic. Keep these publications for future reference. An ownership registration card is also included. This card must be completed and returned to Paslode immediately to register your ownership.
3.The plastic cap in the air inlet of the tool must be removed before the male fitting is installed. The fitting must be a male pneumatic type that dis- charges the air from the tool when the air line is disconnected.
4.Install a filter/regulator/lubricator unit, with a gauge as close as practical to the tool, preferably within ten feet. Refer to the Air Systems section of this manual for air hose requirements and lengths. In general, no other special installation is required.
5.If the operator is working at a bench or table, it is usually best to run the air line underneath the bench. A small tray under the benchtop can hold the fastener supply and the tool when not in use.
6.If this tool does not work when it is first con- nected, do not try to make repairs. Call your Paslode representative immediately.
TOOL OPERATION
Depth of Drive Adjustment
(On tools equipped with this feature)
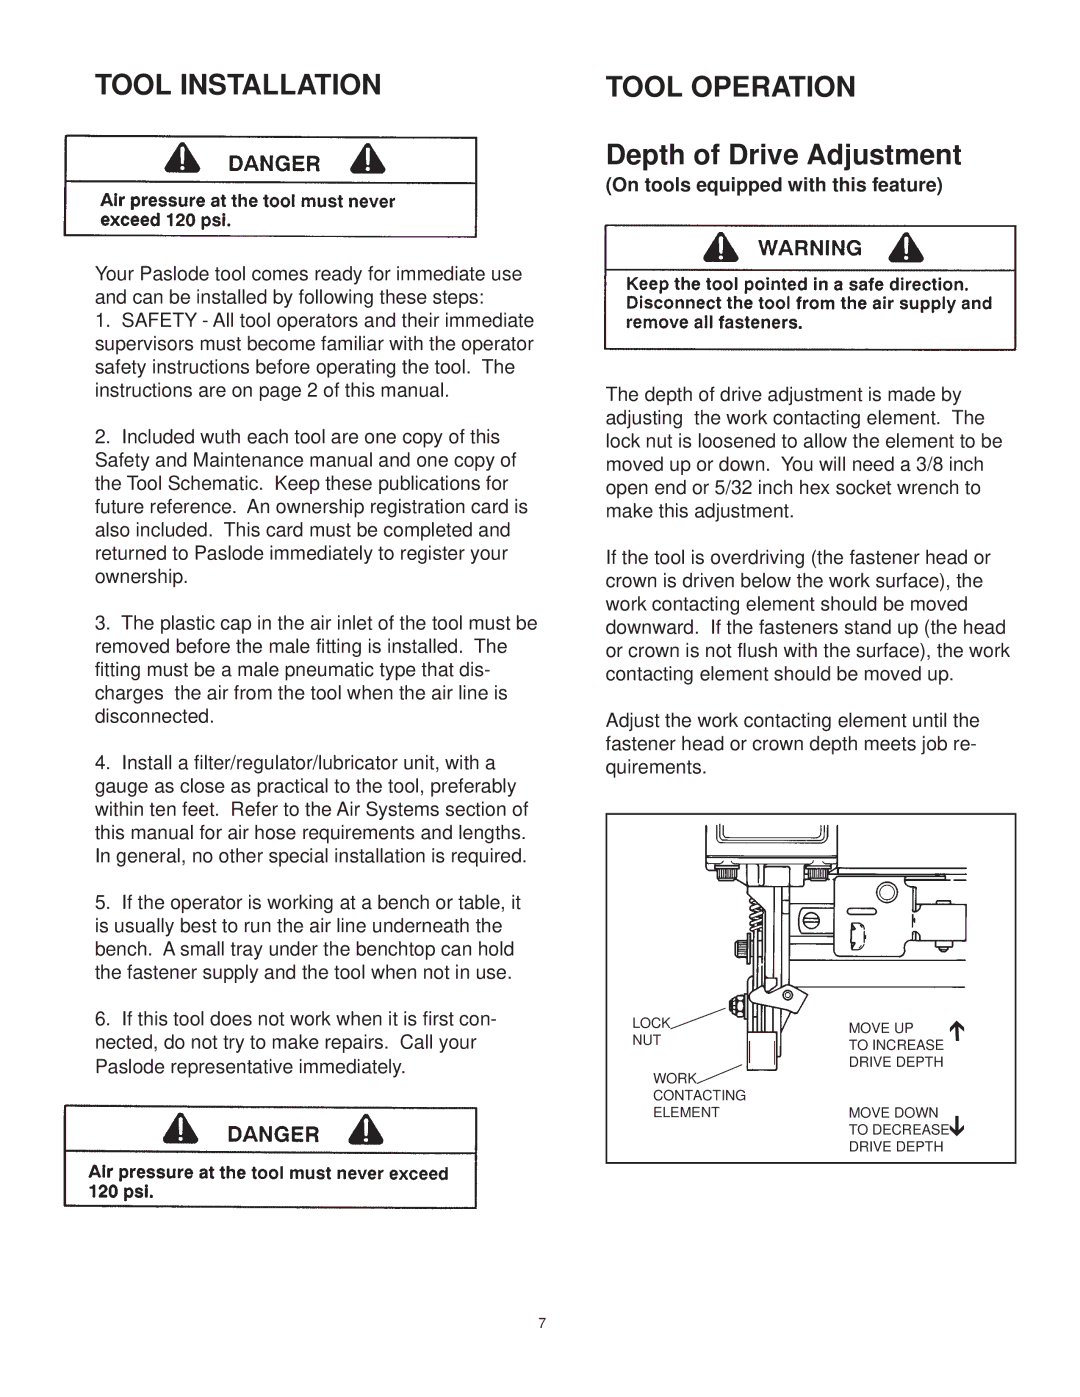
The depth of drive adjustment is made by adjusting the work contacting element. The lock nut is loosened to allow the element to be moved up or down. You will need a 3/8 inch open end or 5/32 inch hex socket wrench to make this adjustment.
If the tool is overdriving (the fastener head or crown is driven below the work surface), the work contacting element should be moved downward. If the fasteners stand up (the head or crown is not flush with the surface), the work contacting element should be moved up.
Adjust the work contacting element until the fastener head or crown depth meets job re- quirements.
LOCK | MOVE UP |
|
NUT |
| |
TO INCREASE |
| |
|
| |
| DRIVE DEPTH |
|
WORK |
|
|
CONTACTING |
|
|
ELEMENT | MOVE DOWN | ➔ |
|
| |
| TO DECREASE | |
DRIVE DEPTH
7