The following steps describe how this works using a Linux boot image:
1.A Target Machine (either bare metal or with boot sector removed) boots.
2.The
3.A DHCP server receives the request, and then responds to the client, offering the following information:
•An IP address, subnet mask, DNS, etc.
•The address of the TFTP server
•The location of boot files on the TFTP server
4.When the client receives this information, it contacts the TFTP server to get the boot image.
5.The TFTP server sends the boot image (pxelinux.0), and then the client executes it.
6.The Operating System is loaded.
By default, the boot image searches for the pxelinux.cfg directory on the TFTP server for boot configuration files.
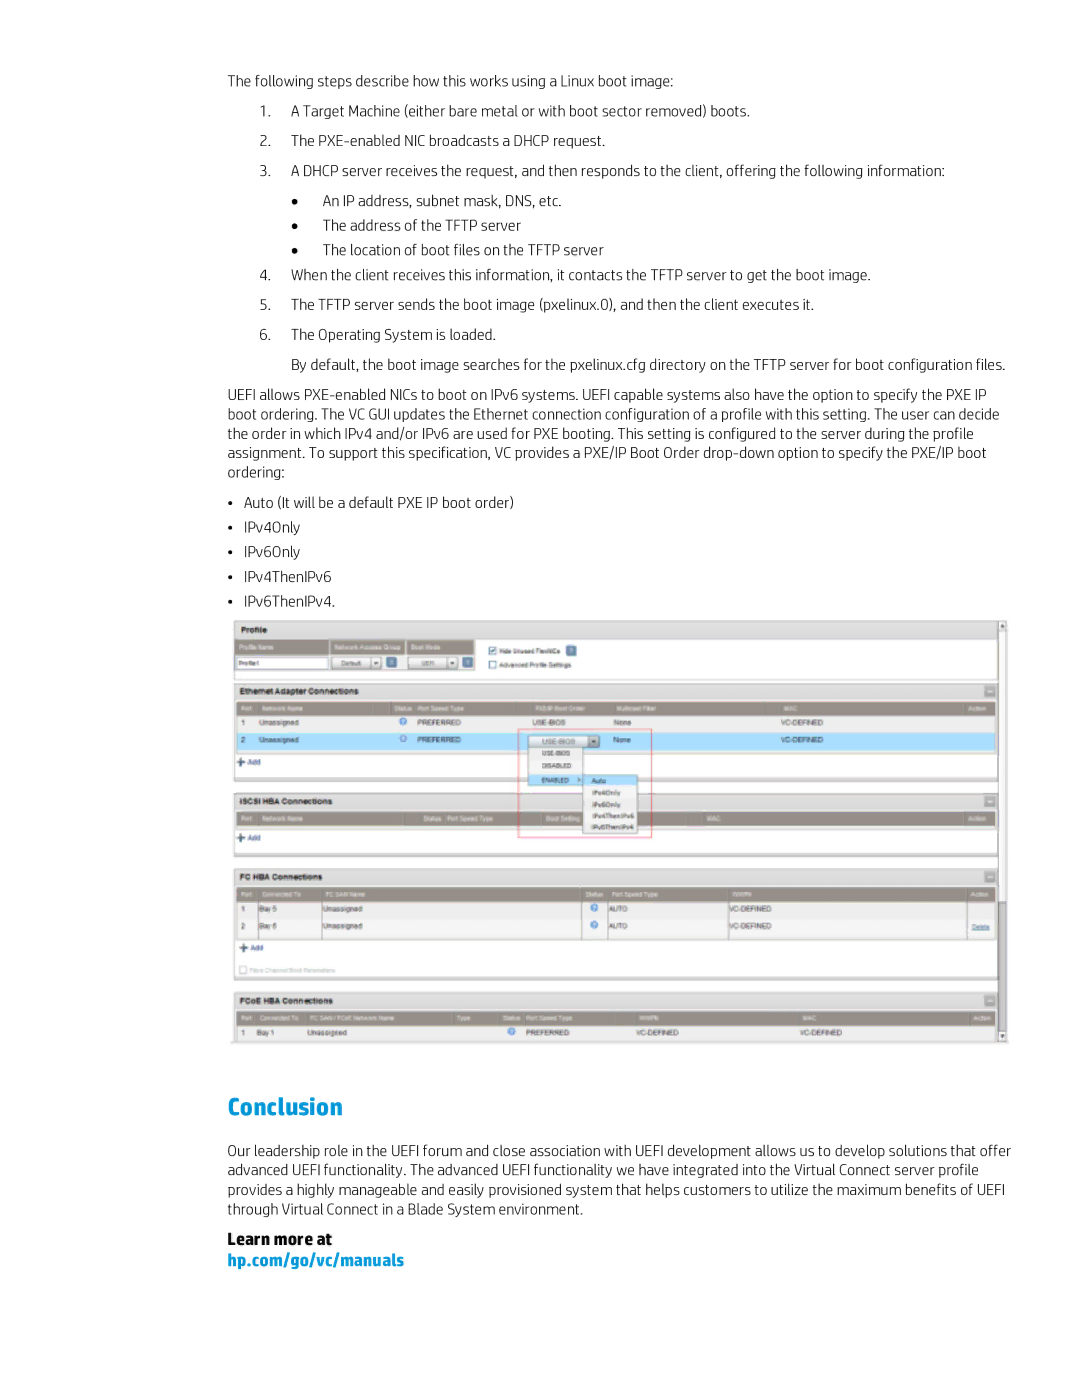
UEFI allows
•Auto (It will be a default PXE IP boot order)
•IPv4Only
•IPv6Only
•IPv4ThenIPv6
•IPv6ThenIPv4.
Conclusion
Our leadership role in the UEFI forum and close association with UEFI development allows us to develop solutions that offer advanced UEFI functionality. The advanced UEFI functionality we have integrated into the Virtual Connect server profile provides a highly manageable and easily provisioned system that helps customers to utilize the maximum benefits of UEFI through Virtual Connect in a Blade System environment.
Learn more at hp.com/go/vc/manuals