
43042-01, 82048 specifications
The Hunter Fan 43042-01,82048 is an exemplary ceiling fan that embodies functionality, style, and innovation. This fan stands out in the market due to its exceptional performance and aesthetic appeal, making it an ideal addition to various spaces, from living rooms to bedrooms.One of the primary features of the Hunter Fan 43042-01,82048 is its powerful motor, designed to deliver optimal airflow with minimal noise. This ensures a comfortable environment without the disruptive sounds often associated with ceiling fans. The motor is engineered for durability, contributing to the fan's long lifespan and reliability in different conditions.
The design of the Hunter Fan 43042-01,82048 is both contemporary and classic, making it a versatile choice for numerous decor styles. Available in various finishes, including brushed nickel and farmhouse white, this fan can seamlessly blend into any interior design, providing both function and flair. The sleek blades not only enhance its aesthetic appeal but are also ergonomically designed for maximum air circulation.
Another remarkable technology featured in this model is its reversible motor function. This allows the user to switch the blade direction, making it suitable for both summer and winter use. In the summer, the fan can be set to a counterclockwise rotation for a refreshing breeze, while in the winter, it can be adjusted to clockwise to circulate warm air trapped near the ceiling. This feature promotes energy efficiency year-round, potentially lowering heating and cooling costs.
The integrated LED lighting system is another advantageous characteristic of the Hunter Fan 43042-01,82048. The built-in lights provide ample illumination while being energy-efficient, ensuring that the fan not only cools the room but also brightens the space effectively. Additionally, the light kit is designed to be dimmable, allowing users to customize the ambiance according to their preferences.
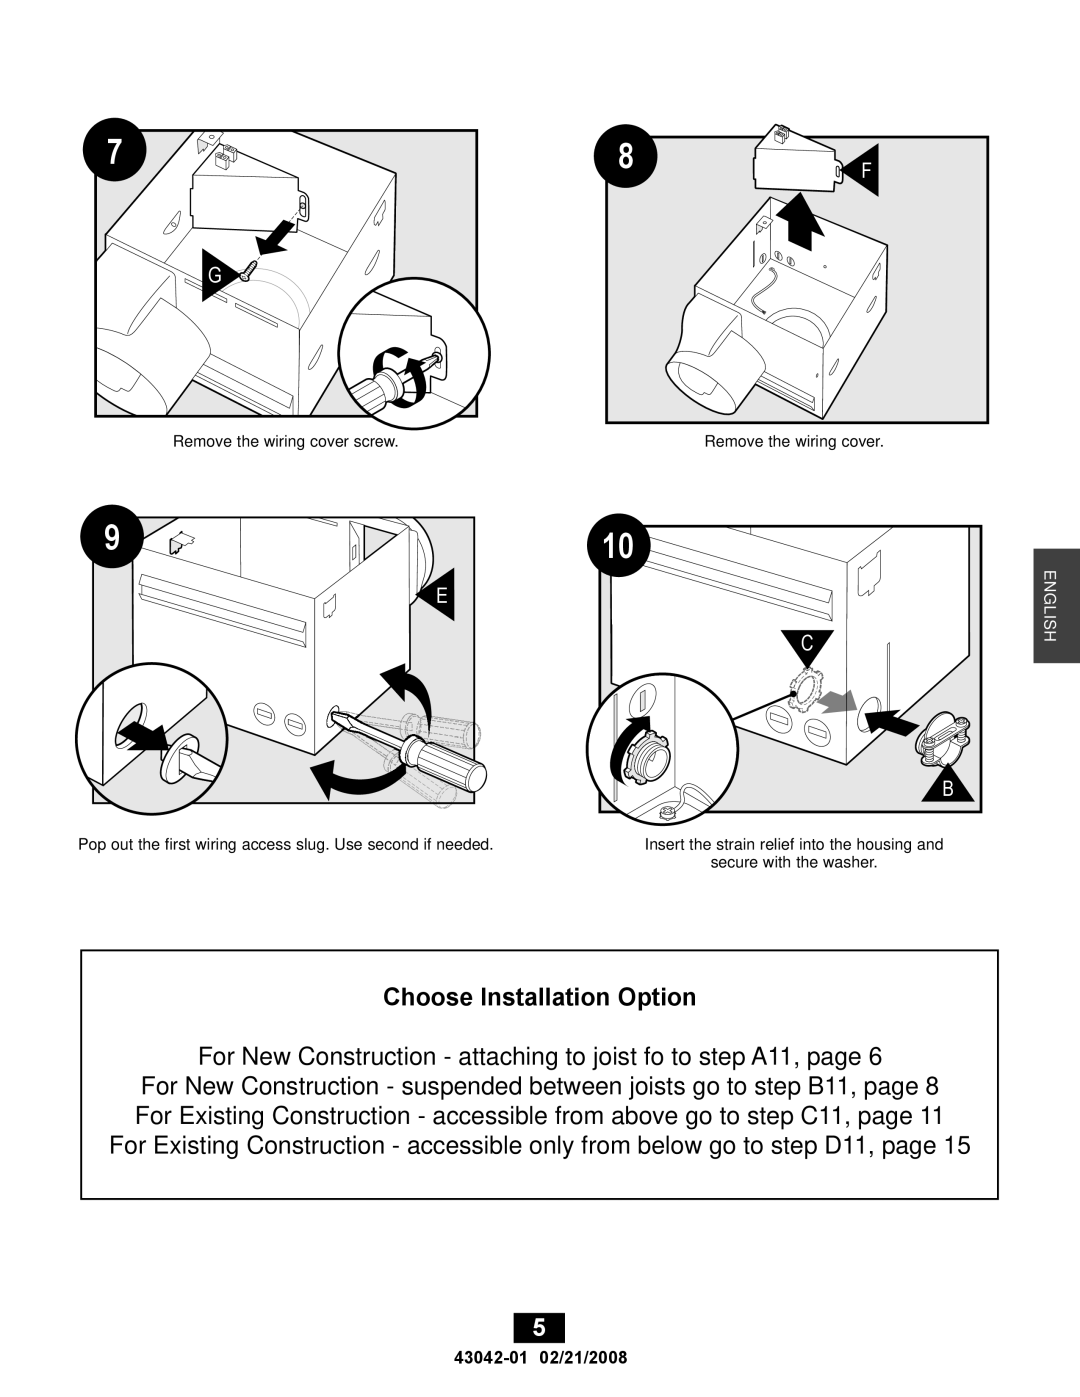
Installation is made convenient with the fan's user-friendly mounting system, which accommodates standard ceilings and sloped angles. This versatility enables homeowners and renters to enjoy the benefits of this ceiling fan regardless of their ceiling layout.
In summary, the Hunter Fan 43042-01,82048 combines advanced technology, aesthetic versatility, and energy efficiency, making it a modern choice for any home. From its powerful motor and reversible functionality to integrated lighting and stylish design, this fan is poised to enhance comfort and décor in any space.