3 | 4 |
H |
|
| E |
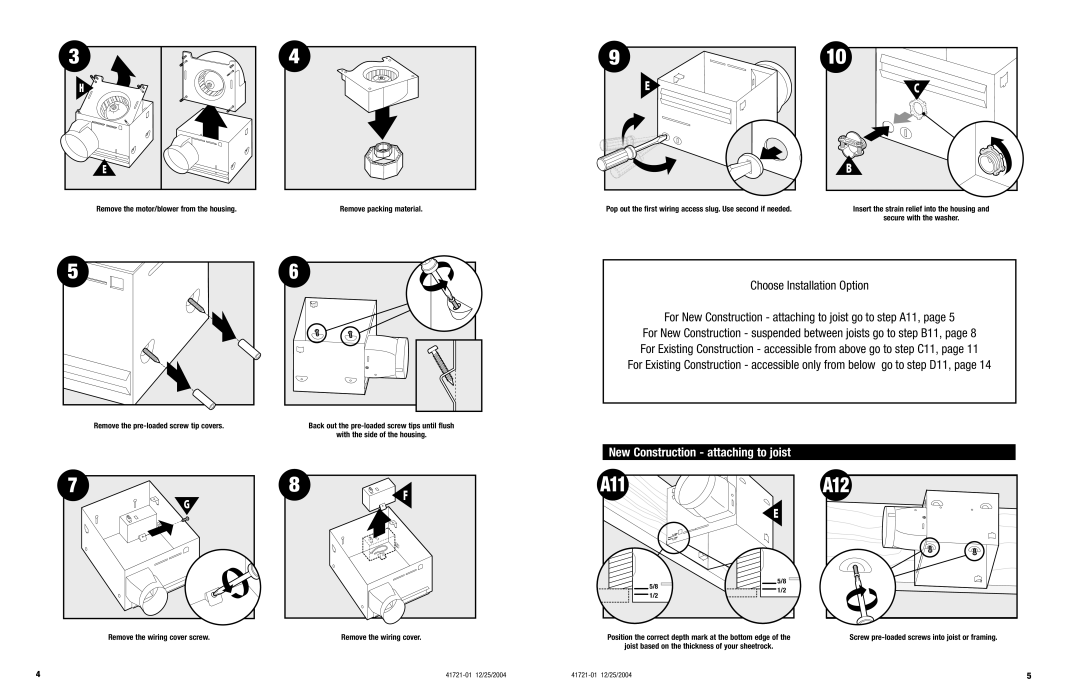
Remove the motor/blower from the housing. | Remove packing material. |
9
E![]() C
C
B
Pop out the first wiring access slug. Use second if needed. | Insert the strain relief into the housing and |
| secure with the washer. |
5 |
Remove the
6 |
Back out the
with the side of the housing.
Choose Installation Option
For New Construction - attaching to joist go to step A11, page 5
For New Construction - suspended between joists go to step B11, page 8 For Existing Construction - accessible from above go to step C11, page 11 For Existing Construction - accessible only from below go to step D11, page 14
7 |
G |
Remove the wiring cover screw.
8 | F |
|
Remove the wiring cover.
New Construction - attaching to joist
A11 |
| |
| E | |
5/8 | 5/8 | |
1/2 | ||
1/2 | ||
|
Position the correct depth mark at the bottom edge of the
joist based on the thickness of your sheetrock.
A12
Screw
4 |
5 |
