2.Hook the heavy thread onto the back of the buttonhole foot, then bring the two heavy thread ends to the front of the foot, insert them into the grooves and temporarily tie them there.
3.Lower the presser foot and start sewing.
*Set the stitch width to match the diameter of the gimp thread.
4.Once sewing is completed, gently pull the heavy thread to remove any slack, then trim off the excess.
LEFT AND RIGHT SIDE BALANCE FOR BUTTONHOLE
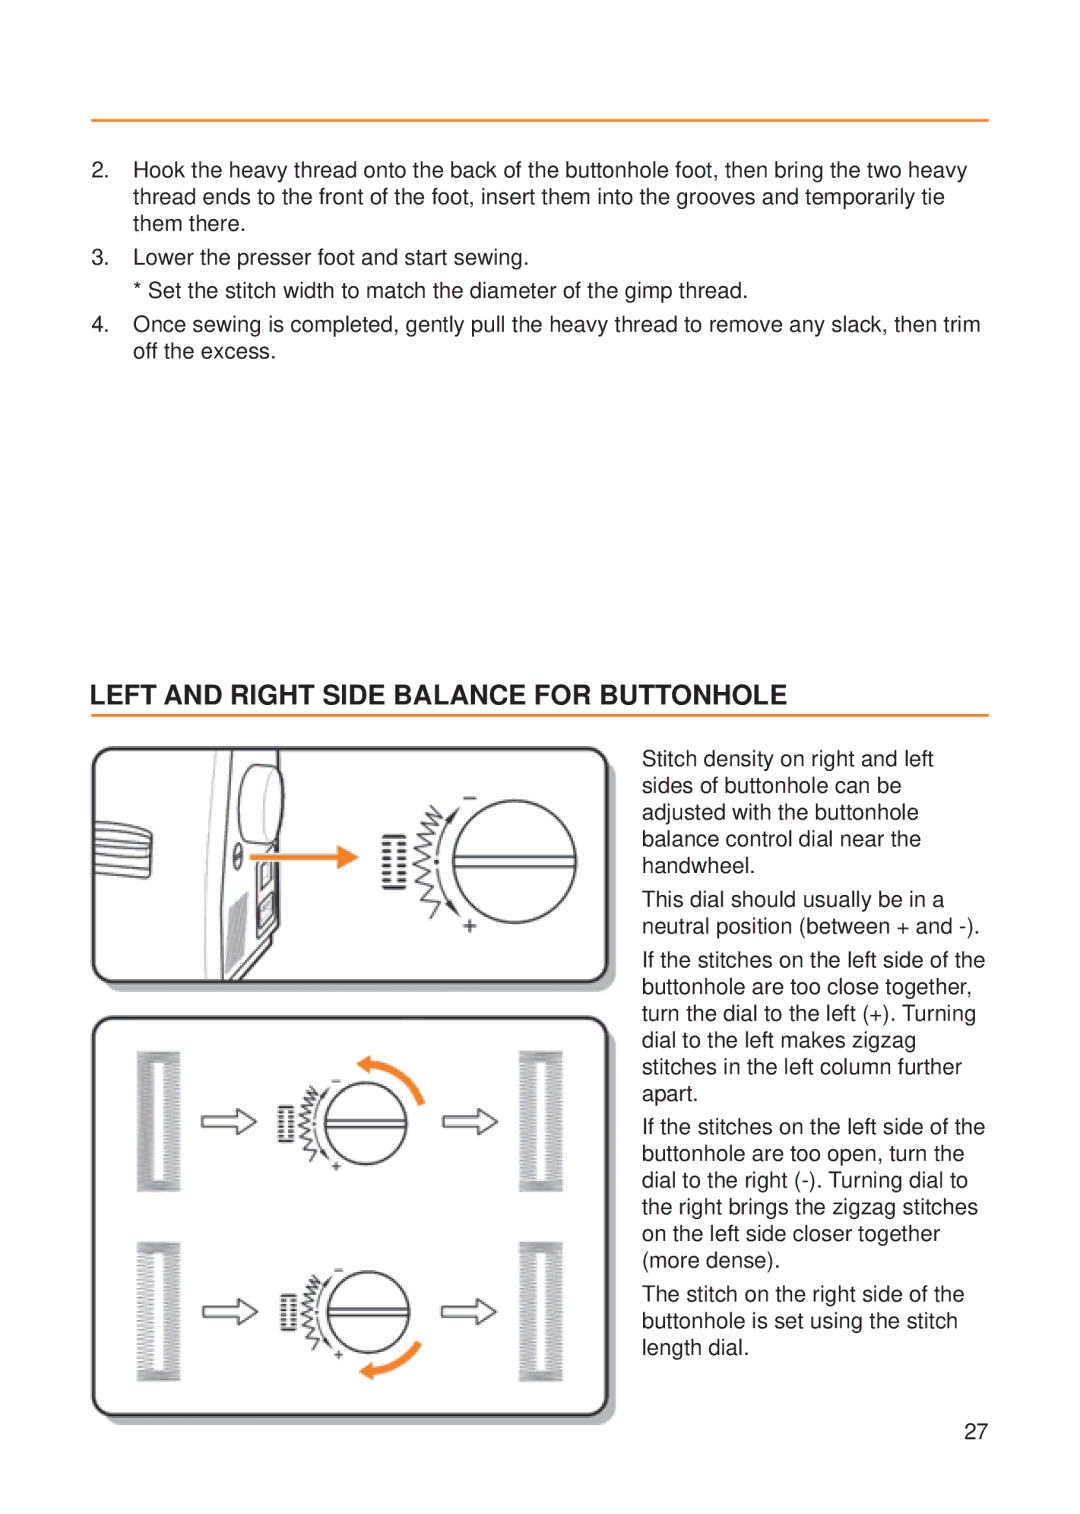
Stitch density on right and left sides of buttonhole can be adjusted with the buttonhole balance control dial near the handwheel.
This dial should usually be in a neutral position (between + and
If the stitches on the left side of the buttonhole are too close together, turn the dial to the left (+). Turning dial to the left makes zigzag stitches in the left column further apart.
If the stitches on the left side of the buttonhole are too open, turn the dial to the right
The stitch on the right side of the buttonhole is set using the stitch length dial.
27