INSTALLATION
Installation, step by step
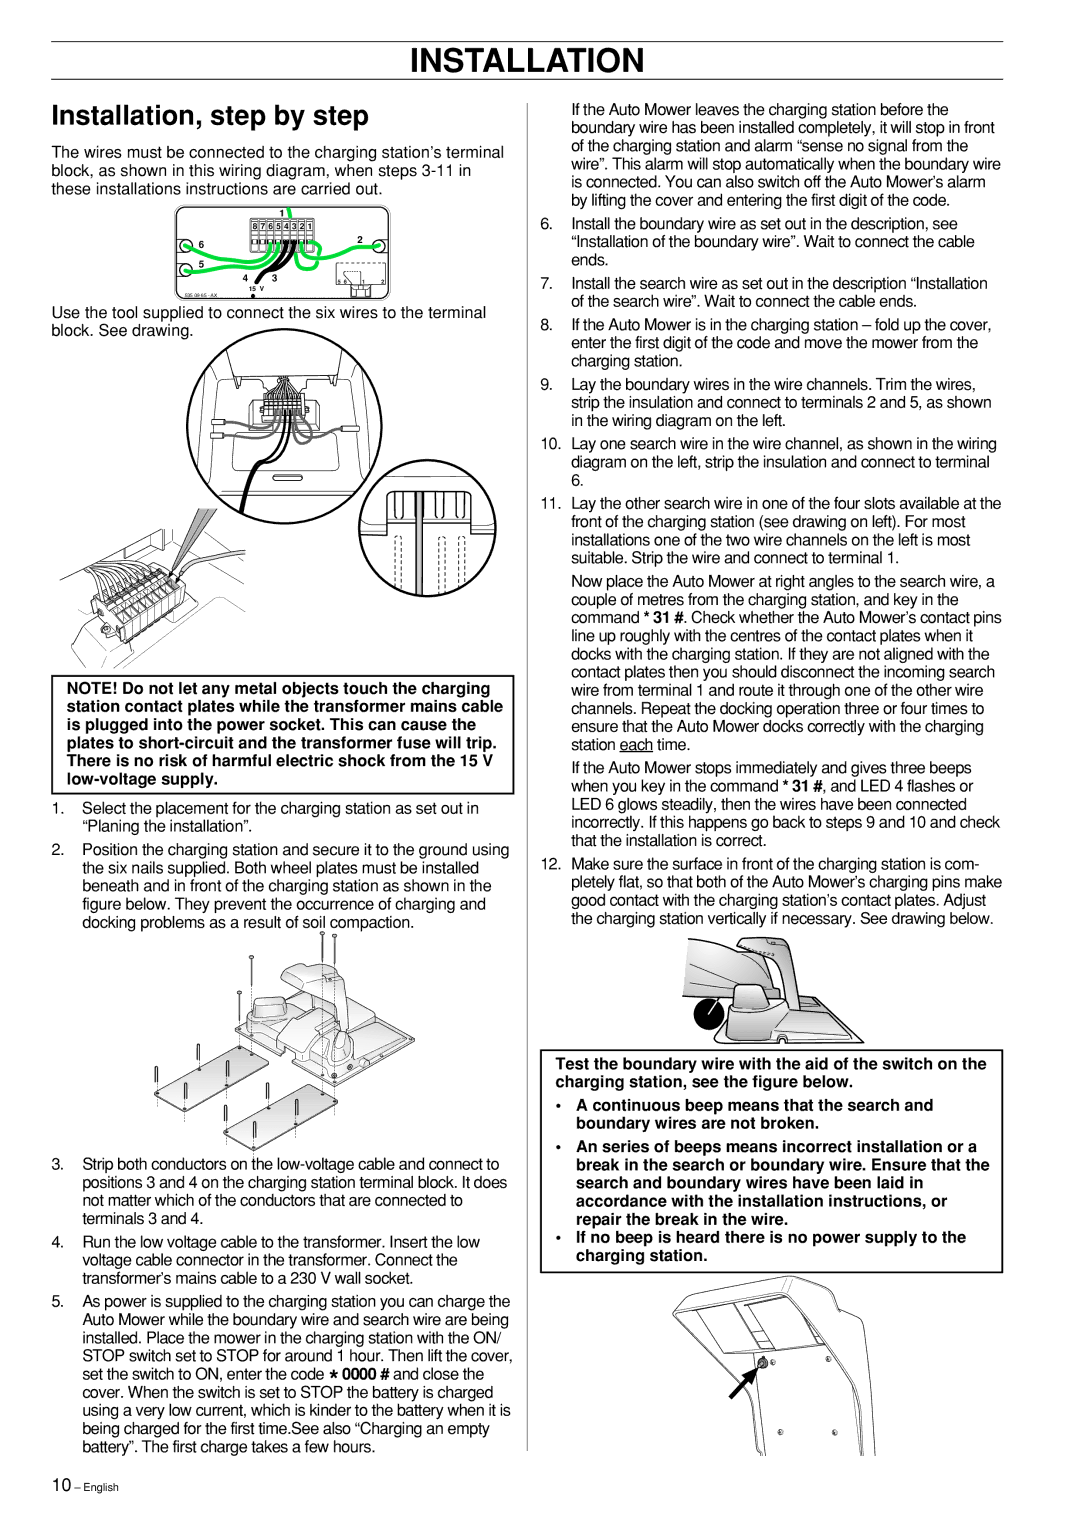
The wires must be connected to the charging station’s terminal block, as shown in this wiring diagram, when steps
1
8 7 6 5 4 3 2 1
6 |
|
|
| 2 |
|
|
|
|
|
| |
5 |
|
|
|
|
|
4 | 3 | 5 | 6 | 1 | 2 |
15 V
535 09 65 - AX
Use the tool supplied to connect the six wires to the terminal block. See drawing.
NOTE! Do not let any metal objects touch the charging station contact plates while the transformer mains cable is plugged into the power socket. This can cause the plates to
1.Select the placement for the charging station as set out in “Planing the installation”.
2.Position the charging station and secure it to the ground using the six nails supplied. Both wheel plates must be installed beneath and in front of the charging station as shown in the figure below. They prevent the occurrence of charging and docking problems as a result of soil compaction.
3.Strip both conductors on the
4.Run the low voltage cable to the transformer. Insert the low voltage cable connector in the transformer. Connect the transformer’s mains cable to a 230 V wall socket.
5.As power is supplied to the charging station you can charge the Auto Mower while the boundary wire and search wire are being installed. Place the mower in the charging station with the ON/ STOP switch set to STOP for around 1 hour. Then lift the cover,
set the switch to ON, enter the code * 0000 # and close the cover. When the switch is set to STOP the battery is charged using a very low current, which is kinder to the battery when it is being charged for the first time.See also “Charging an empty battery”. The first charge takes a few hours.
If the Auto Mower leaves the charging station before the boundary wire has been installed completely, it will stop in front of the charging station and alarm “sense no signal from the wire”. This alarm will stop automatically when the boundary wire is connected. You can also switch off the Auto Mower’s alarm by lifting the cover and entering the first digit of the code.
6.Install the boundary wire as set out in the description, see “Installation of the boundary wire”. Wait to connect the cable ends.
7.Install the search wire as set out in the description “Installation of the search wire”. Wait to connect the cable ends.
8.If the Auto Mower is in the charging station – fold up the cover, enter the first digit of the code and move the mower from the charging station.
9.Lay the boundary wires in the wire channels. Trim the wires, strip the insulation and connect to terminals 2 and 5, as shown in the wiring diagram on the left.
10.Lay one search wire in the wire channel, as shown in the wiring diagram on the left, strip the insulation and connect to terminal 6.
11.Lay the other search wire in one of the four slots available at the front of the charging station (see drawing on left). For most installations one of the two wire channels on the left is most suitable. Strip the wire and connect to terminal 1.
Now place the Auto Mower at right angles to the search wire, a couple of metres from the charging station, and key in the command * 31 #. Check whether the Auto Mower’s contact pins line up roughly with the centres of the contact plates when it docks with the charging station. If they are not aligned with the contact plates then you should disconnect the incoming search wire from terminal 1 and route it through one of the other wire channels. Repeat the docking operation three or four times to ensure that the Auto Mower docks correctly with the charging station each time.
If the Auto Mower stops immediately and gives three beeps when you key in the command * 31 #, and LED 4 flashes or LED 6 glows steadily, then the wires have been connected incorrectly. If this happens go back to steps 9 and 10 and check that the installation is correct.
12.Make sure the surface in front of the charging station is com- pletely flat, so that both of the Auto Mower’s charging pins make good contact with the charging station’s contact plates. Adjust the charging station vertically if necessary. See drawing below.
Test the boundary wire with the aid of the switch on the charging station, see the figure below.
•A continuous beep means that the search and boundary wires are not broken.
•An series of beeps means incorrect installation or a break in the search or boundary wire. Ensure that the search and boundary wires have been laid in accordance with the installation instructions, or repair the break in the wire.
•If no beep is heard there is no power supply to the charging station.
10 – English