IBM 10K0001 manual Mounting the drive in the bay, Attaching the cables to the drive

Models: 10K0001

1 20
Download 20 pages 57.01 Kb
Page 14
Image 14
Step 4. Mounting the drive in the bay

Step 4. Mounting the drive in the bay

Attention: Be sure to use the M3 x 5-mm mounting screws in the option package when you are driving screws directly into the drive. Using screws that are too long might damage the drive.

You can mount the DVD-ROM drive horizontally or vertically in the computer. If you mount the drive vertically, you must secure any discs that you place into the drive before the drive tray is closed, or the DVD-ROM drive will not be able to read the disc properly.

1.Slide the drive into the bay. Your computer might have specific required procedures for installing storage devices. For more information on storage devices, refer to the documentation that comes with your computer.

2.Align the drive-bay screw holes with the threaded holes in the drive housing or mounting bracket.

3.Thread the screws in loosely to check their position. Two screws are usually used on each side. Verify that the alignment is correct; then tighten the screws to secure the drive. Do not overtighten.

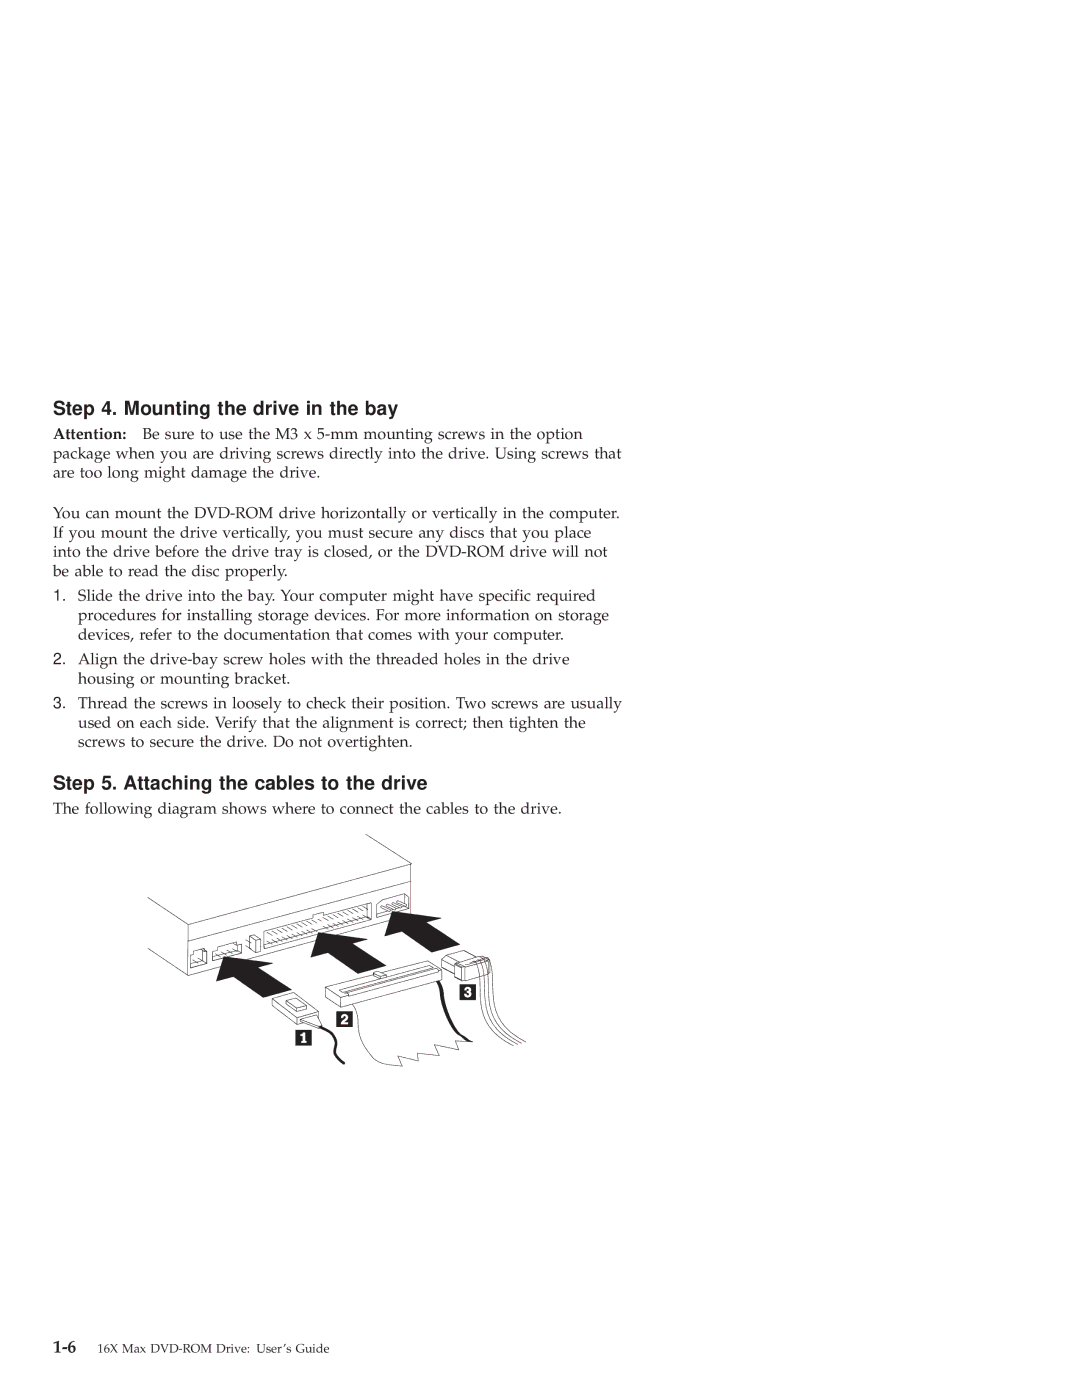
Step 5. Attaching the cables to the drive

The following diagram shows where to connect the cables to the drive.

1-616X Max DVD-ROM Drive: User's Guide

Page 14
Image 14
IBM 10K0001 manual Mounting the drive in the bay, Attaching the cables to the drive