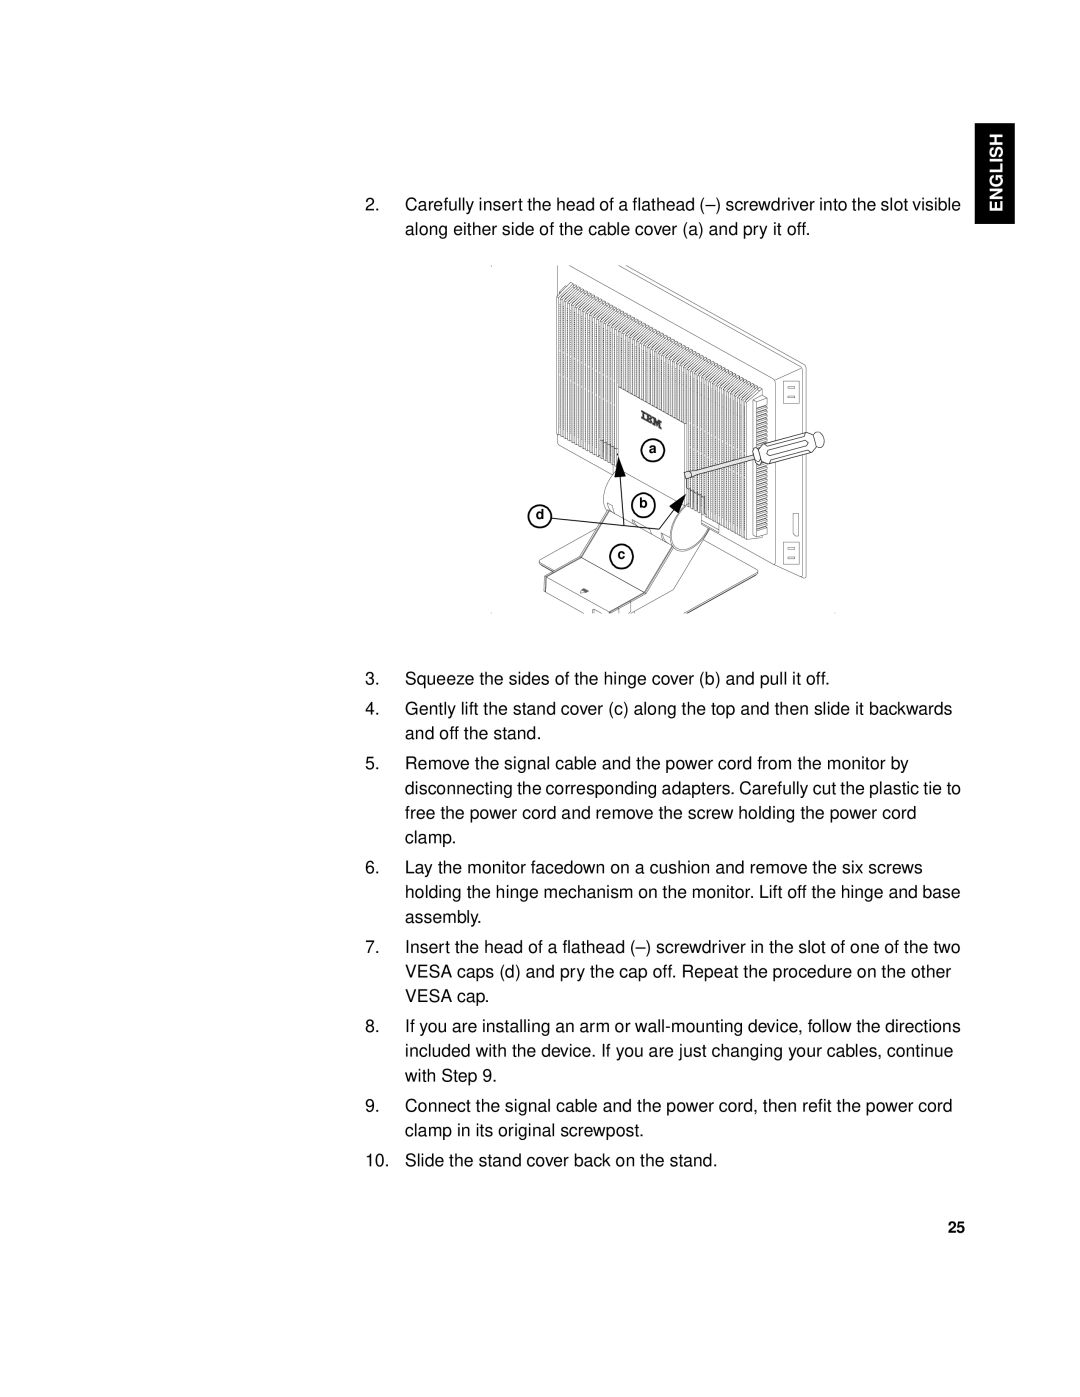
2.Carefully insert the head of a flathead
a
b
d
c
3.Squeeze the sides of the hinge cover (b) and pull it off.
4.Gently lift the stand cover (c) along the top and then slide it backwards and off the stand.
5.Remove the signal cable and the power cord from the monitor by disconnecting the corresponding adapters. Carefully cut the plastic tie to free the power cord and remove the screw holding the power cord clamp.
6.Lay the monitor facedown on a cushion and remove the six screws holding the hinge mechanism on the monitor. Lift off the hinge and base assembly.
7.Insert the head of a flathead
8.If you are installing an arm or
9.Connect the signal cable and the power cord, then refit the power cord clamp in its original screwpost.
10.Slide the stand cover back on the stand.
FRANÇ AIS ENGLISH
COMPL & WARR JAPANESE ITALIANO ESPAÑ OL
25