2. Installation and Connections
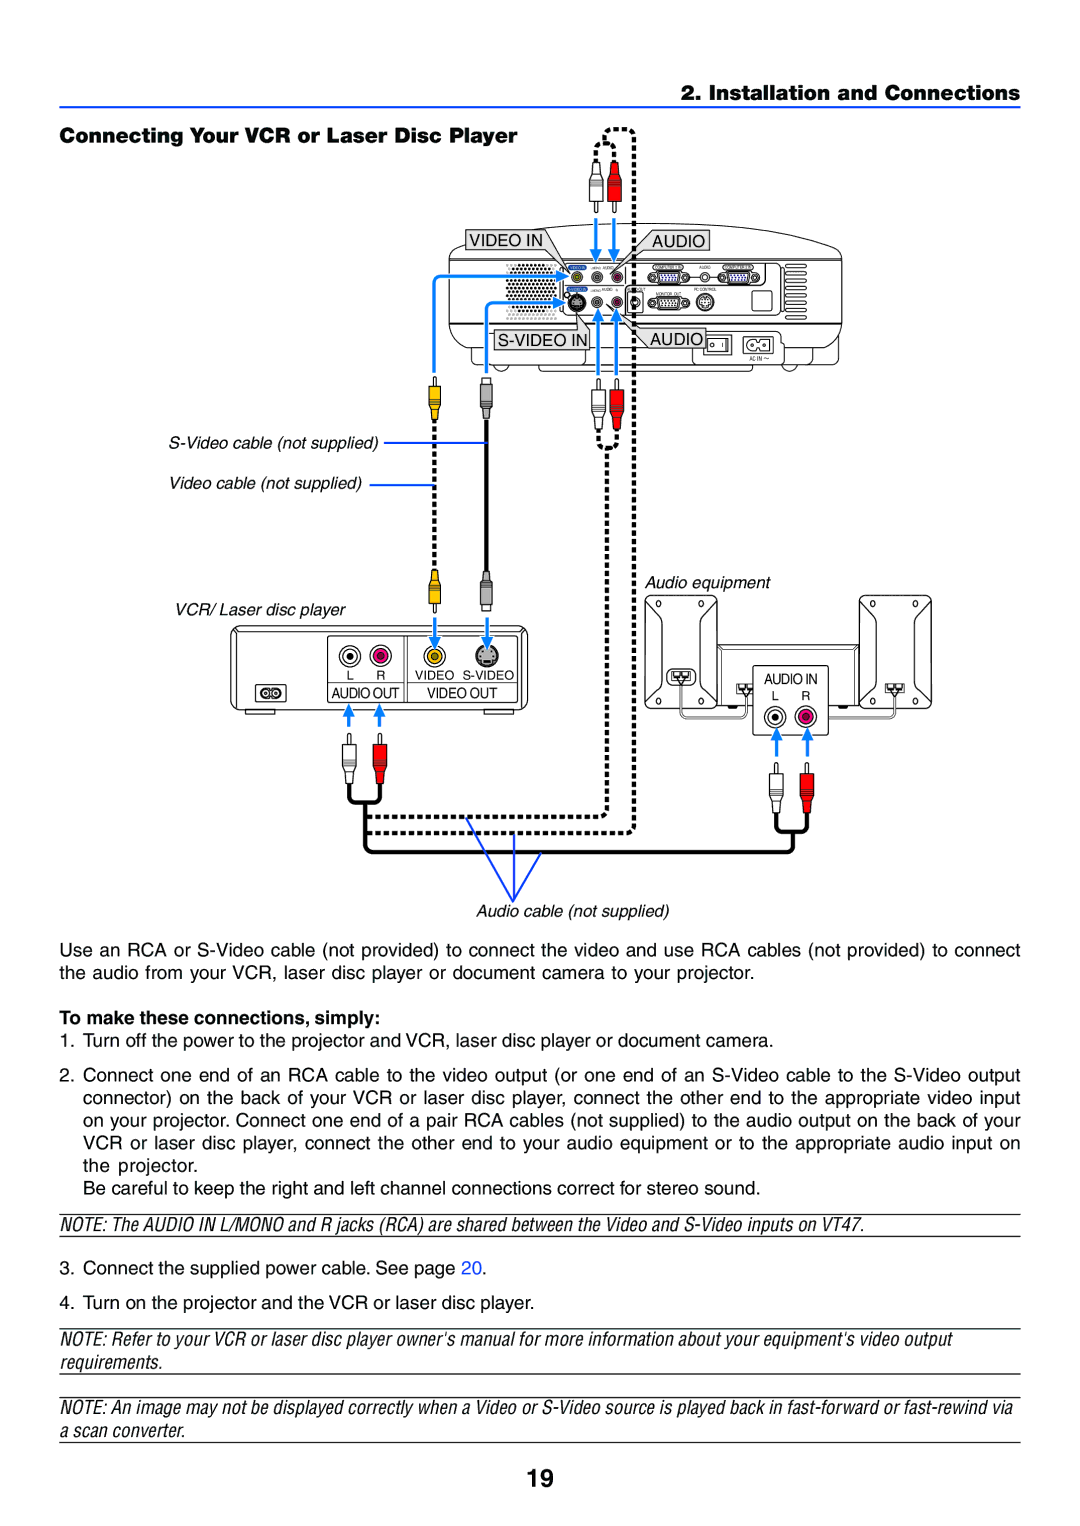
Connecting Your VCR or Laser Disc Player
VIDEO IN |
|
| AUDIO |
| |
VIDEO IN | L/MONO AUDIO R |
| COMPUTER 1 IN | AUDIO | COMPUTER 2 IN |
L/MONO AUDIO R | AUDIO OUT | MONITOR OUT | PC CONTROL |
| |
|
|
|
|
| |
|
| AUDIO |
| ||
|
|
|
|
| AC IN |
Video cable (not supplied)
Audio equipment
VCR/ Laser disc player
LR
AUDIO OUT
VIDEO | AUDIO IN |
VIDEO OUT | L R |
Audio cable (not supplied)
Use an RCA or
To make these connections, simply:
1.Turn off the power to the projector and VCR, laser disc player or document camera.
2.Connect one end of an RCA cable to the video output (or one end of an
Be careful to keep the right and left channel connections correct for stereo sound.
NOTE: The AUDIO IN L/MONO and R jacks (RCA) are shared between the Video and
3.Connect the supplied power cable. See page 20.
4.Turn on the projector and the VCR or laser disc player.
NOTE: Refer to your VCR or laser disc player owner's manual for more information about your equipment's video output requirements.
NOTE: An image may not be displayed correctly when a Video or
19