|
|
|
|
|
|
|
| a. Unplug the connector and remove the screws that hold the power supply. | |||||
| b. Lift the power supply from the unit. | |||||
|
|
| Attention |
| ||
|
|
|
| |||
|
| When installing a new power supply, be sure to set the correct input | ||||
|
| voltage for your area or the power supply will be damaged. See | ||||
|
| Figure | ||||
|
|
|
|
| ||
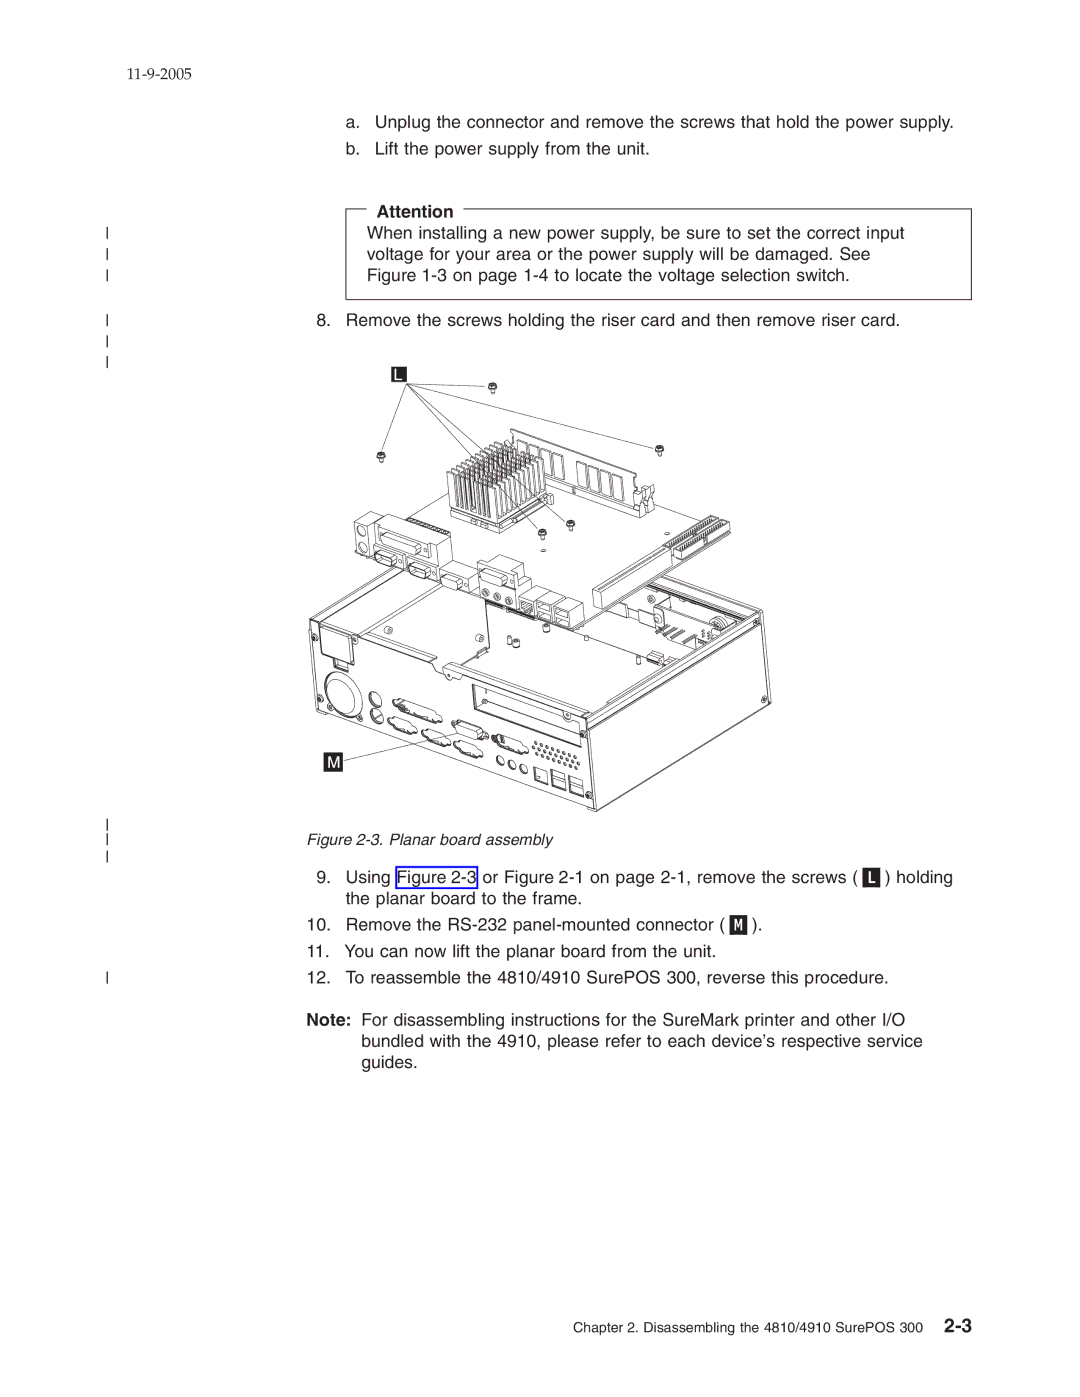
8. Remove the screws holding the riser card and then remove riser card. | ||||||
|
|
|
|
|
| |
|
|
|
|
|
| |
|
|
|
|
|
|
|
Figure | ||
|
| |
| 9. | Using Figure |
|
| the planar board to the frame. |
| 10. | Remove the |
| 11. You can now lift the planar board from the unit. | |
12. | To reassemble the 4810/4910 SurePOS 300, reverse this procedure. | |
Note: For disassembling instructions for the SureMark printer and other I/O bundled with the 4910, please refer to each device’s respective service guides.
Chapter 2. Disassembling the 4810/4910 SurePOS 300
