White and black balance adjustment
White balance adjustment
White balance is best adjusted in the sequence AWB (auto white balance), ABB (auto black balance), then again AWB.
Readjustment is normally not required even at power off/on.
Be sure to adjust the white balance after changes in the lighting conditions.
White and black balance adjustment progress can be observed from the viewfinder screen.
<Note>
●The white and black balance cannot be adjusted while the setting menu is displayed on the viewfinder screen. Be sure to exit the setting menu before these adjustments.
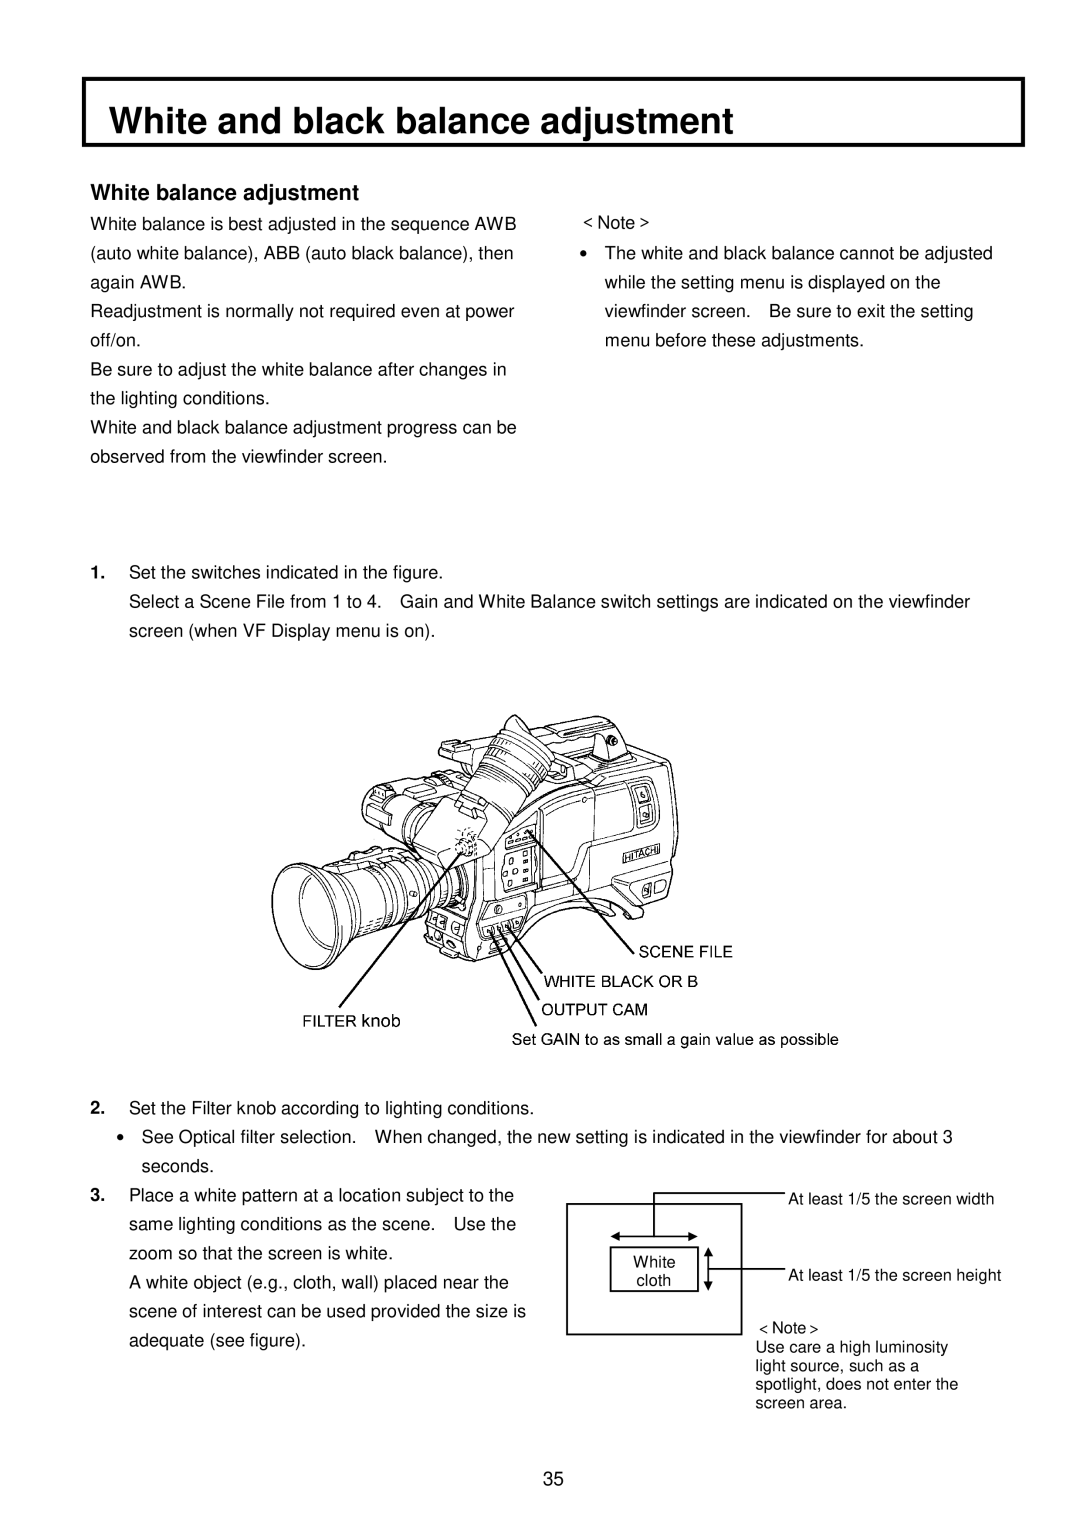
1.Set the switches indicated in the figure.
Select a Scene File from 1 to 4. Gain and White Balance switch settings are indicated on the viewfinder screen (when VF Display menu is on).
2.Set the Filter knob according to lighting conditions.
●See Optical filter selection. When changed, the new setting is indicated in the viewfinder for about 3 seconds.
3. Place a white pattern at a location subject to the |
|
|
|
|
|
|
|
|
| At least 1/5 the screen width |
|
|
|
|
|
|
|
| |||
same lighting conditions as the scene. Use the |
|
|
|
|
|
|
|
|
|
|
zoom so that the screen is white. |
|
|
|
|
|
|
|
|
|
|
|
| White |
|
|
|
| At least 1/5 the screen height | |||
|
|
|
|
|
| |||||
|
|
|
|
|
|
| ||||
A white object (e.g., cloth, wall) placed near the |
|
| cloth |
|
|
|
| |||
|
|
|
| |||||||
scene of interest can be used provided the size is |
|
|
|
|
|
|
| <Note> | ||
adequate (see figure). |
|
|
|
|
|
|
| |||
|
|
|
|
|
|
| Use care a high luminosity | |||
light source, such as a spotlight, does not enter the screen area.
35
