Camera ID setting
An identification (ID) designation for the camera can be assigned by using the ID SET page of the setting menu. ID No.: A 3 place alphanumeric code assigned to each camera. Convenient when controlling multiple cameras
from a single personal computer. A specific camera can be accessed from the computer by entering its ID number. ID number is not displaed in the coler bor.
ID DISP: An up to 14 place alphanumeric message displayed at the bottom right of the screen during camera color bar output. Can be used to indicate title or other information.
<Note>
●The camera ID is not indicated at Video Out even during the color bar while the setting menu is displayed.
Setting steps
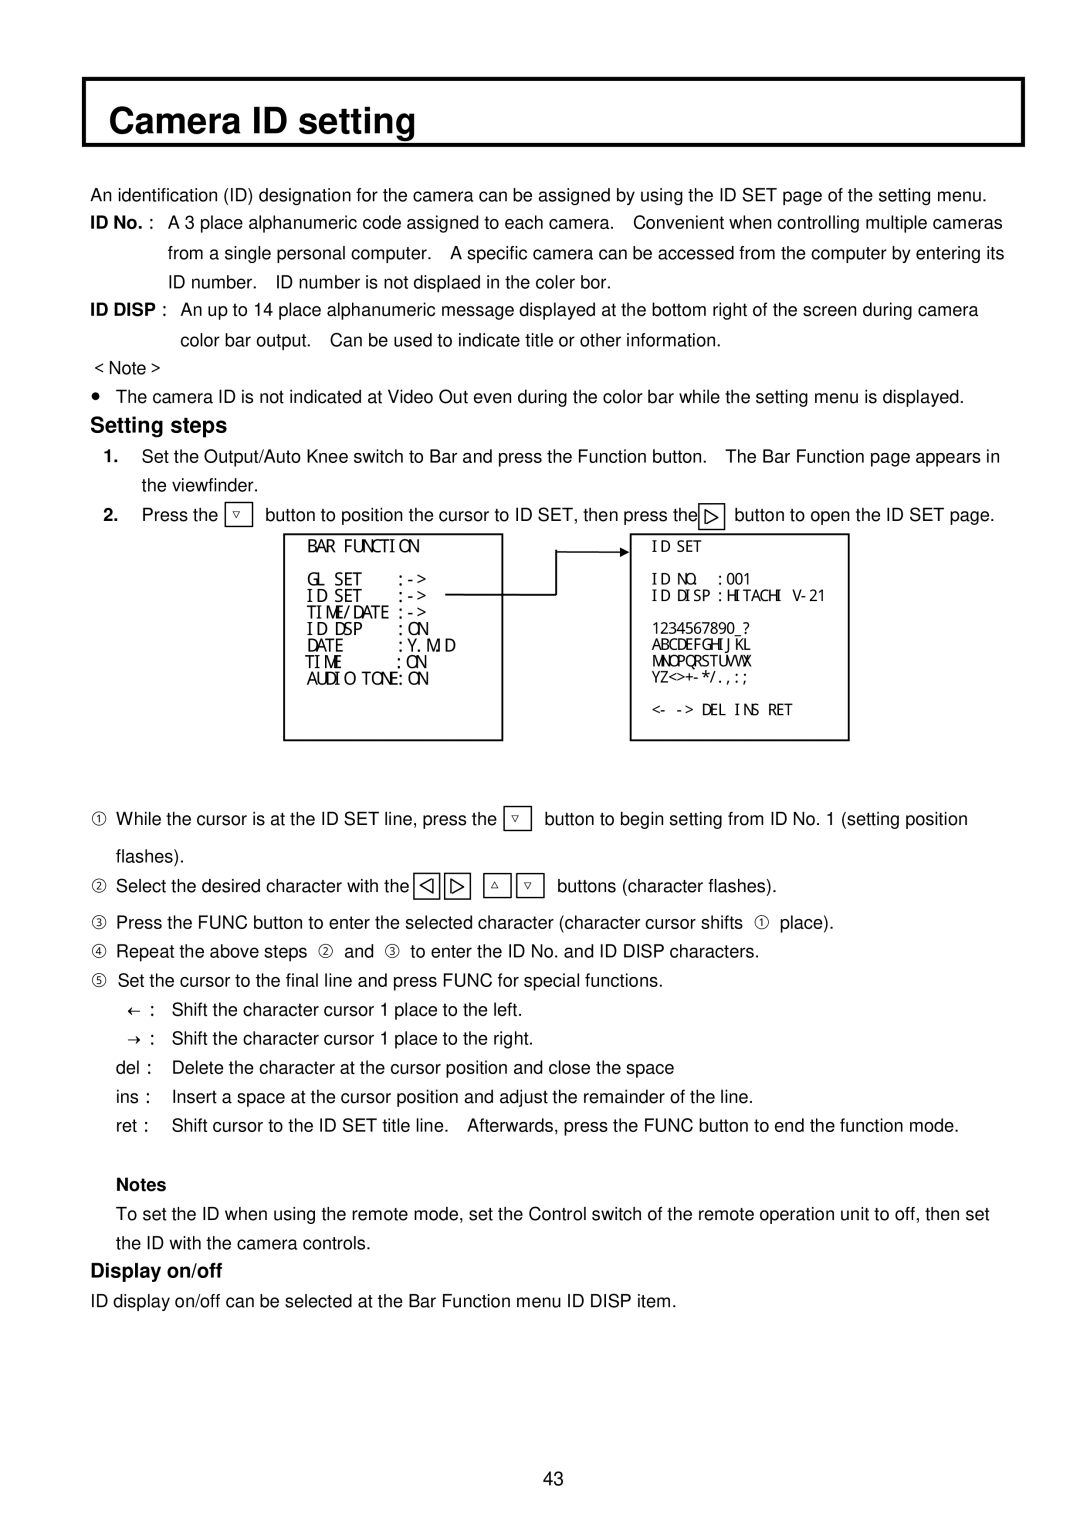
1.Set the Output/Auto Knee switch to Bar and press the Function button. the viewfinder.
2. Press the ▽ button to position the cursor to ID SET, then press the![]()
![]()
![]()
The Bar Function page appears in
button to open the ID SET page.
BAR FUNCTION
GL SET | |
ID SET | |
TIME/DATE | |
ID DSP | :ON |
DATE | :Y.M.D |
TIME | :ON |
AUDIO TONE:ON
ID SET
ID NO. :001
ID DISP :HITACHI
1234567890_?
ABCDEFGHIJKL MNOPQRSTUVWX
<-
①While the cursor is at the ID SET line, press the
▽
button to begin setting from ID No. 1 (setting position
flashes). |
|
② Select the desired character with the | △ ▽ buttons (character flashes). |
③Press the FUNC button to enter the selected character (character cursor shifts ① place).
④ Repeat the above steps ② and ③ to enter the ID No. and ID DISP characters.
⑤ Set the cursor to the final line and press FUNC for special functions. ←: Shift the character cursor 1 place to the left.
→: Shift the character cursor 1 place to the right.
del: Delete the character at the cursor position and close the space
ins: Insert a space at the cursor position and adjust the remainder of the line.
ret: Shift cursor to the ID SET title line. Afterwards, press the FUNC button to end the function mode.
Notes
To set the ID when using the remote mode, set the Control switch of the remote operation unit to off, then set the ID with the camera controls.
Display on/off
ID display on/off can be selected at the Bar Function menu ID DISP item.
43