3, Next, loosen the two locking screws "A" and remove the two bars "B," as illustrated below. Keep the transport bolts,
screws, spacers and bars for future use.
The washer can be installed using the standpipe drain system (floor or wall), the laundry tub drain system, or the floor drain system. Select the drain hose installation method you need. See "Tools and Parts."
AScrews (2)
B. Transportbars (2)
4.Plug the holes with the 4 clear plastic plugs and 2 black plastic plugs, packed inside the parts bag.
\
"_)
NOTE: If the washer is to be transported at a later date, call your local service center.
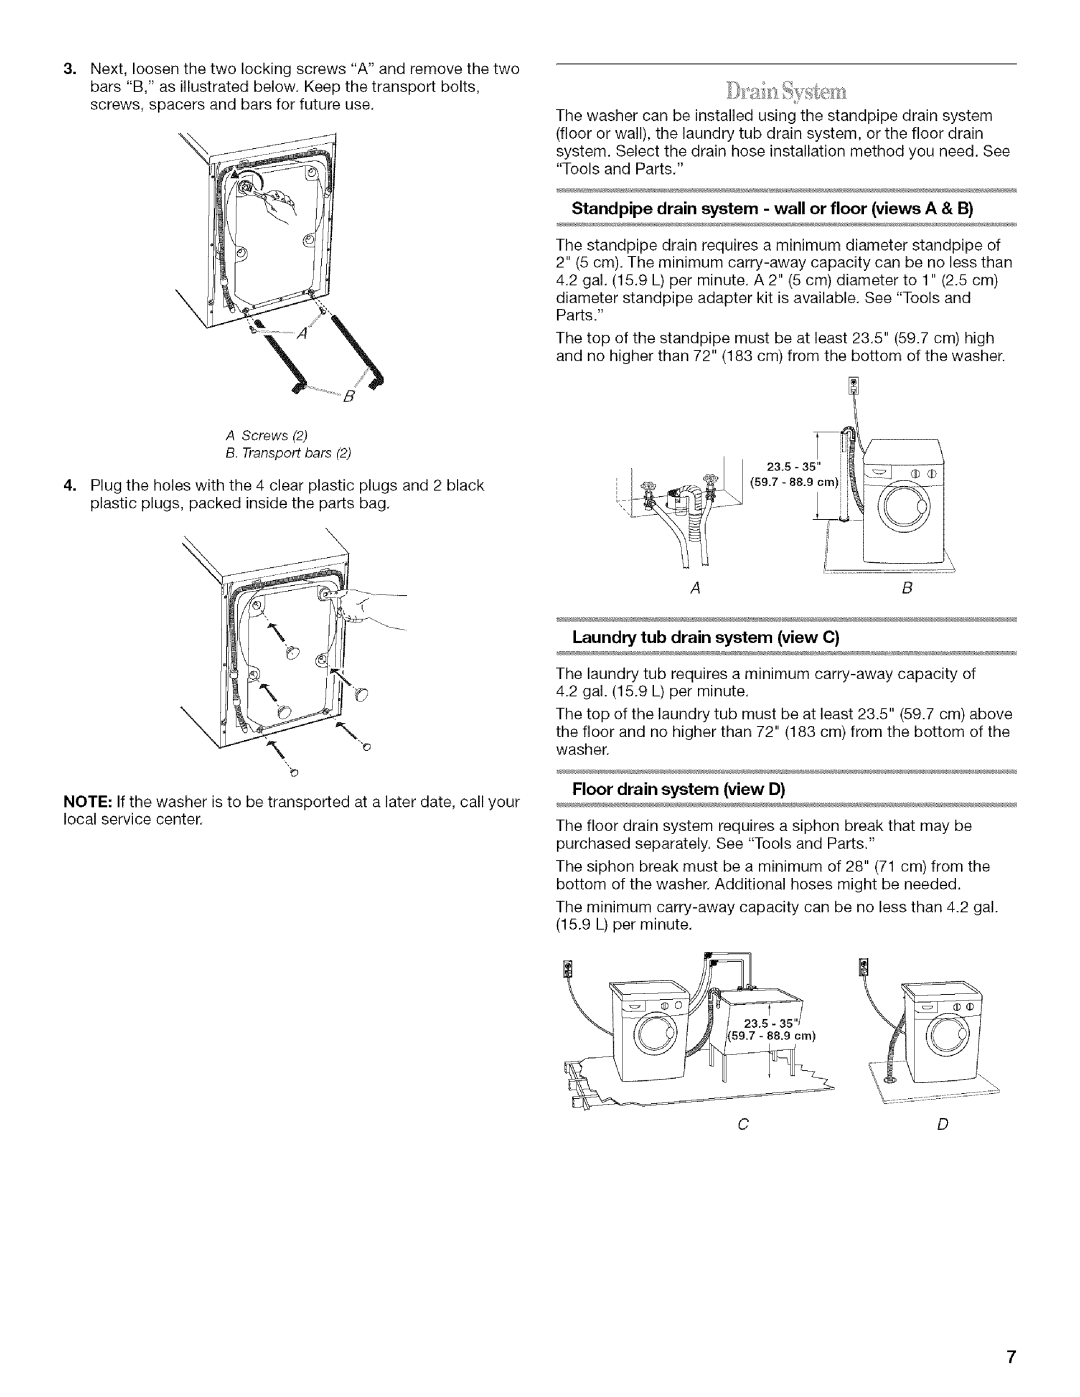
Standpipe drain system - wall or floor (views A & B)
The standpipe drain requires a minimum diameter standpipe of 2" (5 cm). The minimum
4.2gal. (15.9 L) per minute. A 2" (5 cm) diameter to 1" (2.5 cm) diameter standpipe adapter kit is available. See "Tools and Parts."
The top of the standpipe must be at least 23.5" (59.7 cm) high and no higher than 72" (183 cm) from the bottom of the washer.
23.5= 35"
(s9.7- 88.9om)
\
AB
Laundry tub drain system (view C)
The laundry tub requires a minimum
The top of the laundry tub must be at least 23.5" (59.7 cm) above the floor and no higher than 72" (183 cm) from the bottom of the washer.
Floor drain system (view D)
The floor drain system requires a siphon break that may be purchased separately. See "Tools and Parts."
The siphon break must be a minimum of 28" (71 cm) from the bottom of the washer. Additional hoses might be needed.
The minimum
CD