Step 1-1: CPU Installation
Figure 1.
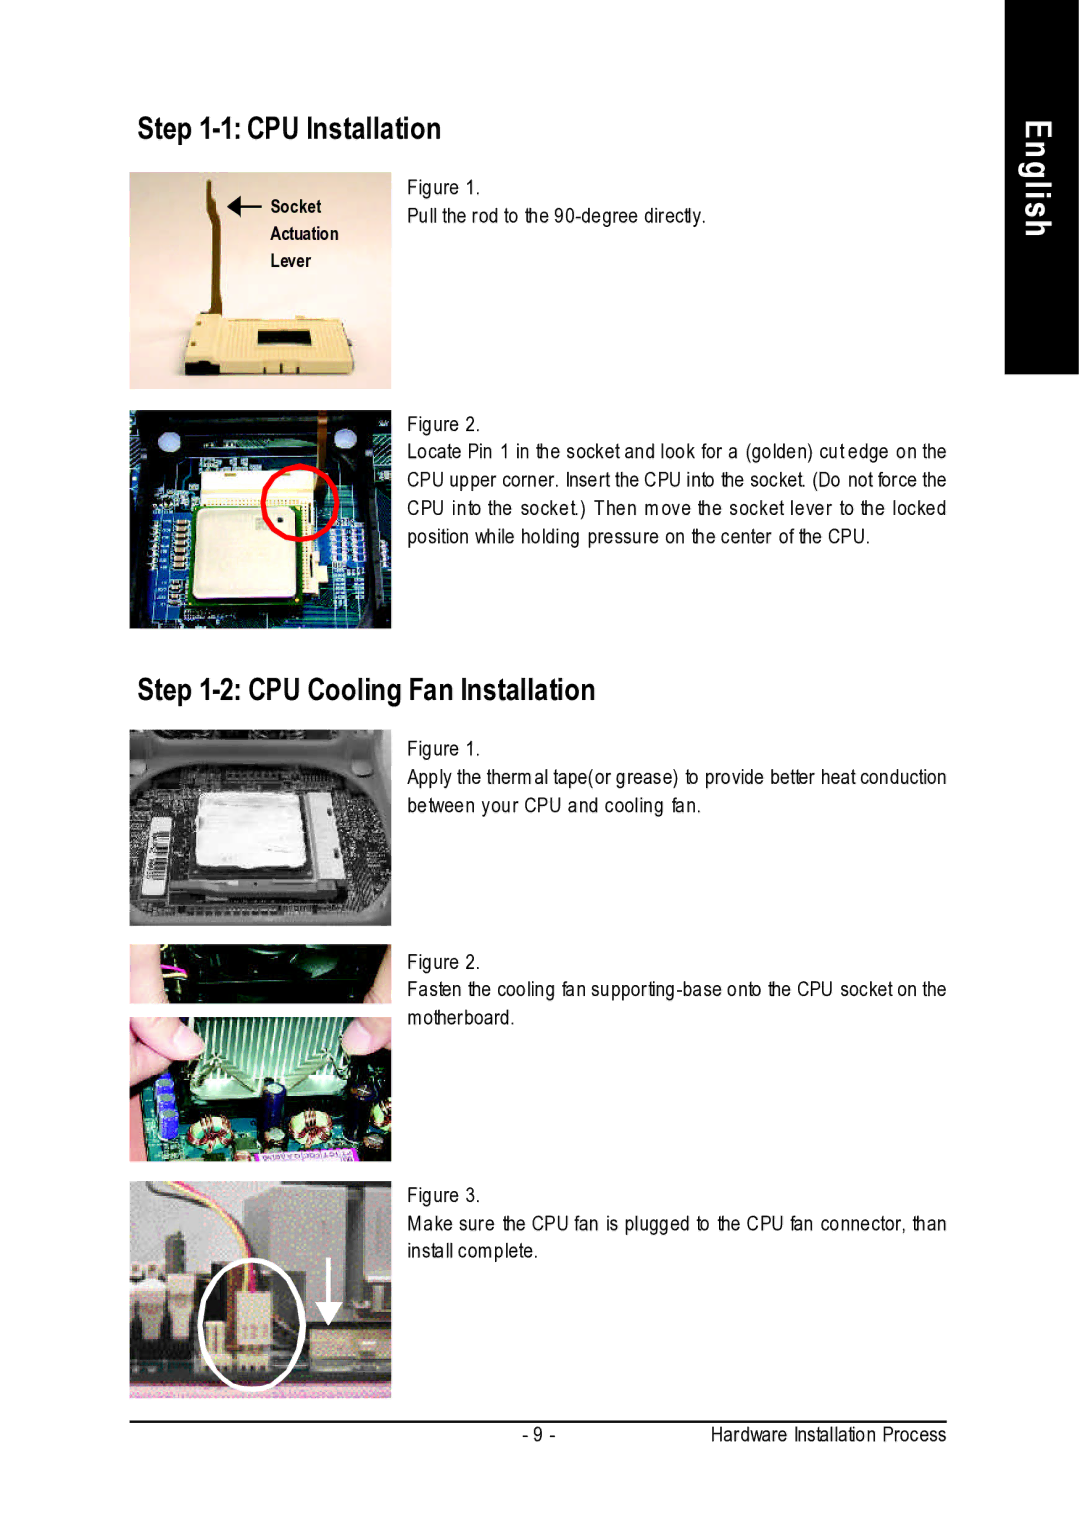
Socket | Pull the rod to the | |
Actuation | ||
| ||
Lever |
|
Figure 2.
Locate Pin 1 in the socket and look for a (golden) cut edge on the CPU upper corner. Insert the CPU into the socket. (Do not force the CPU into the socket.) Then m ove the socket lever to the locked position while holding pressure on the center of the CPU.
Step 1-2: CPU Cooling Fan Installation
Figure 1.
Apply the therm al tape(or grease) to provide better heat conduction between your CPU and cooling fan.
Figure 2.
Fasten the cooling fan supporting
Figure 3.
Make sure the CPU fan is plugged to the CPU fan connector, than install complete.
English
- 9 - | Hardware Installation Process |