B. Configuring the Promise PDC20779 RAID BIOS 
The Promise PDC20779 RAID BIOS setup lets you choose the RAID array type and which hard drives you want to make part of the array.
Entering the RAID BIOS Setup
1.After rebooting your computer, wait until you see the RAID software prompting you to press Ctrl + F. The RAID prompt appears as part of the system POST and boot process prior to loading the OS. You have a few seconds to press <Ctrl> + <F> before the window disappears.
FastTrak 779 (tm) BIOS Version 2.00.0.25
Copyright (c) 2003 Promise Technology, Inc.
Updated in 2004
No Array is defined..............................
Press
Press [ESC] to continue booting
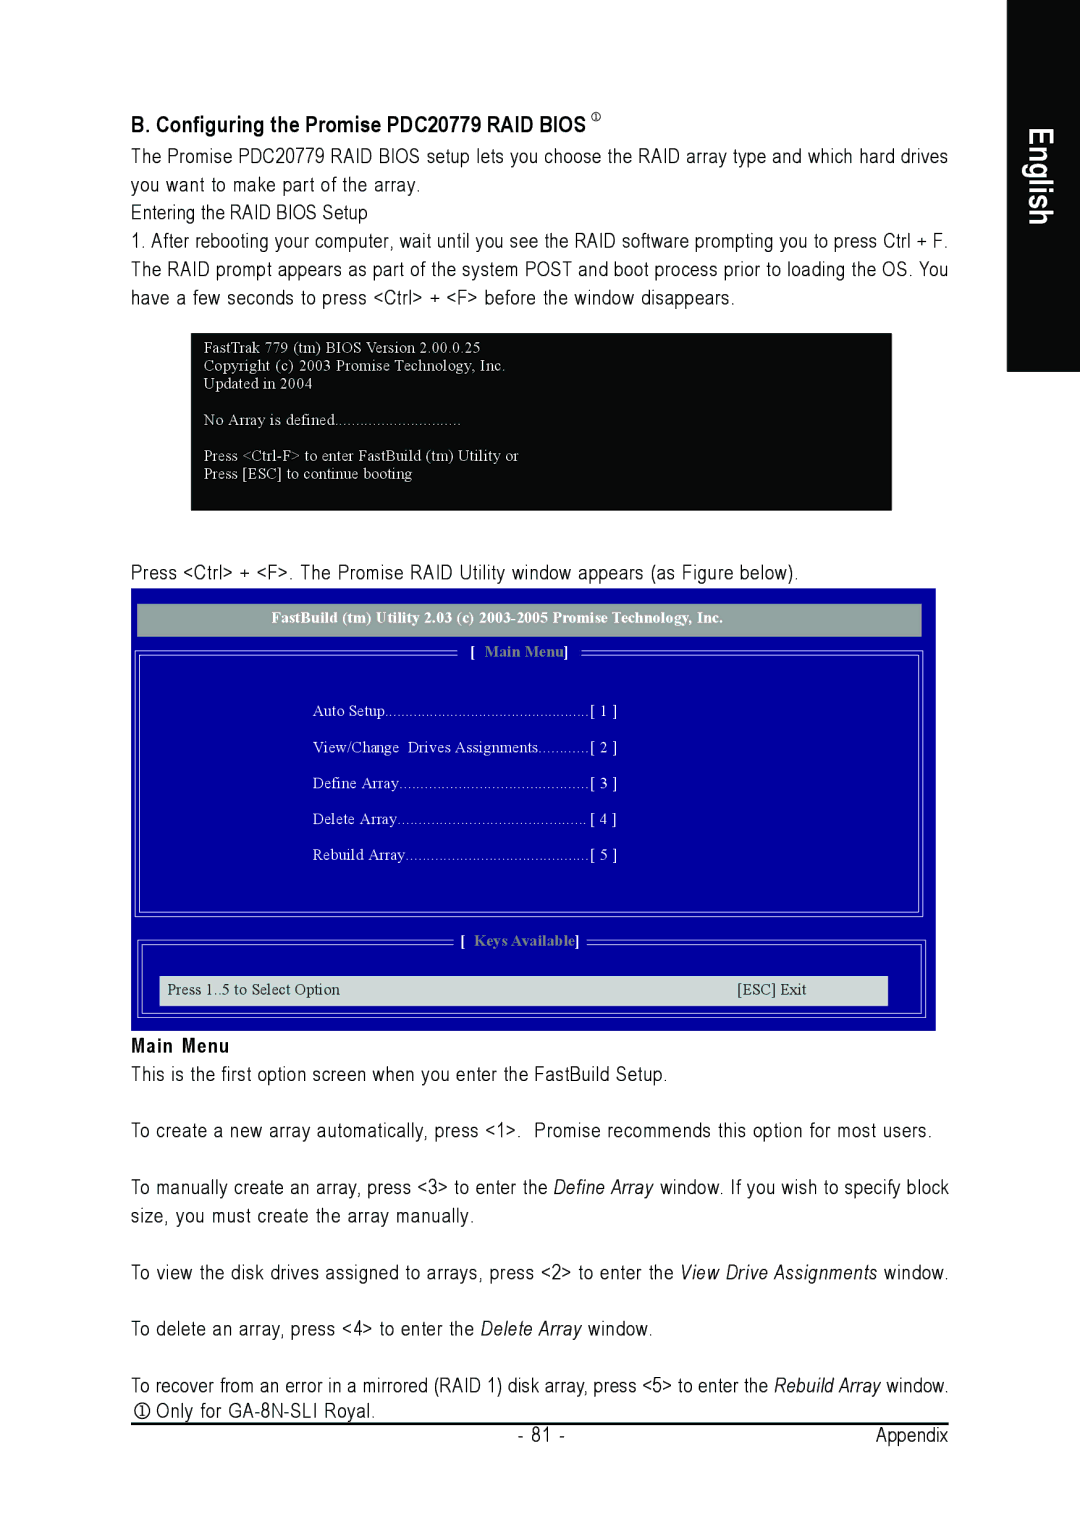
Press <Ctrl> + <F>. The Promise RAID Utility window appears (as Figure below).
FastBuild (tm) Utility 2.03 (c)
[ Main Menu] ] |
|
Auto Setup | [ 1 ] |
View/Change Drives Assignments | [ 2 ] |
Define Array | [ 3 ] |
Delete Array | [ 4 ] |
Rebuild Array | [ 5 ] |
[ Keys Available] |
|
Press 1..5 to Select Option | [ESC] Exit |
Main Menu
This is the first option screen when you enter the FastBuild Setup.
To create a new array automatically, press <1>. Promise recommends this option for most users.
To manually create an array, press <3> to enter the Define Array window. If you wish to specify block size, you must create the array manually.
To view the disk drives assigned to arrays, press <2> to enter the View Drive Assignments window.
To delete an array, press <4> to enter the Delete Array window.
To recover from an error in a mirrored (RAID 1) disk array, press <5> to enter the Rebuild Array window. ![]() Only for
Only for
- 81 - | Appendix |