Create Arrays Manually
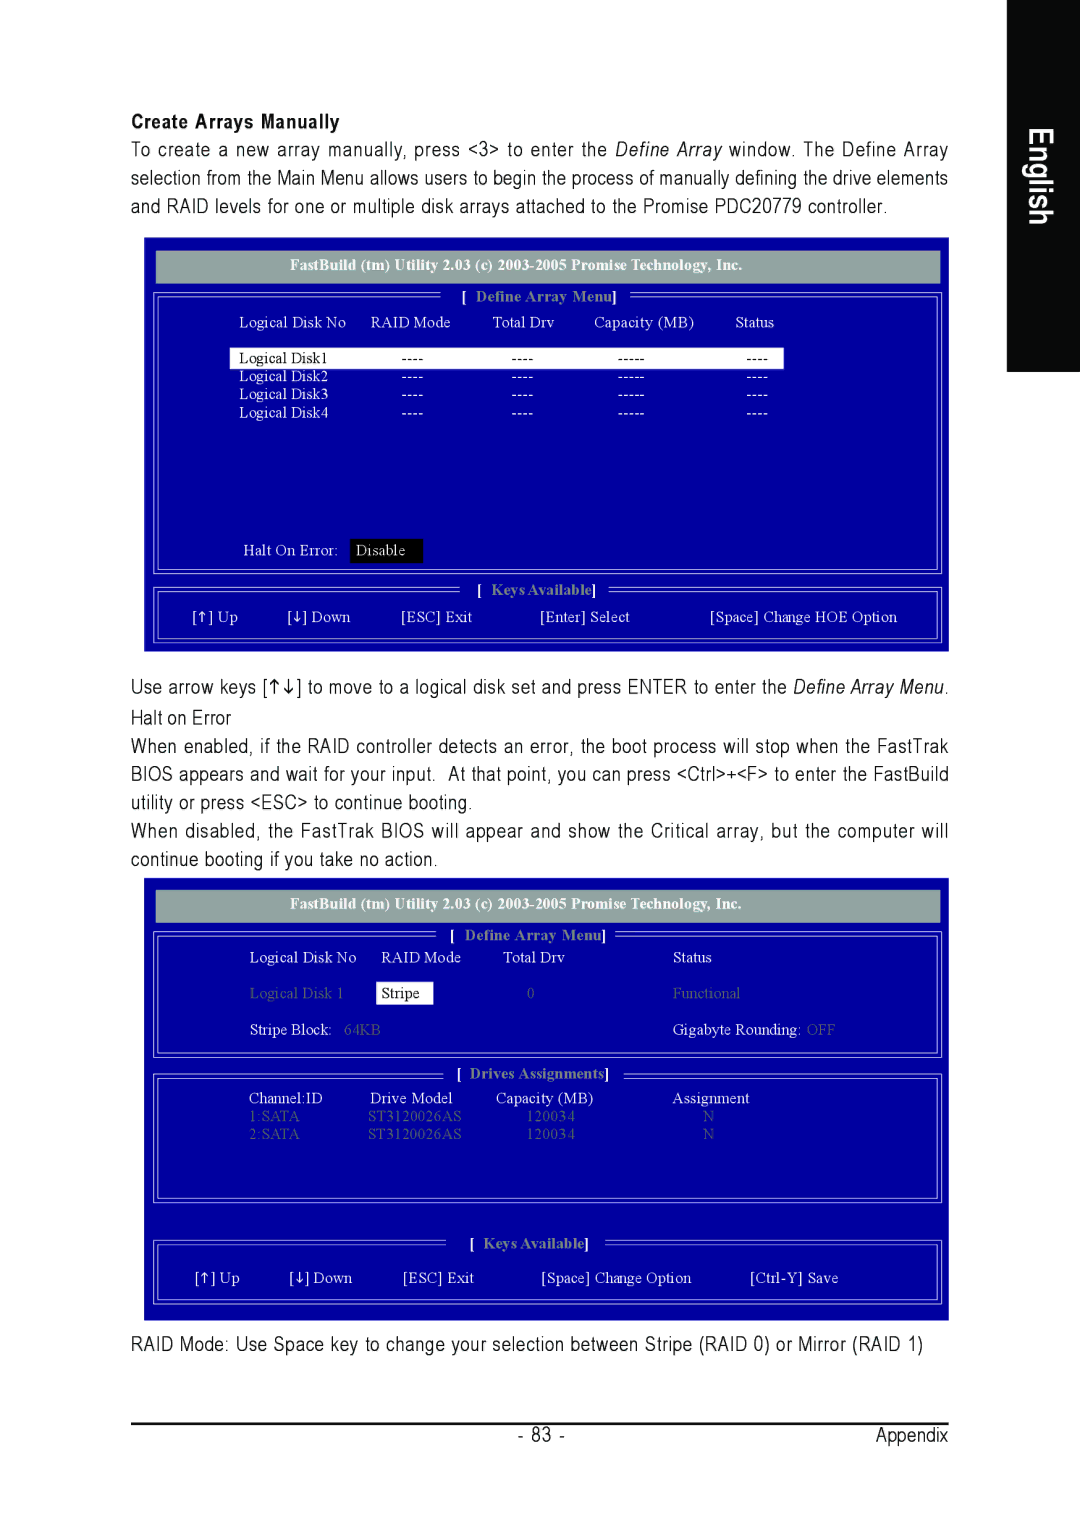
To create a new array manually, press <3> to enter the Define Array window. The Define Array selection from the Main Menu allows users to begin the process of manually defining the drive elements and RAID levels for one or multiple disk arrays attached to the Promise PDC20779 controller.
FastBuild (tm) Utility 2.03 (c)
| [ | Define Array Menu] ] |
| |
Logical Disk No | RAID Mode | Total Drv | Capacity (MB) | Status |
Logical Disk1 | ||||
Logical Disk2 | ||||
Logical Disk3 | ||||
Logical Disk4 | ||||
| Halt On Error: | Disable |
|
|
|
| [ | Keys Available] ] |
|
[ ] Up | [ ] Down | [ESC] Exit | [Enter] Select | [Space] Change HOE Option |
Use arrow keys [ ] to move to a logical disk set and press ENTER to enter the Define Array Menu. Halt on Error
When enabled, if the RAID controller detects an error, the boot process will stop when the FastTrak BIOS appears and wait for your input. At that point, you can press <Ctrl>+<F> to enter the FastBuild utility or press <ESC> to continue booting.
When disabled, the FastTrak BIOS will appear and show the Critical array, but the computer will continue booting if you take no action.
FastBuild (tm) Utility 2.03 (c)
| [ | Define Array Menu] |
|
Logical Disk No | RAID Mode | Total Drv | Status |
Logical Disk 1 | Stripe | 0 | Functional |
Stripe Block: 64KB |
|
| Gigabyte Rounding: OFF |
| [ | Drives Assignments] | ] |
Channel:ID | Drive Model | Capacity (MB) | Assignment |
1:SATA | ST3120026AS | 120034 | N |
2:SATA | ST3120026AS | 120034 | N |
|
| [ | Keys Available] ] |
|
[ ] Up | [ ] Down | [ESC] Exit | [Space] Change Option |
RAID Mode: Use Space key to change your selection between Stripe (RAID 0) or Mirror (RAID 1)
English
- 83 - | Appendix |
