2. Telescope Assembly
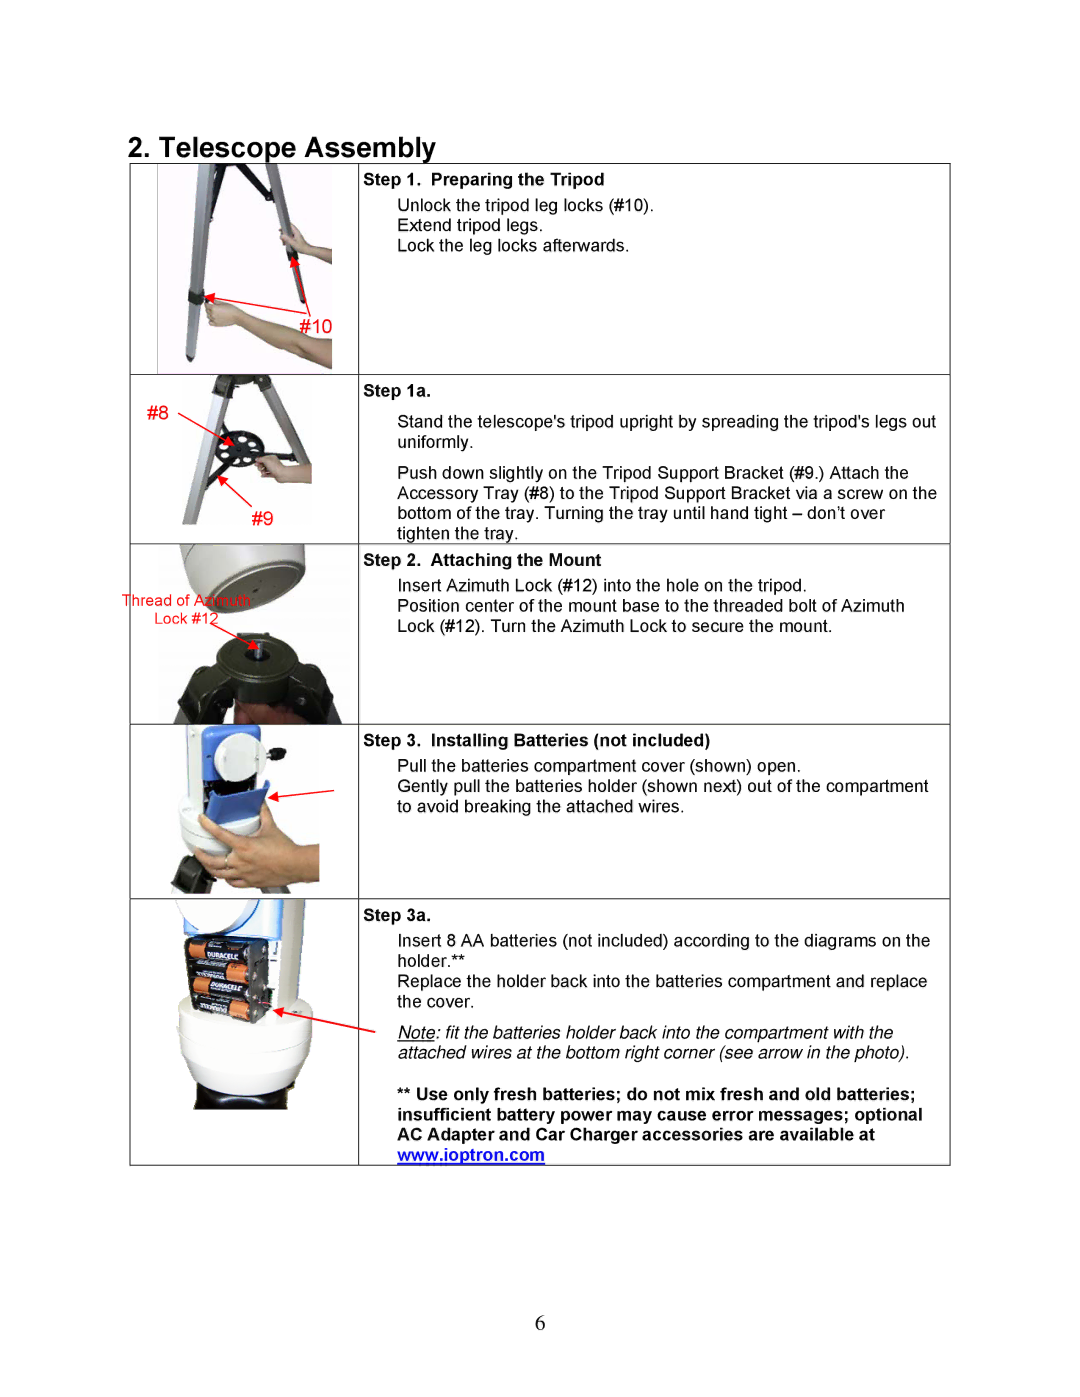
Step 1. Preparing the Tripod
Unlock the tripod leg locks (#10).
Extend tripod legs.
Lock the leg locks afterwards.
|
| #10 | |
|
|
| |
#8 | Step 1a. | ||
Stand the telescope's tripod upright by spreading the tripod's legs out | |||
|
| ||
|
| uniformly. | |
|
| Push down slightly on the Tripod Support Bracket (#9.) Attach the | |
|
| Accessory Tray (#8) to the Tripod Support Bracket via a screw on the | |
#9 | bottom of the tray. Turning the tray until hand tight – don’t over | ||
|
| tighten the tray. | |
|
| Step 2. Attaching the Mount | |
Thread of Azimuth | Insert Azimuth Lock (#12) into the hole on the tripod. | ||
Position center of the mount base to the threaded bolt of Azimuth | |||
| Lock #12 | Lock (#12). Turn the Azimuth Lock to secure the mount. | |
|
| ||
Step 3. Installing Batteries (not included)
Pull the batteries compartment cover (shown) open.
Gently pull the batteries holder (shown next) out of the compartment to avoid breaking the attached wires.
Step 3a.
Insert 8 AA batteries (not included) according to the diagrams on the holder.**
Replace the holder back into the batteries compartment and replace the cover.
Note: fit the batteries holder back into the compartment with the attached wires at the bottom right corner (see arrow in the photo).
**Use only fresh batteries; do not mix fresh and old batteries; insufficient battery power may cause error messages; optional AC Adapter and Car Charger accessories are available at www.ioptron.com
6