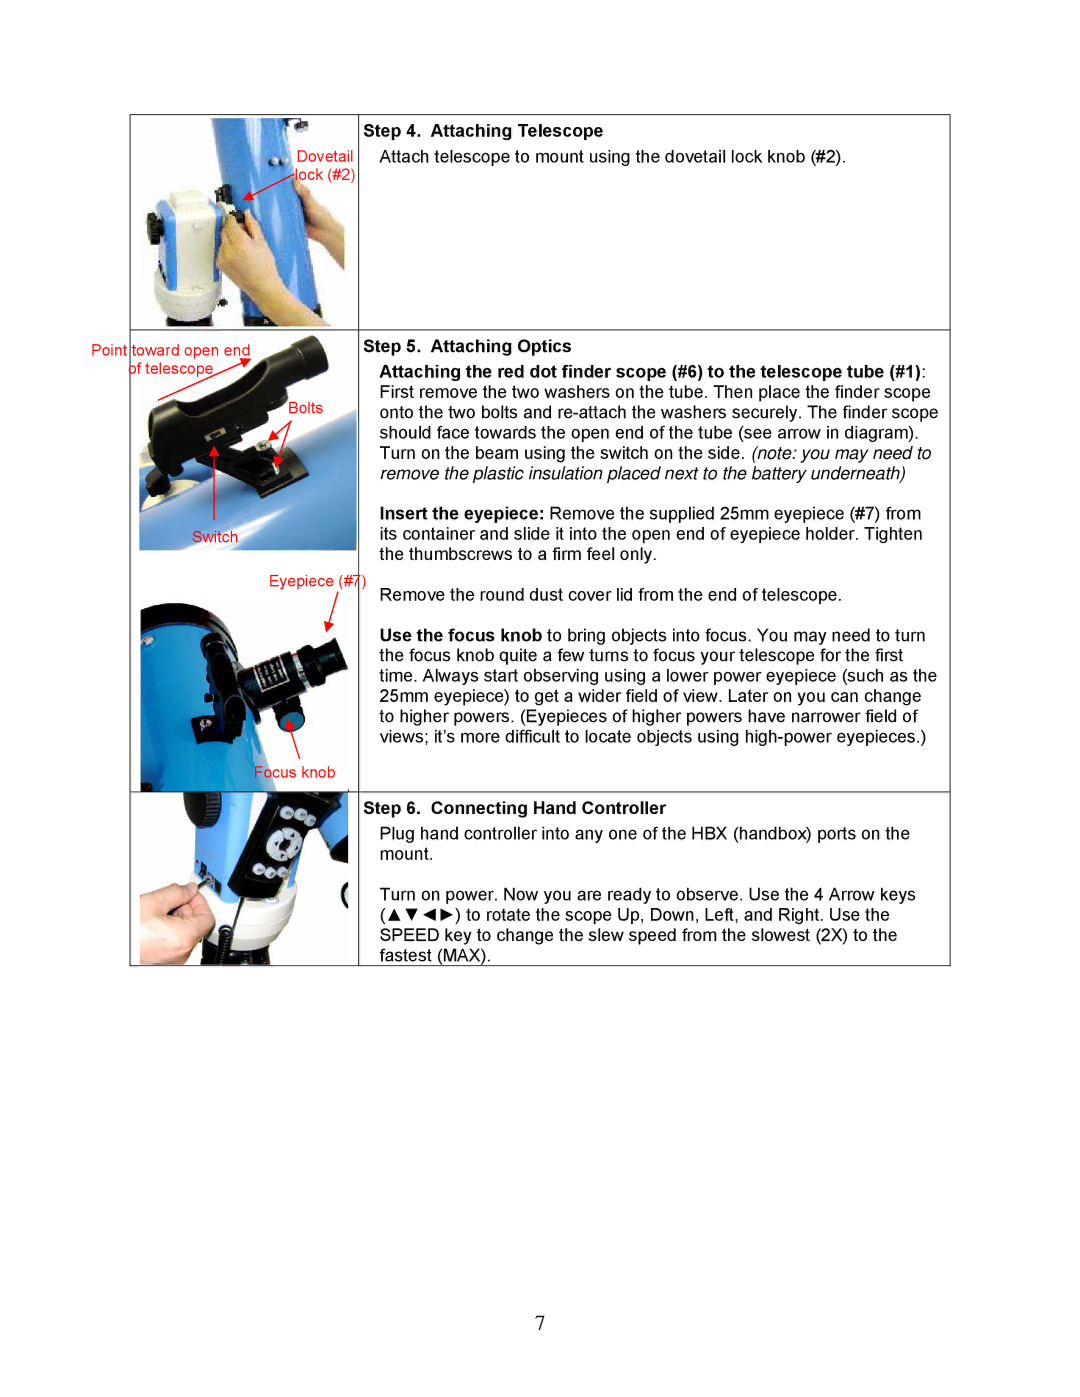
Step 4. Attaching Telescope
Dovetail Attach telescope to mount using the dovetail lock knob (#2). lock (#2)
Point toward open end | Step 5. Attaching Optics | |
of telescope | Attaching the red dot finder scope (#6) to the telescope tube (#1): | |
| Bolts | First remove the two washers on the tube. Then place the finder scope |
| onto the two bolts and | |
|
| should face towards the open end of the tube (see arrow in diagram). |
|
| Turn on the beam using the switch on the side. (note: you may need to |
|
| remove the plastic insulation placed next to the battery underneath) |
|
| Insert the eyepiece: Remove the supplied 25mm eyepiece (#7) from |
| Switch | its container and slide it into the open end of eyepiece holder. Tighten |
|
| the thumbscrews to a firm feel only. |
| Eyepiece (#7) Remove the round dust cover lid from the end of telescope. | |
|
| Use the focus knob to bring objects into focus. You may need to turn |
|
| the focus knob quite a few turns to focus your telescope for the first |
|
| time. Always start observing using a lower power eyepiece (such as the |
|
| 25mm eyepiece) to get a wider field of view. Later on you can change |
|
| to higher powers. (Eyepieces of higher powers have narrower field of |
|
| views; it’s more difficult to locate objects using |
| Focus knob |
|
|
|
|
|
| Step 6. Connecting Hand Controller |
|
| Plug hand controller into any one of the HBX (handbox) ports on the |
|
| mount. |
|
| Turn on power. Now you are ready to observe. Use the 4 Arrow keys |
|
| (▲▼◄►) to rotate the scope Up, Down, Left, and Right. Use the |
|
| SPEED key to change the slew speed from the slowest (2X) to the |
|
| fastest (MAX). |
7