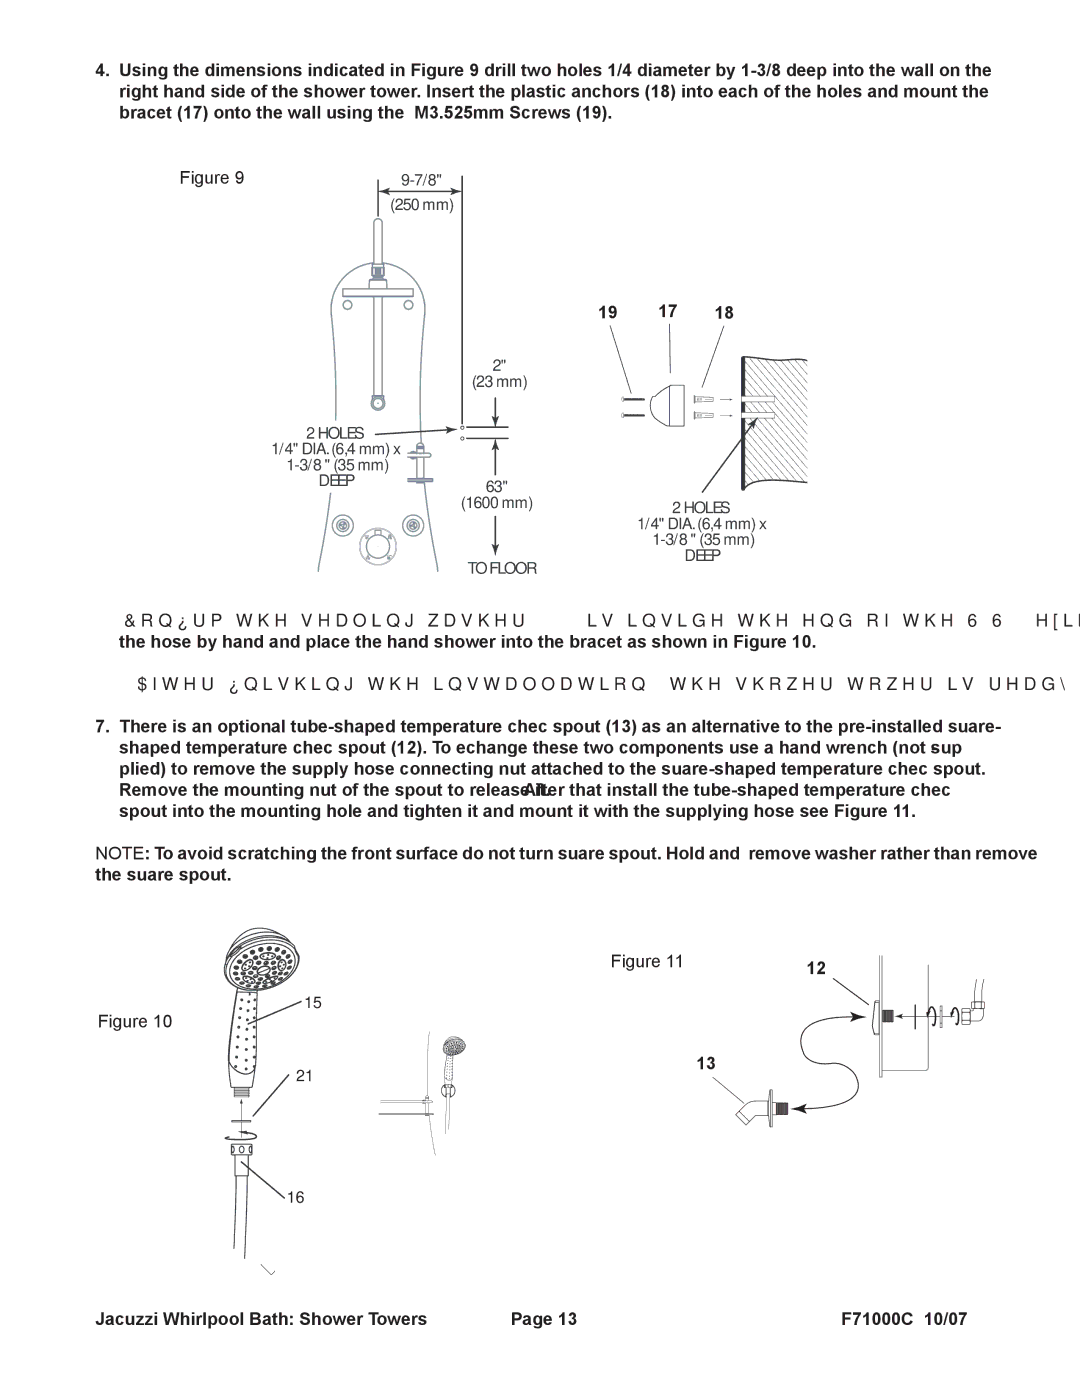
4.Using the dimensions indicated in Figure 9, drill two holes 1/4” diameter by
Figure 9 |
(250 mm)
| 19 | 17 | 18 |
| 2" |
|
|
| (23 mm) |
|
|
2 HOLES |
|
|
|
1/4" DIA. (6,4 mm) x |
|
|
|
|
|
| |
DEEP | 63" |
|
|
|
|
| |
| (1600 mm) | 2 HOLES | |
|
| ||
|
| 1/4" DIA. (6,4 mm) x | |
|
| ||
| TO FLOOR |
| DEEP |
|
|
| |
5.Confirm the sealing washer (21) is inside the end of the S.S. flexible hose (16). Attach the hand shower (15) onto the hose by hand and place the hand shower into the bracket as shown in Figure 10.
6.After finishing the installation, the shower tower is ready for use.
7.There is an optional
NOTE: To avoid scratching the front surface, do not turn square spout. Hold and remove washer rather than remove the square spout.
Figure 11
15
Figure 10
21 | 13 |
|
![]() 16
16
12
Jacuzzi Whirlpool Bath: Shower Towers | Page 13 | FZ71000C • 10/07 |
