
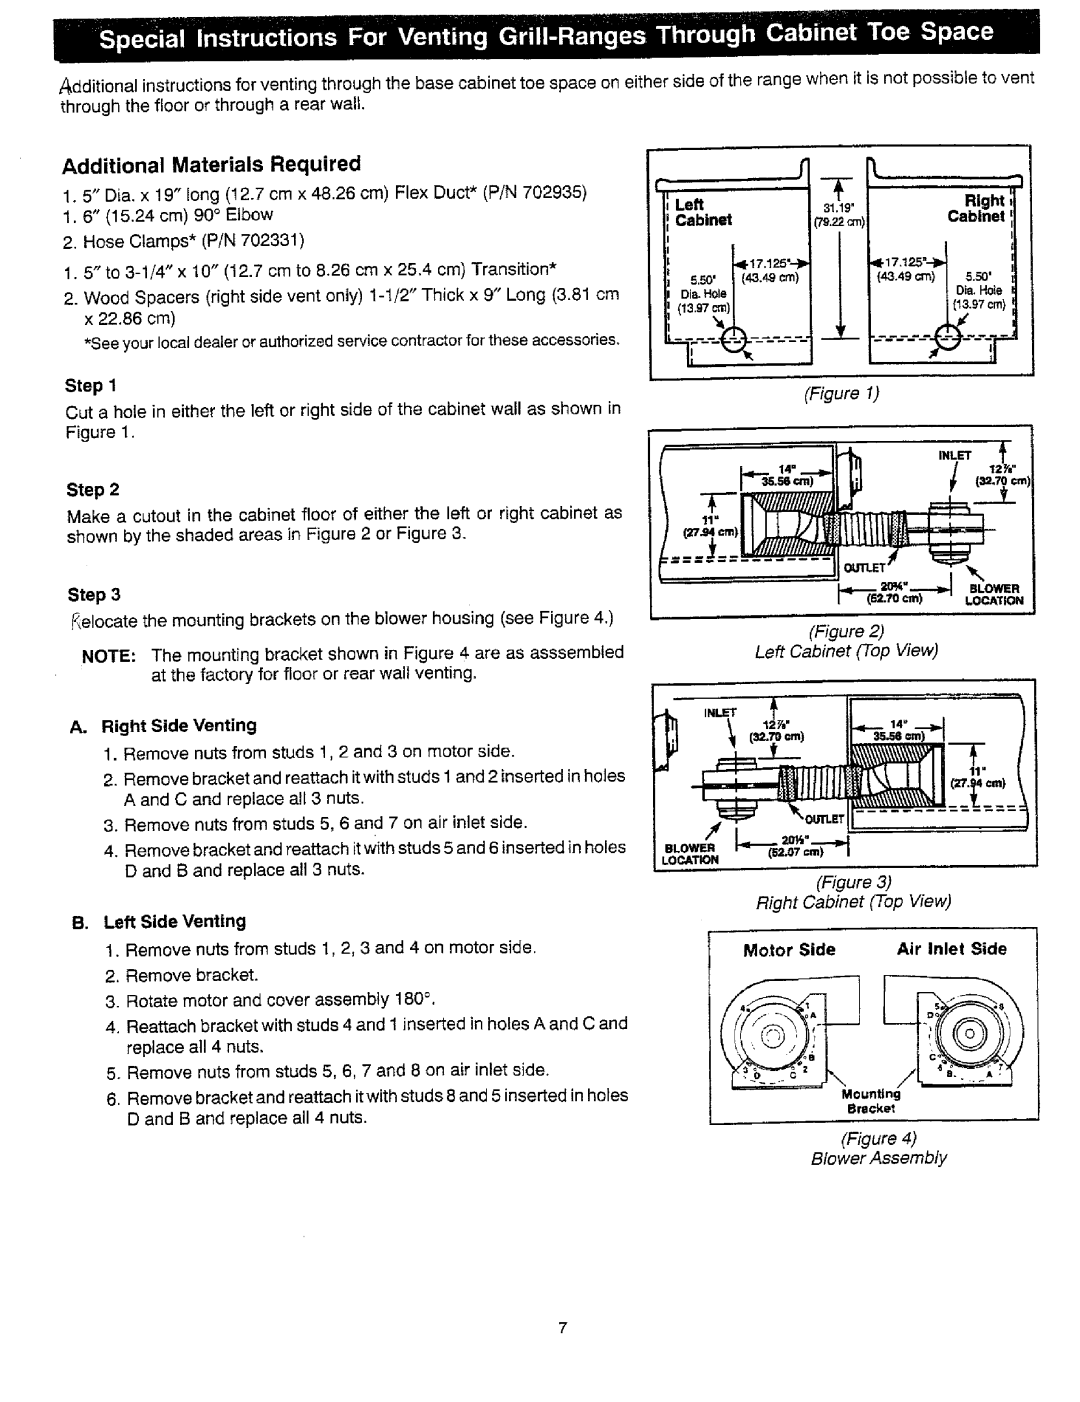
SCE30600, SCE30500, SVE47100 specifications
Jenn-Air has long been a leader in the luxury appliance market, and its latest offerings, the SCE30500, SVE47100, and SCE30600, showcase innovation and style that cater to the needs of modern home chefs. Each unit is designed with advanced features, sophisticated technologies, and attention to detail, ensuring optimal performance and an elegant aesthetic.The Jenn-Air SCE30500 is a 30-inch downdraft cooktop that combines sleek design with powerful cooking capabilities. What sets this cooktop apart is its integrated downdraft ventilation system, which effectively captures smoke and odors without the need for an overhead hood. The cooktop is equipped with high-performance gas burners, including a powerful simmer burner that allows for precise temperature control. Its clean, glass touch controls provide a modern look and make it easy to adjust cooking settings at the touch of a finger. Additionally, the SCE30500 is designed for easy cleaning, with a smooth surface that resists stains and a removable grate that facilitates maintenance.
The SVE47100 is a built-in wall oven that takes convection cooking to the next level. Featuring a large capacity, this oven offers enough space to prepare multiple dishes at once. Its innovative True Convection technology ensures even heat distribution, resulting in perfectly cooked meals every time. The oven includes advanced features like a self-cleaning mode and a temperature probe, allowing users to monitor the internal temperature of meats without opening the door. A stylish, intuitive touchscreen interface provides easy access to cooking modes and settings, while its seamless design allows it to blend effortlessly into any kitchen decor.
Finally, the SCE30600 is another premium downdraft cooktop that offers both electric and gas cooking options. This versatility makes it suitable for various cooking styles. The cooktop features a sleek stainless steel finish and a powerful ventilation system, making kitchen odors a thing of the past. The integrated control panel allows for precise adjustments, while its induction cooking capabilities ensure rapid heating and energy efficiency. Safety features, such as automatic shut-off, provide peace of mind during cooking.
In summary, the Jenn-Air SCE30500, SVE47100, and SCE30600 exemplify the brand’s commitment to quality, performance, and style. With their advanced technologies, user-friendly interfaces, and unique design elements, these appliances are perfect for anyone looking to elevate their culinary experience while adding a touch of luxury to their kitchen.