Assembly of JWBS-14CS
Tools Required for Assembly
Metric combination wrench set and adjustable wrench
#1 and #2 cross point screwdrivers
Exposed metal surfaces, such as the table, have been given a protective coating. This should be cleaned with a soft cloth and solvent, such as kerosene. Do not use an abrasive pad, and do not get solvents on plastic parts.
1.Remove pulley cover from inside of stand.
2.Place cabinet stand upright on a level surface. If desired, the stand can be further stabilized by securing it to the floor with lag screws through the inside corner holes. If using a mobile base, lock the casters before assembling or operating the band saw.
![]() Saw body is heavy! Use caution when lifting and stabilize until firmly attached to the stand! Failure to comply may cause serious injury!
Saw body is heavy! Use caution when lifting and stabilize until firmly attached to the stand! Failure to comply may cause serious injury!
3.With the aid of a second person, lift the saw body out of the shipping container and place onto stand top. Be sure front of saw (with JET logo) faces stand front (JET logo).
4.Line up holes in saw body with holes in top of stand. Fasten saw body to the stand with four M8 x 40 hex cap screws, eight M8 washers, four M8 lock washers, and four M8 hex nuts (as shown in item A, page 8).
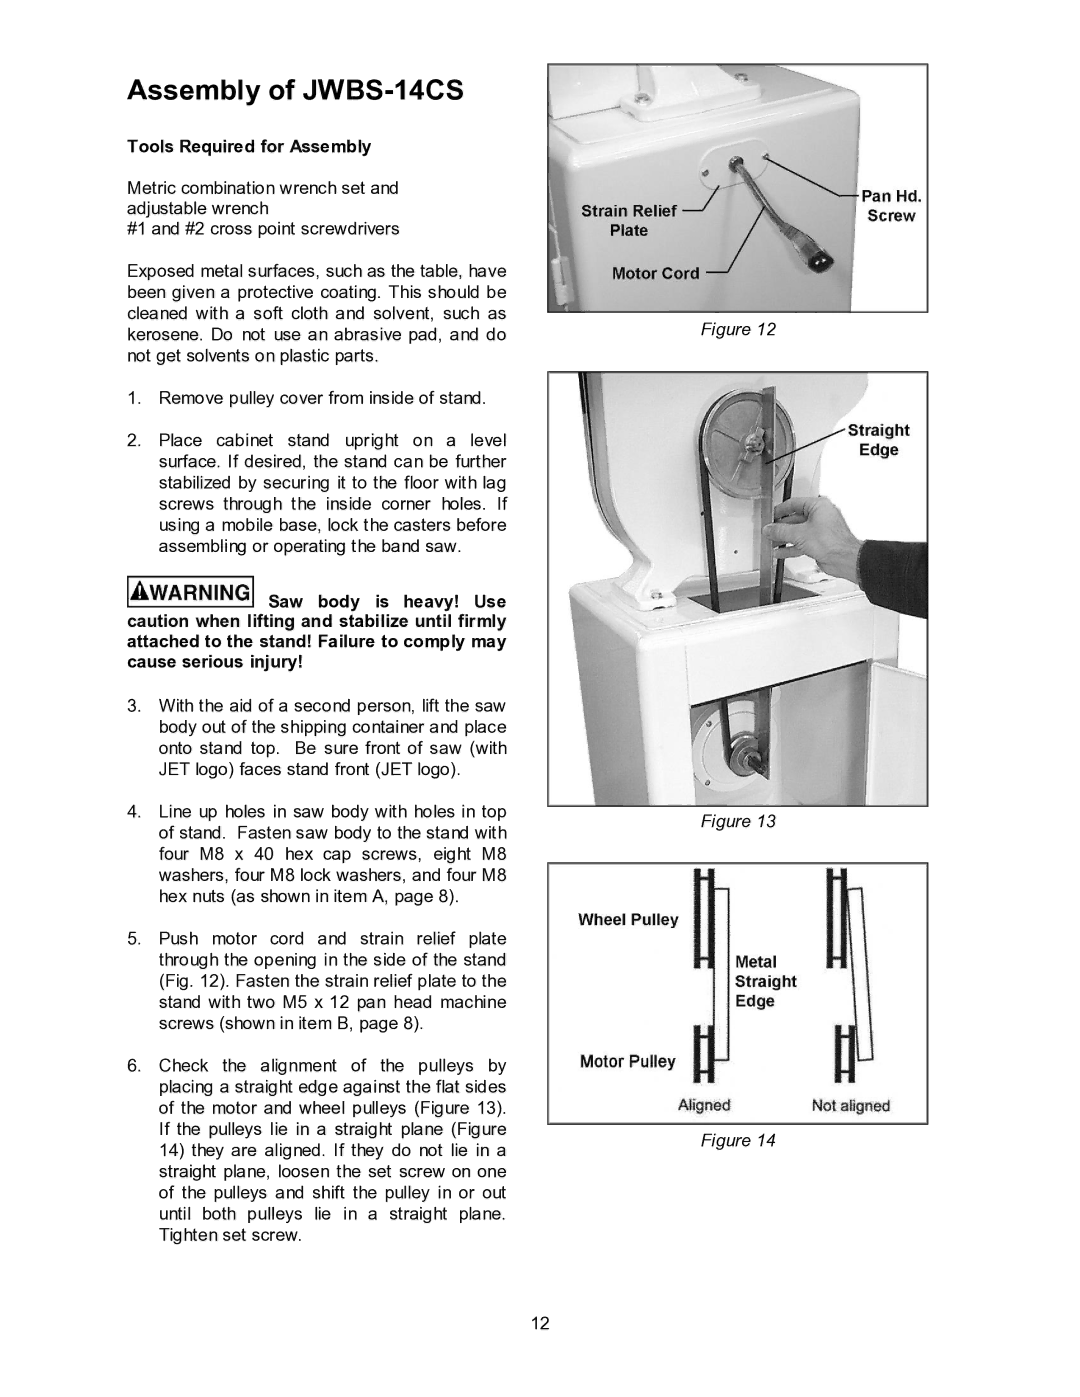
5.Push motor cord and strain relief plate through the opening in the side of the stand (Fig. 12). Fasten the strain relief plate to the stand with two M5 x 12 pan head machine screws (shown in item B, page 8).
6.Check the alignment of the pulleys by placing a straight edge against the flat sides of the motor and wheel pulleys (Figure 13). If the pulleys lie in a straight plane (Figure
14)they are aligned. If they do not lie in a straight plane, loosen the set screw on one of the pulleys and shift the pulley in or out until both pulleys lie in a straight plane. Tighten set screw.
Figure 12
Figure 13
Figure 14
12
