lightly backing out the six locking screws (F, Fig. 19) against the slot. NOTE: At this time, only tighten the knife in the slot just enough to hold knife in position.
6.If additional knives must be reset, repeat step 5.
7.After all four knives are set with screws just snug, back out and tighten the six locking screws (F, Fig. 19 & 20), against the slot starting with the end screws first, then the center screws, until the knife is securely held in the cutterhead. Tighten remaining three knives in the same manner.
Important: Double check all screws for tightness.
Replacing & Resetting Knives
If the knives are removed for sharpening, care must be exercise in replacing and resetting them. Proceed as follows:
1.Disconnect machine from power source.
2.Remove six screws and upper cover (see Fig. 18).
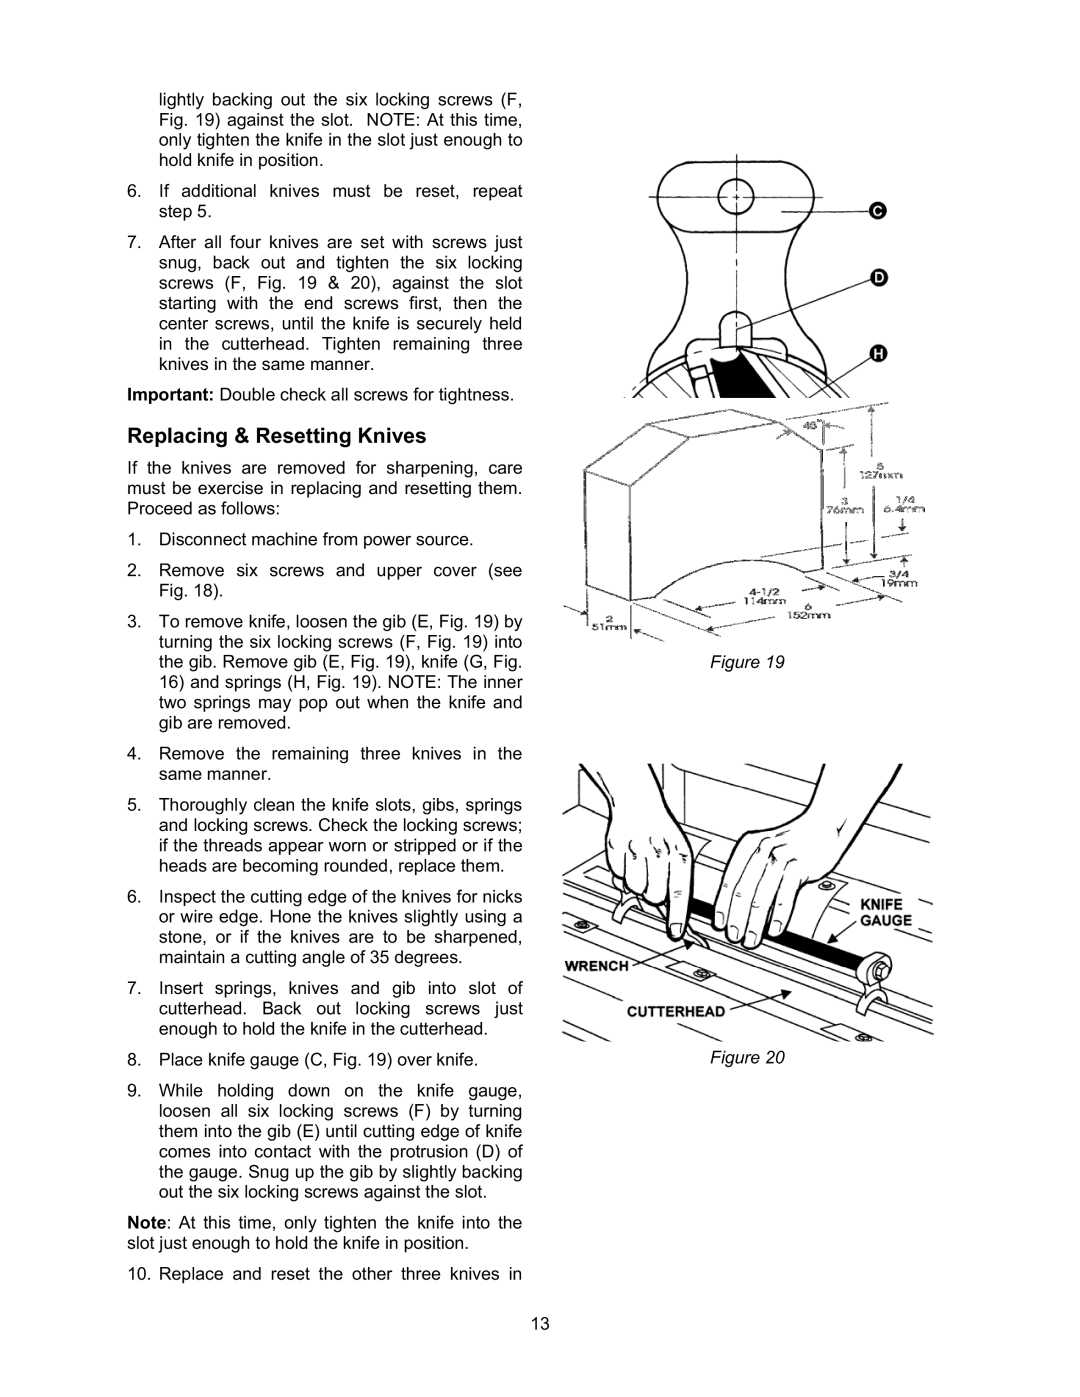
3.To remove knife, loosen the gib (E, Fig. 19) by turning the six locking screws (F, Fig. 19) into the gib. Remove gib (E, Fig. 19), knife (G, Fig. 16) and springs (H, Fig. 19). NOTE: The inner two springs may pop out when the knife and gib are removed.
4.Remove the remaining three knives in the same manner.
5.Thoroughly clean the knife slots, gibs, springs and locking screws. Check the locking screws; if the threads appear worn or stripped or if the heads are becoming rounded, replace them.
6.Inspect the cutting edge of the knives for nicks or wire edge. Hone the knives slightly using a stone, or if the knives are to be sharpened, maintain a cutting angle of 35 degrees.
7.Insert springs, knives and gib into slot of cutterhead. Back out locking screws just enough to hold the knife in the cutterhead.
8.Place knife gauge (C, Fig. 19) over knife.
9.While holding down on the knife gauge, loosen all six locking screws (F) by turning them into the gib (E) until cutting edge of knife comes into contact with the protrusion (D) of the gauge. Snug up the gib by slightly backing out the six locking screws against the slot.
Note: At this time, only tighten the knife into the slot just enough to hold the knife in position.
10. Replace and reset the other three knives in
Figure 19
Figure 20
13