Installing/Replacing the Blade
![]() When installing or changing the saw blade, always disconnect the saw from the power source! Failure to comply cay cause serious injury!
When installing or changing the saw blade, always disconnect the saw from the power source! Failure to comply cay cause serious injury!
1.Using the handwheels, raise the blade arbor fully and lock the saw at zero degrees by tightening the lock knob in the middle of the hand wheel.
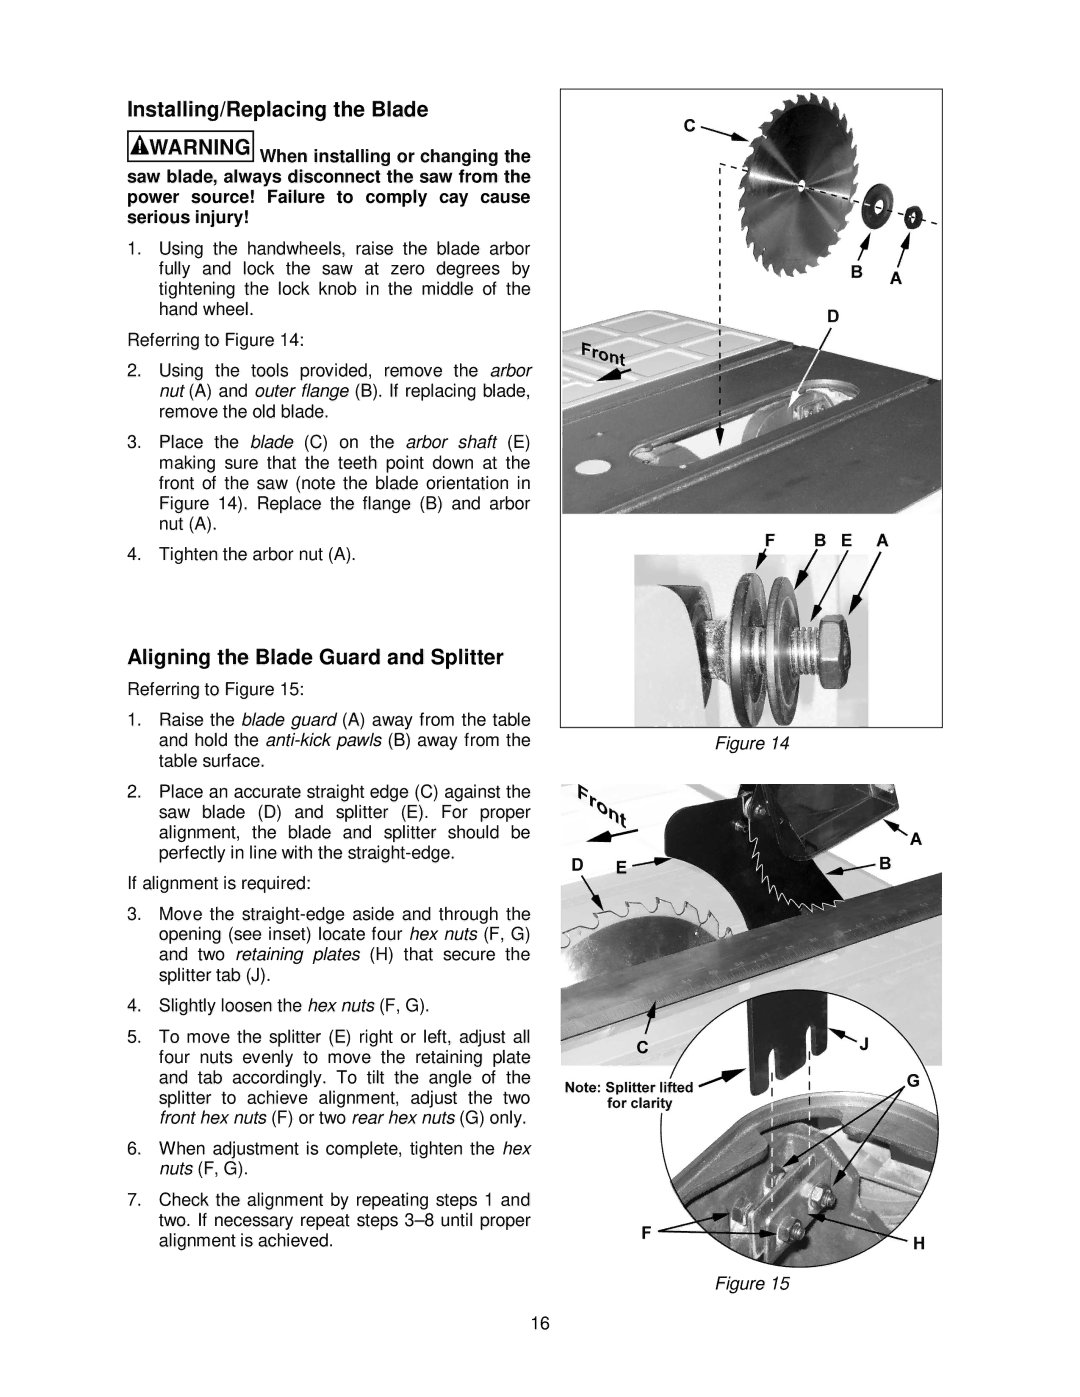
Referring to Figure 14:
2.Using the tools provided, remove the arbor nut (A) and outer flange (B). If replacing blade, remove the old blade.
3.Place the blade (C) on the arbor shaft (E) making sure that the teeth point down at the front of the saw (note the blade orientation in Figure 14). Replace the flange (B) and arbor nut (A).
4.Tighten the arbor nut (A).
Aligning the Blade Guard and Splitter
Referring to Figure 15:
1.Raise the blade guard (A) away from the table and hold the
2.Place an accurate straight edge (C) against the saw blade (D) and splitter (E). For proper alignment, the blade and splitter should be perfectly in line with the
If alignment is required:
3.Move the
4.Slightly loosen the hex nuts (F, G).
5.To move the splitter (E) right or left, adjust all four nuts evenly to move the retaining plate and tab accordingly. To tilt the angle of the splitter to achieve alignment, adjust the two front hex nuts (F) or two rear hex nuts (G) only.
6.When adjustment is complete, tighten the hex nuts (F, G).
7.Check the alignment by repeating steps 1 and two. If necessary repeat steps
Figure 14
Figure 15
16