7.When satisfied, return the upper and lower blade guides close to the blade.
8.Close upper and lower doors.
Guide Post
For effective cutting and for safety’s sake, there should be a minimum amount of space between the top of the workpiece and the bottom of the blade guides. Loosen the locking knob (see Figure 6) and rotate the handwheel (Figure 6) to raise or lower the guide post so that the guides clear the workpiece by about 3/16”.
Blade Guides
![]() Blade guides must be properly adjusted or damage may occur to the blade and/or guides.
Blade guides must be properly adjusted or damage may occur to the blade and/or guides.
1.Loosen the two socket head cap screws on the guide housing. See Figure 8.
2.Move the guide support forward or backward in accordance with the width of the blade. The front end of the blade guides should be adjusted approximately 1/8” behind the blade teeth. See Figure 8.
3.Tighten the hex cap screws securely.
4.This procedure should be done for both upper and lower guide housings.
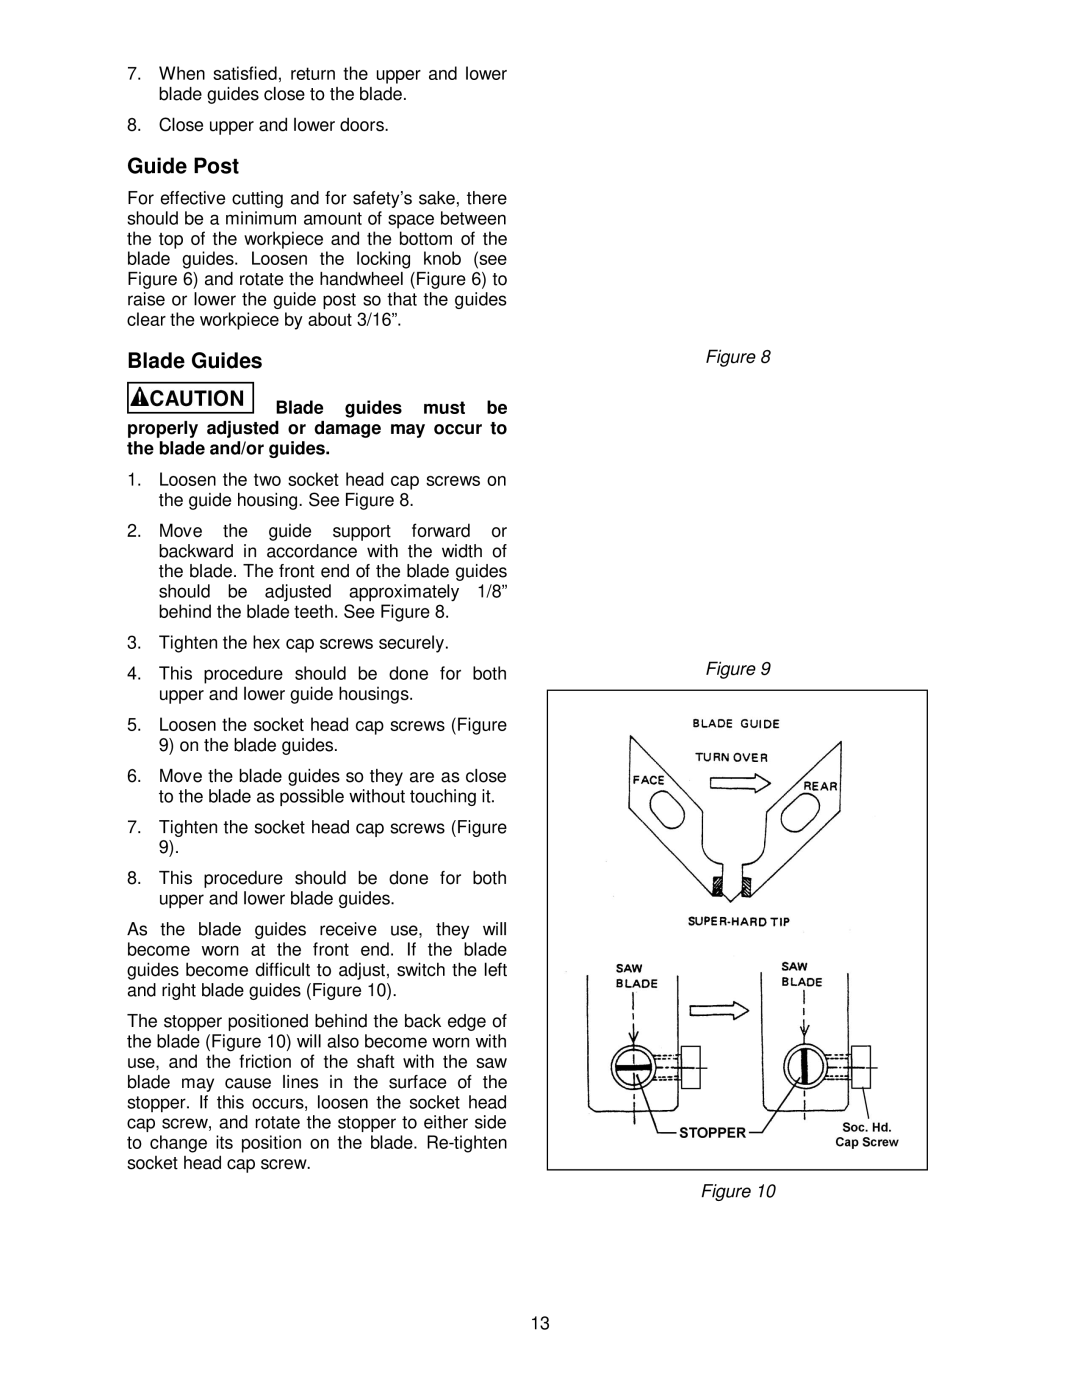
5.Loosen the socket head cap screws (Figure
9)on the blade guides.
6.Move the blade guides so they are as close to the blade as possible without touching it.
7.Tighten the socket head cap screws (Figure
8.This procedure should be done for both upper and lower blade guides.
As the blade guides receive use, they will become worn at the front end. If the blade guides become difficult to adjust, switch the left and right blade guides (Figure 10).
The stopper positioned behind the back edge of the blade (Figure 10) will also become worn with use, and the friction of the shaft with the saw blade may cause lines in the surface of the stopper. If this occurs, loosen the socket head cap screw, and rotate the stopper to either side to change its position on the blade.
Figure 8
Figure 9
Figure 10
13
