Playing Back Tapes
You can play back type I, type II, and type IV tapes without changing any settings.
Playing Back a Tape
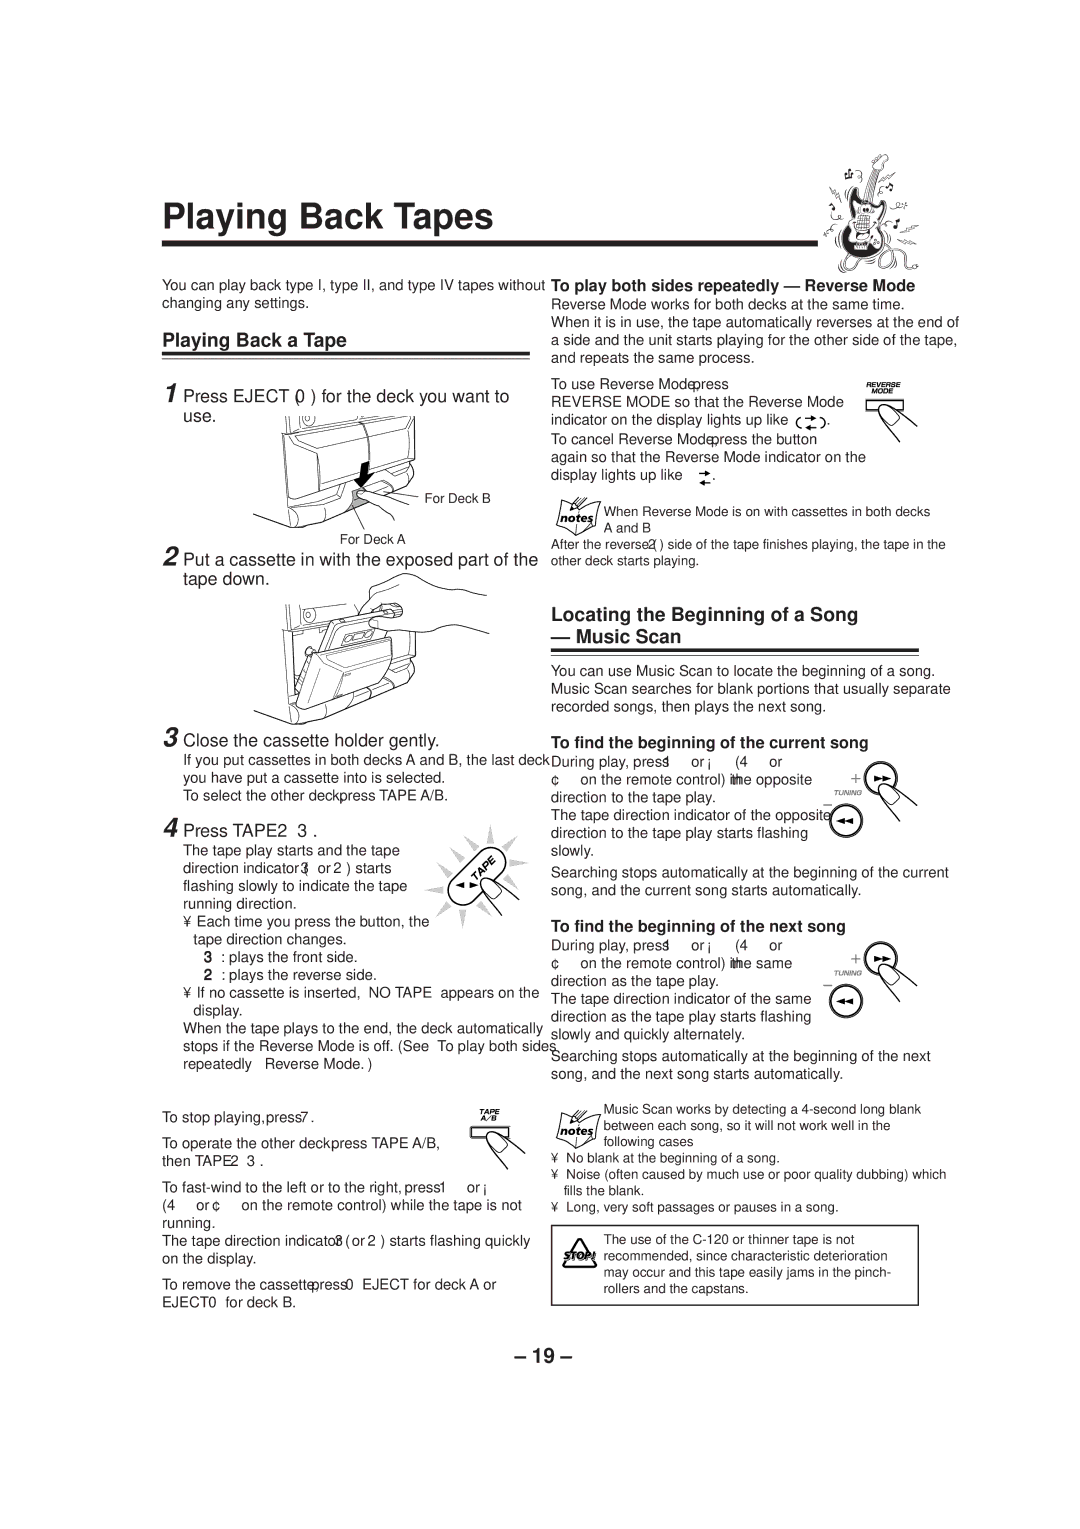
1 Press EJECT (0) for the deck you want to use.
For Deck B
For Deck A
2 Put a cassette in with the exposed part of the tape down.
To play both sides repeatedly — Reverse Mode
Reverse Mode works for both decks at the same time.
When it is in use, the tape automatically reverses at the end of a side and the unit starts playing for the other side of the tape, and repeats the same process.
To use Reverse Mode, press |
|
REVERSE MODE so that the Reverse Mode |
|
indicator on the display lights up like — | . |
To cancel Reverse Mode, press the button again so that the Reverse Mode indicator on the
display lights up like — | . |
When Reverse Mode is on with cassettes in both decks A and B
After the reverse (2) side of the tape finishes playing, the tape in the other deck starts playing.
3 Close the cassette holder gently.
If you put cassettes in both decks A and B, the last deck you have put a cassette into is selected.
To select the other deck, press TAPE A/B.
4 Press TAPE 23.
The tape play starts and the tape direction indicator (3or 2) starts flashing slowly to indicate the tape running direction.
• Each time you press the button, the tape direction changes.
3: plays the front side.
2 : plays the reverse side.
•If no cassette is inserted, “NO TAPE” appears on the display.
When the tape plays to the end, the deck automatically stops if the Reverse Mode is off. (See “To play both sides repeatedly — Reverse Mode.”)
To stop playing, press 7.
To operate the other deck, press TAPE A/B,
then TAPE 23.
To
The tape direction indicator (3 or 2) starts flashing quickly on the display.
To remove the cassette, press 0EJECT for deck A or
EJECT 0 for deck B.
Locating the Beginning of a Song
— Music Scan
You can use Music Scan to locate the beginning of a song. Music Scan searches for blank portions that usually separate recorded songs, then plays the next song.
To find the beginning of the current song
During play, press 1 or Á(4 or ¢ on the remote control) in the opposite direction to the tape play.
The tape direction indicator of the opposite direction to the tape play starts flashing slowly.
Searching stops automatically at the beginning of the current song, and the current song starts automatically.
To find the beginning of the next song
During play, press 1 or Á(4 or ¢ on the remote control) in the same direction as the tape play.
The tape direction indicator of the same direction as the tape play starts flashing slowly and quickly alternately.
Searching stops automatically at the beginning of the next song, and the next song starts automatically.
Music Scan works by detecting a
•No blank at the beginning of a song.
•Noise (often caused by much use or poor quality dubbing) which fills the blank.
•Long, very soft passages or pauses in a song.
The use of the ![]()
![]()
![]() recommended, since characteristic deterioration may occur and this tape easily jams in the pinch- rollers and the capstans.
recommended, since characteristic deterioration may occur and this tape easily jams in the pinch- rollers and the capstans.
– 19 –