English

ALL CD

EJECT

DISC 1

DISC 1

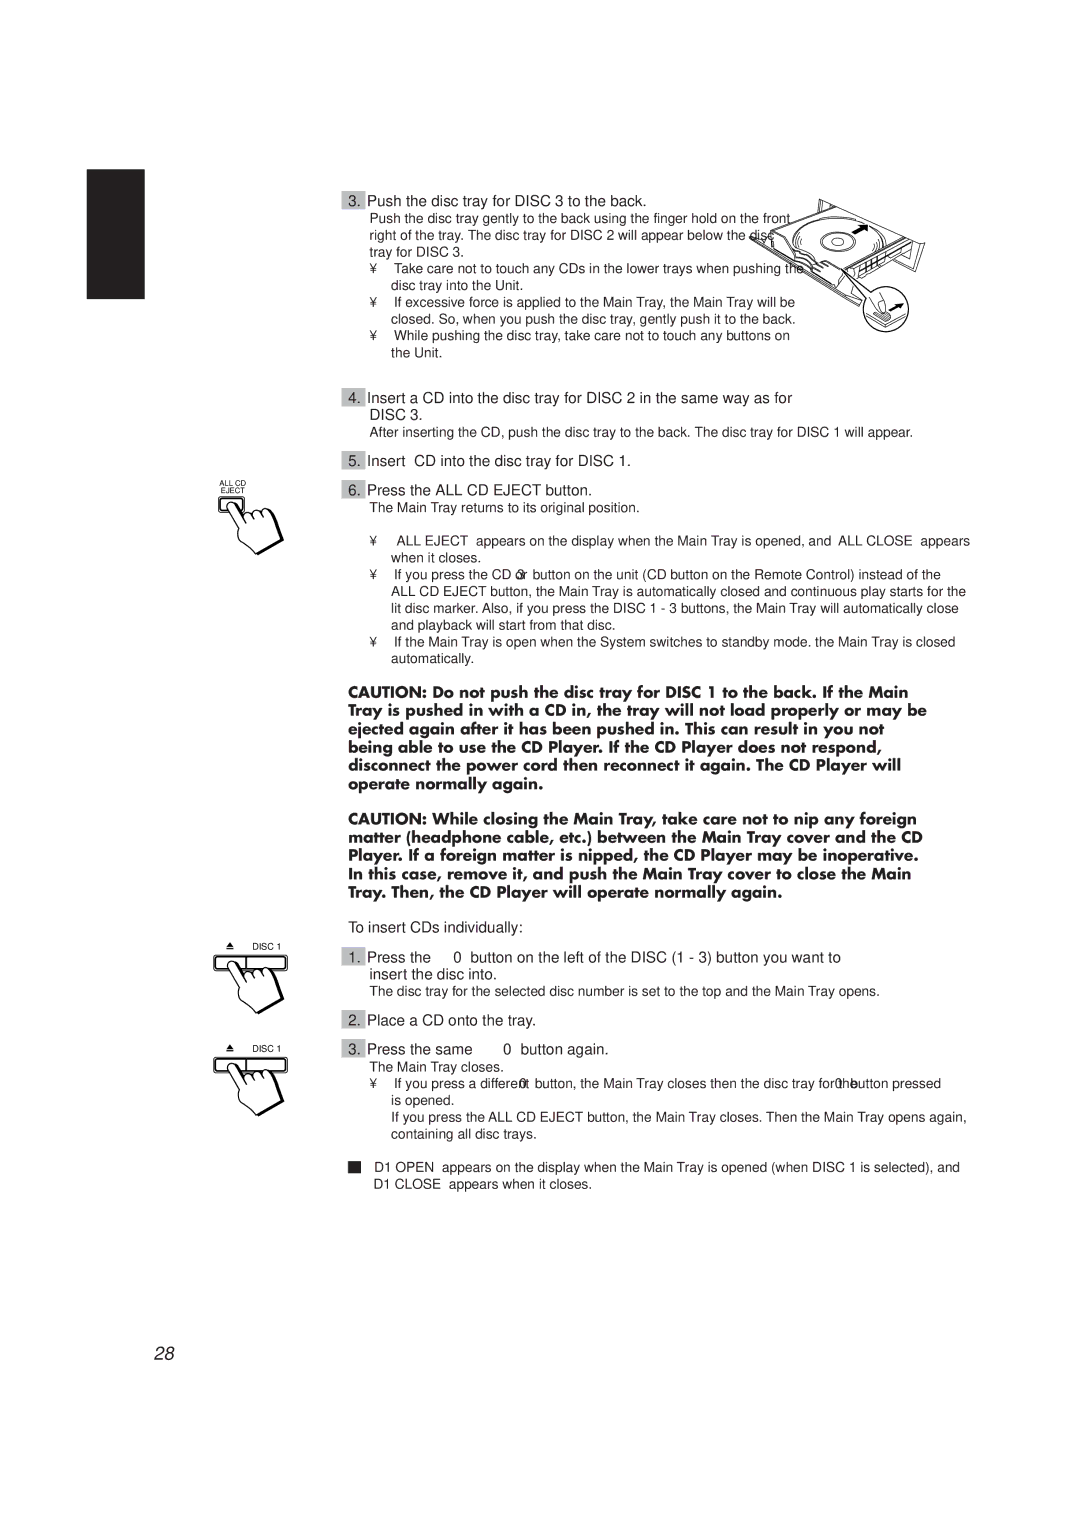
3.Push the disc tray for DISC 3 to the back.

Push the disc tray gently to the back using the finger hold on the front

right of the tray. The disc tray for DISC 2 will appear below the disc tray for DISC 3.

Take care not to touch any CDs in the lower trays when pushing the disc tray into the Unit.

• If excessive force is applied to the Main Tray, the Main Tray will be closed. So, when you push the disc tray, gently push it to the back.

While pushing the disc tray, take care not to touch any buttons on the Unit.

4.Insert a CD into the disc tray for DISC 2 in the same way as for DISC 3.

After inserting the CD, push the disc tray to the back. The disc tray for DISC 1 will appear.

5.Insert CD into the disc tray for DISC 1.

6.Press the ALL CD EJECT button.

The Main Tray returns to its original position.

“ALL EJECT” appears on the display when the Main Tray is opened, and “ALL CLOSE” appears when it closes.

If you press the CD or 3button on the unit (CD button on the Remote Control) instead of the ALL CD EJECT button, the Main Tray is automatically closed and continuous play starts for the lit disc marker. Also, if you press the DISC 1 - 3 buttons, the Main Tray will automatically close and playback will start from that disc.

If the Main Tray is open when the System switches to standby mode. the Main Tray is closed automatically.

CAUTION: Do not push the disc tray for DISC 1 to the back. If the Main Tray is pushed in with a CD in, the tray will not load properly or may be ejected again after it has been pushed in. This can result in you not being able to use the CD Player. If the CD Player does not respond, disconnect the power cord then reconnect it again. The CD Player will operate normally again.

CAUTION: While closing the Main Tray, take care not to nip any foreign matter (headphone cable, etc.) between the Main Tray cover and the CD Player. If a foreign matter is nipped, the CD Player may be inoperative. In this case, remove it, and push the Main Tray cover to close the Main Tray. Then, the CD Player will operate normally again.

To insert CDs individually:

1.Press the 0 button on the left of the DISC (1 - 3) button you want to insert the disc into.

The disc tray for the selected disc number is set to the top and the Main Tray opens.

2.Place a CD onto the tray.

3.Press the same 0 button again.

The Main Tray closes.

If you press a different 0 button, the Main Tray closes then the disc tray for the 0 button pressed is opened.

If you press the ALL CD EJECT button, the Main Tray closes. Then the Main Tray opens again, containing all disc trays.

o“D1 OPEN” appears on the display when the Main Tray is opened (when DISC 1 is selected), and “D1 CLOSE” appears when it closes.

28

Page 32
Image 32
JVC XT-TD77R, CATD77 Push the disc tray for Disc 3 to the back, Place a CD onto the tray Press the same 0 button again

XT-TD77R, RX-TD77R, CATD77 specifications

The JVC CATD77, RX-TD77R, and XT-TD77R are part of JVC's esteemed line of audio and multimedia equipment, each designed to deliver an impressive audio experience. These models showcase advanced features that cater to audiophiles and casual listeners alike, combining cutting-edge technology with user-friendly interfaces.

The JVC CATD77 is a compact stereo system that stands out for its versatility and performance. One of its primary features includes a built-in CD player that supports various disc formats, ensuring that users can enjoy their favorite music without hassle. It also incorporates a digital AM/FM tuner with preset stations, making it easy to access a range of radio channels. The CATD77 is designed with an appealing, sleek aesthetic, making it a stylish addition to any home decor. Additionally, the model boasts Bluetooth capability, allowing for seamless wireless streaming of music from smartphones, tablets, or other Bluetooth-enabled devices.

In the same vein, the RX-TD77R receiver is packed with features that enhance audio quality and connectivity. It supports multiple audio inputs and outputs, including digital audio inputs for modern devices and traditional analog connections, ensuring compatibility with a wide array of sources. The RX-TD77R also features an integrated equalizer that allows users to tweak the sound according to their preferences, providing a customized listening experience. With its robust power output, this receiver can drive larger speakers while maintaining clarity and depth, making it ideal for both music playback and home theater setups.

Lastly, the XT-TD77R takes portability and functionality up a notch. Designed for active users, this model is lightweight yet durable, making it perfect for outdoor activities or travel. It features an integrated rechargeable battery, ensuring that users can enjoy music on the go without worrying about power outlets. The XT-TD77R also supports multiple audio formats, offering flexibility in music playback. Its water-resistant design further enhances its suitability for outdoor use, allowing users to enjoy their favorite tracks in various environments.

Together, the JVC CATD77, RX-TD77R, and XT-TD77R models represent a harmonious blend of sound quality, advanced technology, and user convenience. They cater to diverse needs, whether at home or on the move, symbolizing JVC's commitment to excellent audio performance in all settings.