ENGLISH

 Mounting this Unit
Measures to prevent the unit from toppling or dropping should be taken for safety reasons and accident prevention during emergencies including earthquakes.
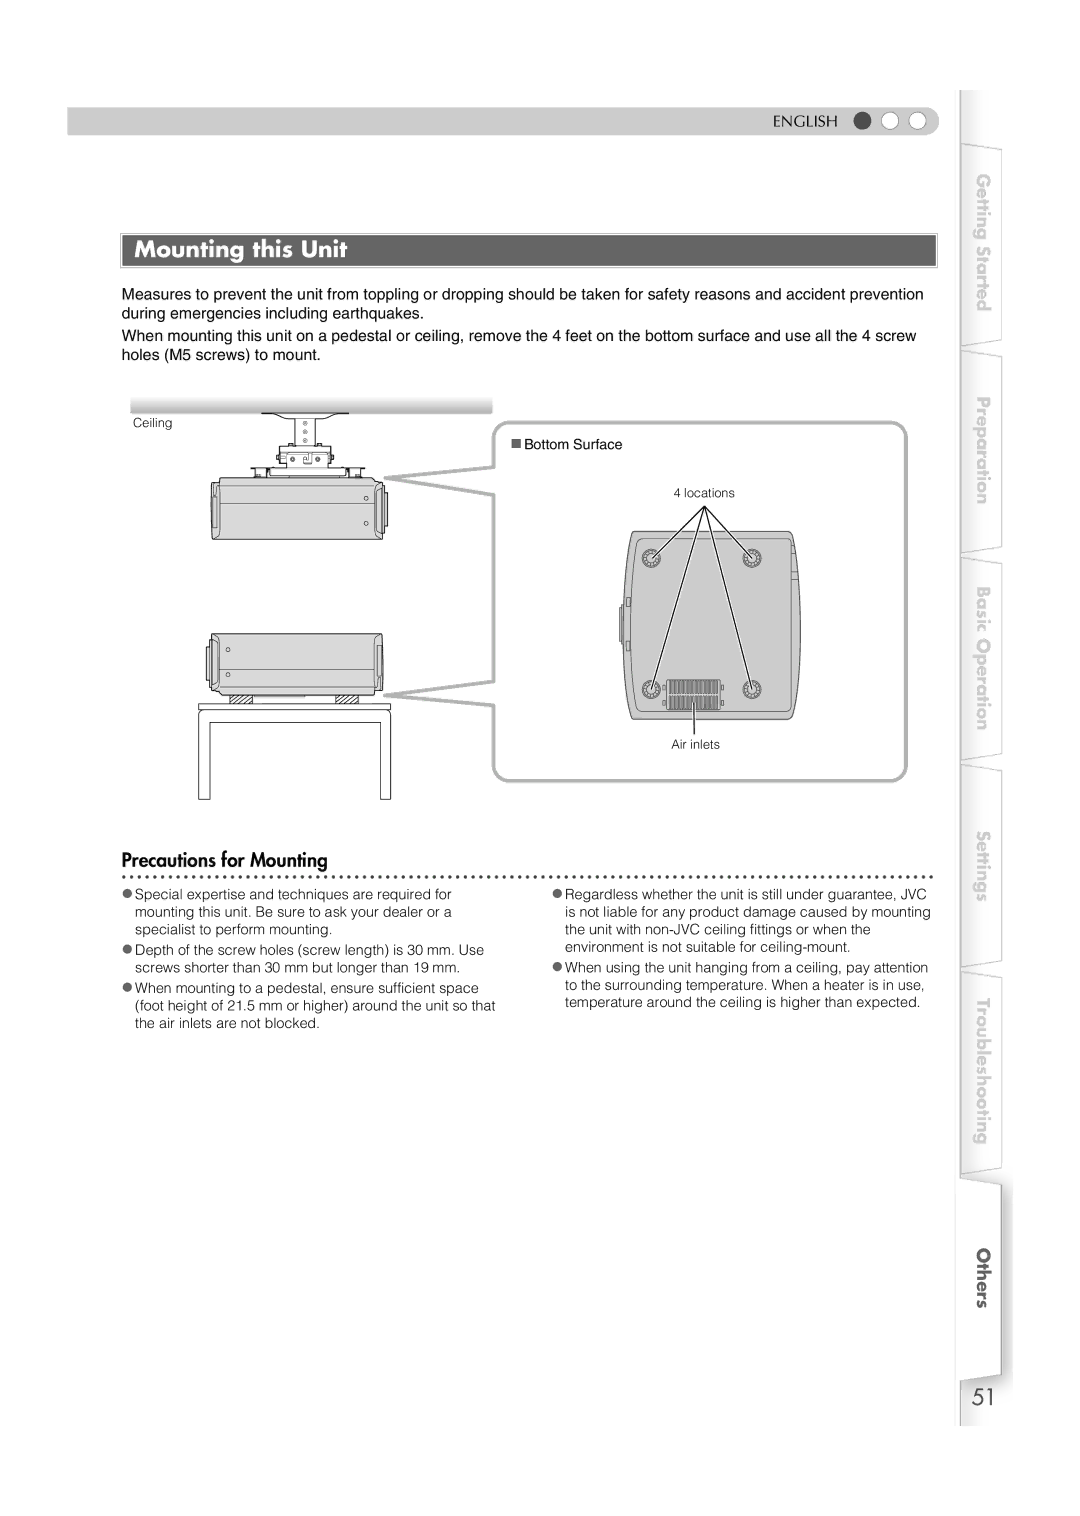
When mounting this unit on a pedestal or ceiling, remove the 4 feet on the bottom surface and use all the 4 screw holes (M5 screws) to mount.
Ceiling
Bottom Surface
4 locations
Air inlets
Precautions for Mounting
Getting Started
Preparation
Basic Operation
Settings
zSpecial expertise and techniques are required for mounting this unit. Be sure to ask your dealer or a specialist to perform mounting.
zDepth of the screw holes (screw length) is 30 mm. Use screws shorter than 30 mm but longer than 19 mm.
zWhen mounting to a pedestal, ensure sufficient space (foot height of 21.5 mm or higher) around the unit so that the air inlets are not blocked.
zRegardless whether the unit is still under guarantee, JVC is not liable for any product damage caused by mounting the unit with
zWhen using the unit hanging from a ceiling, pay attention to the surrounding temperature. When a heater is in use, temperature around the ceiling is higher than expected.
Troubleshooting
Others
51
