Basic Operations
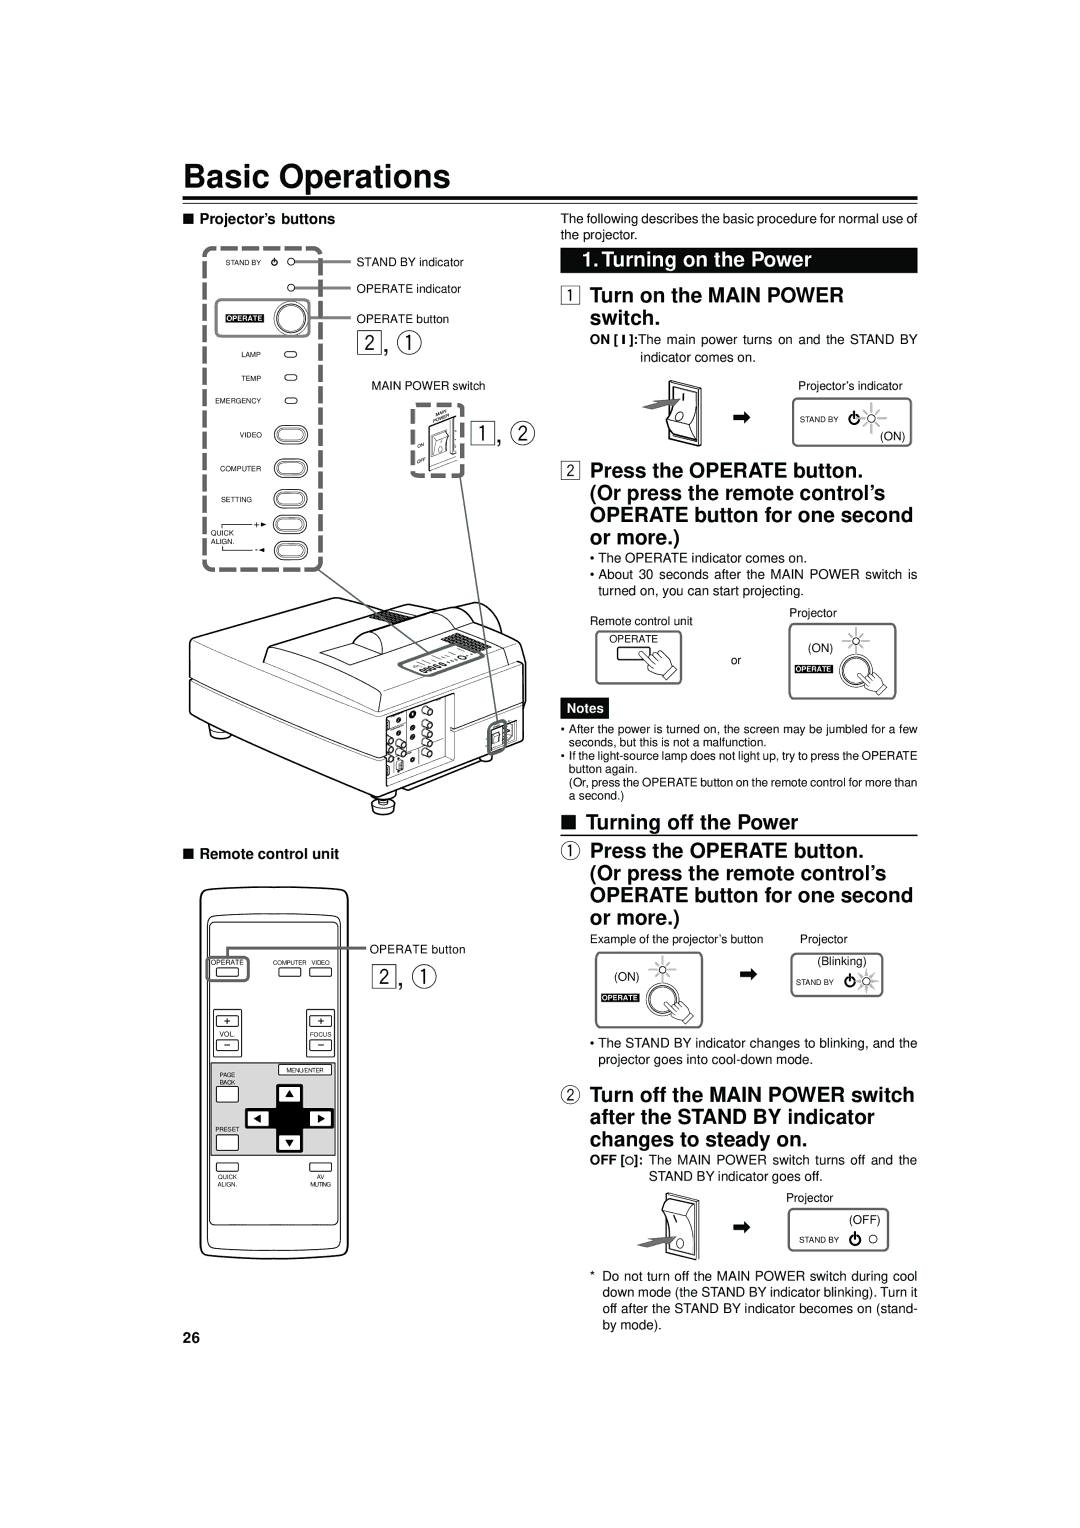
■Projector’s buttons
STAND BY
OPERATE
LAMP
TEMP
EMERGENCY
VIDEO
COMPUTER
SETTING
+3
QUICK
ALIGN.
STAND BY indicator
OPERATE indicator
OPERATE button
2, 1
MAIN POWER switch
![]() 1, 2
1, 2
The following describes the basic procedure for normal use of the projector.
1.Turning on the Power
1 Turn on the MAIN POWER switch.
ON [ ❙ ]:The main power turns on and the STAND BY indicator comes on.
Projector’s indicator
\ | STAND BY |
| (ON) |
2Press the OPERATE button. (Or press the remote control’s OPERATE button for one second or more.)
•The OPERATE indicator comes on.
•About 30 seconds after the MAIN POWER switch is turned on, you can start projecting.
Remote control unit
OPERATE
Projector
(ON)
■Remote control unit
or
OPERATE
Notes
•After the power is turned on, the screen may be jumbled for a few seconds, but this is not a malfunction.
•If the
(Or, press the OPERATE button on the remote control for more than a second.)
■Turning off the Power
1Press the OPERATE button. (Or press the remote control’s OPERATE button for one second
or more.)
Example of the projector’s button | Projector |
|
| OPERATE button |
OPERATE | COMPUTER VIDEO | 2, 1 |
(Blinking)
(ON) | \ | STAND BY |
OPERATE |
|
|
VOL. | FOCUS |
PAGE | MENU/ENTER |
| |
BACK |
|
PRESET |
|
QUICK | AV |
ALIGN. | MUTING |
•The STAND BY indicator changes to blinking, and the projector goes into
2Turn off the MAIN POWER switch after the STAND BY indicator
changes to steady on.
OFF [à]: The MAIN POWER switch turns off and the STAND BY indicator goes off.
Projector
\
(OFF)
26
STAND BY
*Do not turn off the MAIN POWER switch during cool down mode (the STAND BY indicator blinking). Turn it off after the STAND BY indicator becomes on (stand- by mode).
