Filename [MV5S_10Navigation.fm]


MV5S_00.book Page 69 Wednesday, August 31, 2005 4:55 PM

Masterpage:Right+


NAVIGATION (DVD DECK ONLY) EN 69

Move Scenes

Delete Unwanted Part From Play List

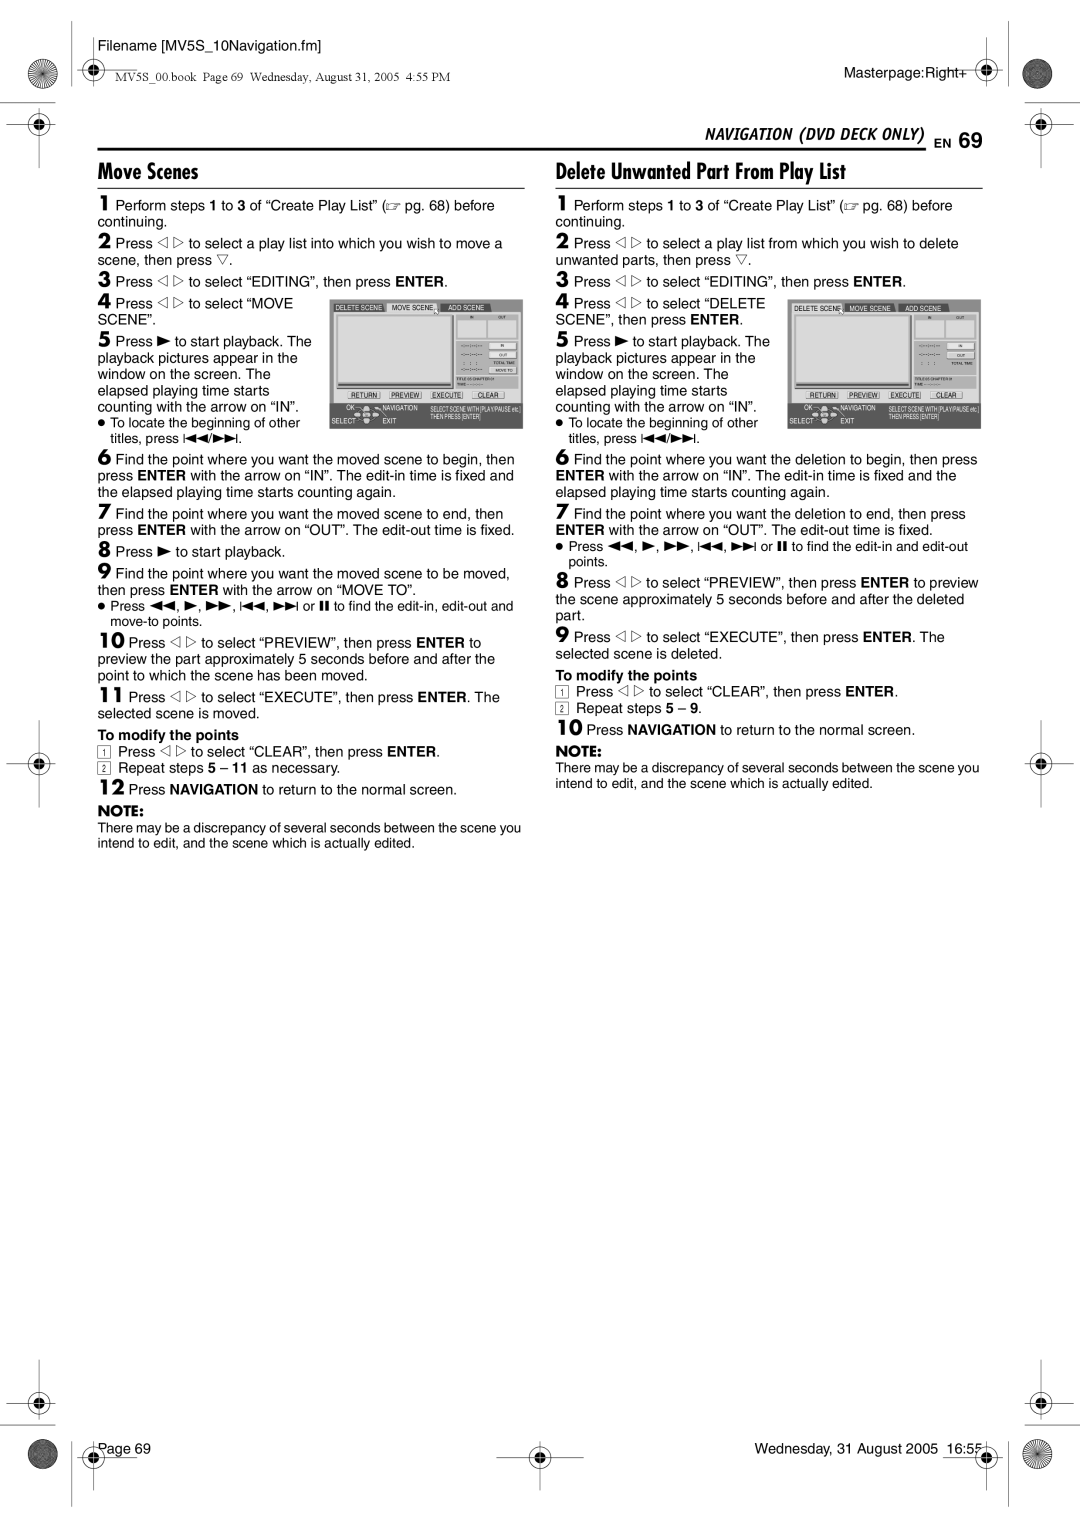
1 Perform steps 1 to 3 of “Create Play List” ( pg. 68) before continuing.

2 Press w e to select a play list into which you wish to move a scene, then press t.

3 Press w e to select “EDITING”, then press ENTER.

4 Press w e to select “MOVE

DELETE SCENE

MOVE SCENE ADD SCENE


SCENE”.


IN


OUT


5 Press 4 to start playback. The


-:--:--:--

IN

playback pictures appear in the


-:--:--:--

OUT


: :

:

TOTAL TIME

window on the screen. The


-:--:--:--

MOVE TO


TITLE 05 CHAPTER 01

elapsed playing time starts


TIME -- --:--:--:--


RETURN

PREVIEW

EXECUTE

CLEAR

counting with the arrow on “IN”.

OK

NAVIGATION

SELECT SCENE WITH [PLAY/PAUSE etc.]

To locate the beginning of other

SELECT

EXIT

THEN PRESS [ENTER]


titles, press 2/6.

6 Find the point where you want the moved scene to begin, then press ENTER with the arrow on “IN”. The edit-in time is fixed and the elapsed playing time starts counting again.

7 Find the point where you want the moved scene to end, then press ENTER with the arrow on “OUT”. The edit-out time is fixed.

8 Press 4 to start playback.

9 Find the point where you want the moved scene to be moved, then press ENTER with the arrow on “MOVE TO”.

Press 3, 4, 5, 2, 6 or 9 to find the edit-in, edit-out and move-to points.

10 Press w e to select “PREVIEW”, then press ENTER to preview the part approximately 5 seconds before and after the point to which the scene has been moved.

11 Press w e to select “EXECUTE”, then press ENTER. The selected scene is moved.

To modify the points

APress w e to select “CLEAR”, then press ENTER. B Repeat steps 5 11 as necessary.

12 Press NAVIGATION to return to the normal screen.

NOTE:

There may be a discrepancy of several seconds between the scene you intend to edit, and the scene which is actually edited.

1 Perform steps 1 to 3 of “Create Play List” ( pg. 68) before continuing.

2 Press w e to select a play list from which you wish to delete unwanted parts, then press t.

3 Press w e to select “EDITING”, then press ENTER.


4 Press w e to select “DELETE

DELETE SCENE MOVE SCENE

ADD SCENE


SCENE”, then press ENTER.


IN


OUT


5 Press 4 to start playback. The


-:--:--:--

IN

playback pictures appear in the


-:--:--:--

OUT


: :

:

TOTAL TIME

window on the screen. The


TITLE 05 CHAPTER 01

elapsed playing time starts


TIME -- --:--:--:--


RETURN

PREVIEW


EXECUTE

CLEAR

counting with the arrow on “IN”.

OK

NAVIGATION

SELECT SCENE WITH [PLAY/PAUSE etc.]

To locate the beginning of other

SELECT

EXIT

THEN PRESS [ENTER]


titles, press 2/6.


6 Find the point where you want the deletion to begin, then press ENTER with the arrow on “IN”. The edit-in time is fixed and the elapsed playing time starts counting again.

7 Find the point where you want the deletion to end, then press ENTER with the arrow on “OUT”. The edit-out time is fixed.

Press 3, 4, 5, 2, 6 or 9 to find the edit-in and edit-out points.

8 Press w e to select “PREVIEW”, then press ENTER to preview the scene approximately 5 seconds before and after the deleted part.

9 Press w e to select “EXECUTE”, then press ENTER. The selected scene is deleted.

To modify the points

APress w e to select “CLEAR”, then press ENTER. B Repeat steps 5 9.

10 Press NAVIGATION to return to the normal screen.

NOTE:

There may be a discrepancy of several seconds between the scene you intend to edit, and the scene which is actually edited.

Page 69

Wednesday, 31 August 2005 16:55

Page 69
Image 69
JVC DR-MV5BE manual Move Scenes, SCENE, then press Enter

DR-MV5BE specifications

The JVC DR-MV5BE is a versatile and feature-rich DVD recorder and VCR combo that caters to the needs of users looking to digitize their home video collection while enjoying the convenience of a dual-format device. This innovative unit combines both DVD recording and VHS playback capabilities, making it a valuable addition to any home entertainment setup.

At the core of the JVC DR-MV5BE’s functionality is its ability to record directly onto DVD discs, offering several formats including DVD-R, DVD-RW, and DVD+R. This flexibility allows users to choose the best format suited for their recording needs, whether they prioritize compatibility with other devices or rewritable options. The device also supports various recording modes, from high-quality SP mode to extended recording modes like LP and EP, granting users control over recording time and quality.

The integrated VHS player adds to the DR-MV5BE’s appeal, allowing users to play their existing VHS tapes seamlessly. This feature is perfect for those looking to preserve old home movies, as the unit can convert VHS content to DVD format through a simple dubbing process. Additionally, the DR-MV5BE features front and rear audio/video inputs, enabling users to easily connect camcorders, gaming consoles, or other external devices for recording or playback.

In terms of connectivity, the JVC DR-MV5BE is equipped with various options. The HDMI output ensures high-definition video playback, while the standard composite outputs allow compatibility with older televisions. The presence of a USB port provides further versatility, allowing users to record or transfer content to and from USB storage devices.

The unit also boasts a user-friendly interface and remote control, simplifying the recording and playback process. With built-in features such as a programmable timer, users can schedule recordings in advance, ensuring they never miss their favorite shows or events.

Overall, the JVC DR-MV5BE is a robust device that encapsulates modern recording technology while retaining the nostalgia of VHS. Its blend of functions, alongside its user-friendly design and versatility, makes it a standout option for anyone looking to bridge the gap between analog and digital media.