English
Getting Started
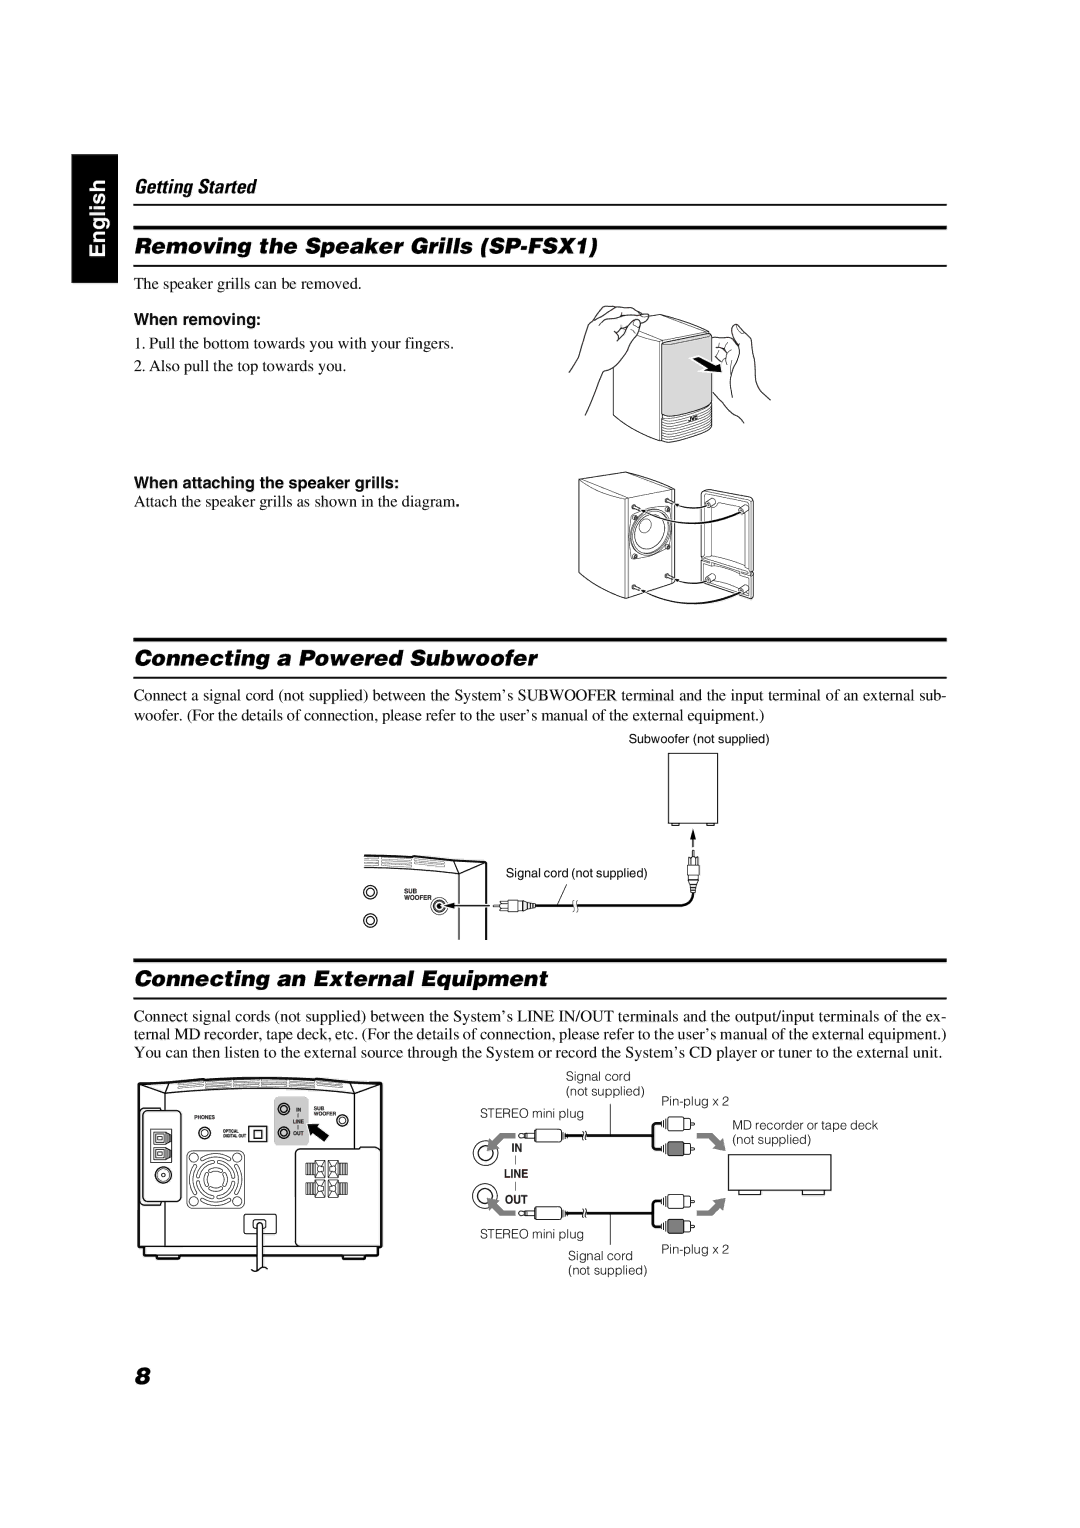
Removing the Speaker Grills (SP-FSX1)
The speaker grills can be removed.
When removing:
1.Pull the bottom towards you with your fingers.
2.Also pull the top towards you.
When attaching the speaker grills:
Attach the speaker grills as shown in the diagram.
Connecting a Powered Subwoofer
Connect a signal cord (not supplied) between the System’s SUBWOOFER terminal and the input terminal of an external sub- woofer. (For the details of connection, please refer to the user’s manual of the external equipment.)
Subwoofer (not supplied)
Signal cord (not supplied)
Connecting an External Equipment
Connect signal cords (not supplied) between the System’s LINE IN/OUT terminals and the output/input terminals of the ex- ternal MD recorder, tape deck, etc. (For the details of connection, please refer to the user’s manual of the external equipment.) You can then listen to the external source through the System or record the System’s CD player or tuner to the external unit.
Signal cord (not supplied)
STEREO mini plug
STEREO mini plug
Signal cord (not supplied)
MD recorder or tape deck (not supplied)
8