RECORDING Basic Recording
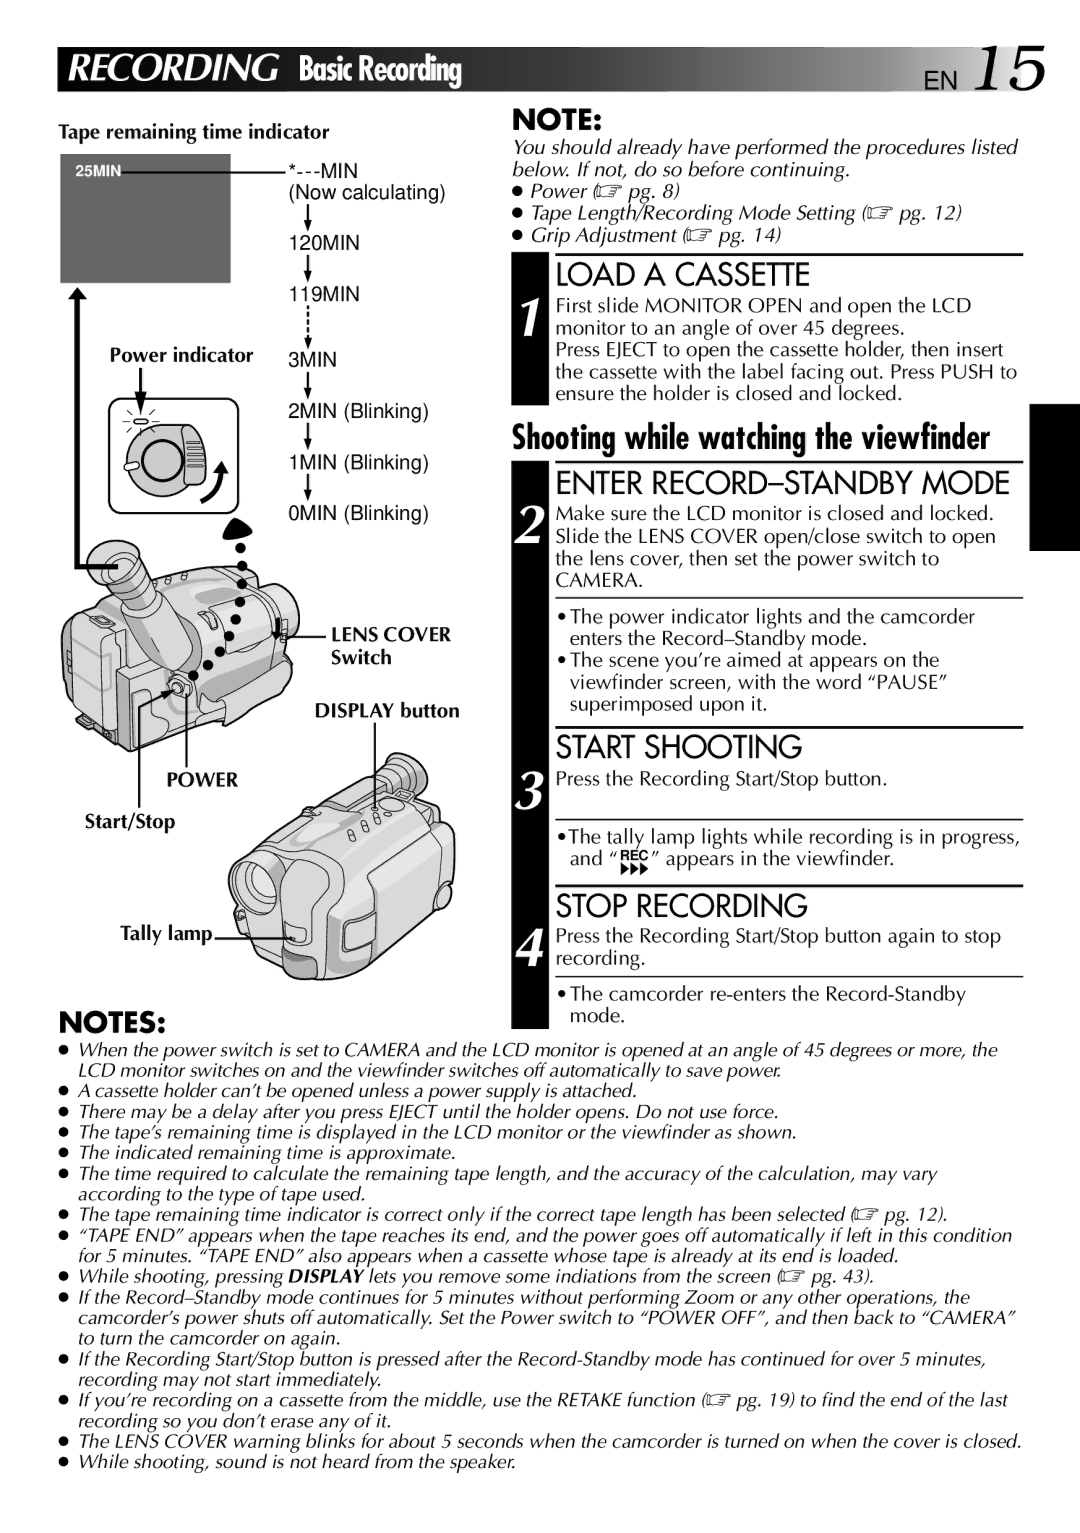
Tape remaining time indicator
25MIN | |
| (Now calculating) |
| 120MIN |
| 119MIN |
Power indicator | 3MIN |
| 2MIN (Blinking) |
| 1MIN (Blinking) |
| 0MIN (Blinking) |
| LENS COVER |
| Switch |
| DISPLAY button |
POWER |
|
Start/Stop |
|
Tally lamp 
NOTES:
![]()
![]()
![]()
![]() EN 15
EN 15
NOTE:
You should already have performed the procedures listed below. If not, do so before continuing.
●Power (☞ pg. 8)
●Tape Length/Recording Mode Setting (☞ pg. 12)
●Grip Adjustment (☞ pg. 14)
LOAD A CASSETTE
1 First slide MONITOR OPEN and open the LCD monitor to an angle of over 45 degrees.
Press EJECT to open the cassette holder, then insert the cassette with the label facing out. Press PUSH to ensure the holder is closed and locked.
Shooting while watching the viewfinder
ENTER RECORD–STANDBY MODE
2 Make sure the LCD monitor is closed and locked. Slide the LENS COVER open/close switch to open the lens cover, then set the power switch to
CAMERA.
•The power indicator lights and the camcorder enters the
•The scene you’re aimed at appears on the viewfinder screen, with the word “PAUSE” superimposed upon it.
START SHOOTING
3 Press the Recording Start/Stop button.
•The tally lamp lights while recording is in progress, and “REC ” appears in the viewfinder.
STOP RECORDING
4 Press the Recording Start/Stop button again to stop recording.
•The camcorder
●When the power switch is set to CAMERA and the LCD monitor is opened at an angle of 45 degrees or more, the LCD monitor switches on and the viewfinder switches off automatically to save power.
●A cassette holder can’t be opened unless a power supply is attached.
●There may be a delay after you press EJECT until the holder opens. Do not use force.
●The tape’s remaining time is displayed in the LCD monitor or the viewfinder as shown.
●The indicated remaining time is approximate.
●The time required to calculate the remaining tape length, and the accuracy of the calculation, may vary according to the type of tape used.
●The tape remaining time indicator is correct only if the correct tape length has been selected (☞ pg. 12).
●“TAPE END” appears when the tape reaches its end, and the power goes off automatically if left in this condition for 5 minutes. “TAPE END” also appears when a cassette whose tape is already at its end is loaded.
●While shooting, pressing DISPLAY lets you remove some indiations from the screen (☞ pg. 43).
●If the
●If the Recording Start/Stop button is pressed after the
●If you’re recording on a cassette from the middle, use the RETAKE function (☞ pg. 19) to find the end of the last recording so you don’t erase any of it.
●The LENS COVER warning blinks for about 5 seconds when the camcorder is turned on when the cover is closed.
●While shooting, sound is not heard from the speaker.