68![]()
![]()
![]() EN
EN![]()
![]()
![]()
![]()
![]()
![]()
![]()
![]()
![]()
![]()
![]()
![]()
![]()
![]()
![]()
![]()
![]()
![]()
![]()
![]()
![]()
![]()
![]()
![]()
![]()
![]()
![]()
![]()
![]()
![]()
![]()
![]()
![]()
![]()
![]()
![]()
![]()
![]()
![]()
![]()
![]()
![]()
![]()
![]()
![]()
![]()
![]()
![]()
![]()
![]()
![]()
![]()
![]()
![]()
![]()
![]()
![]()
![]()
![]()
![]()
![]()
![]()
![]()
![]()
![]()
![]()
![]()
![]()
![]()
![]()
![]()
![]()
![]()
![]()
![]()
![]()
![]()
![]()
EDITING

 (Cont.)


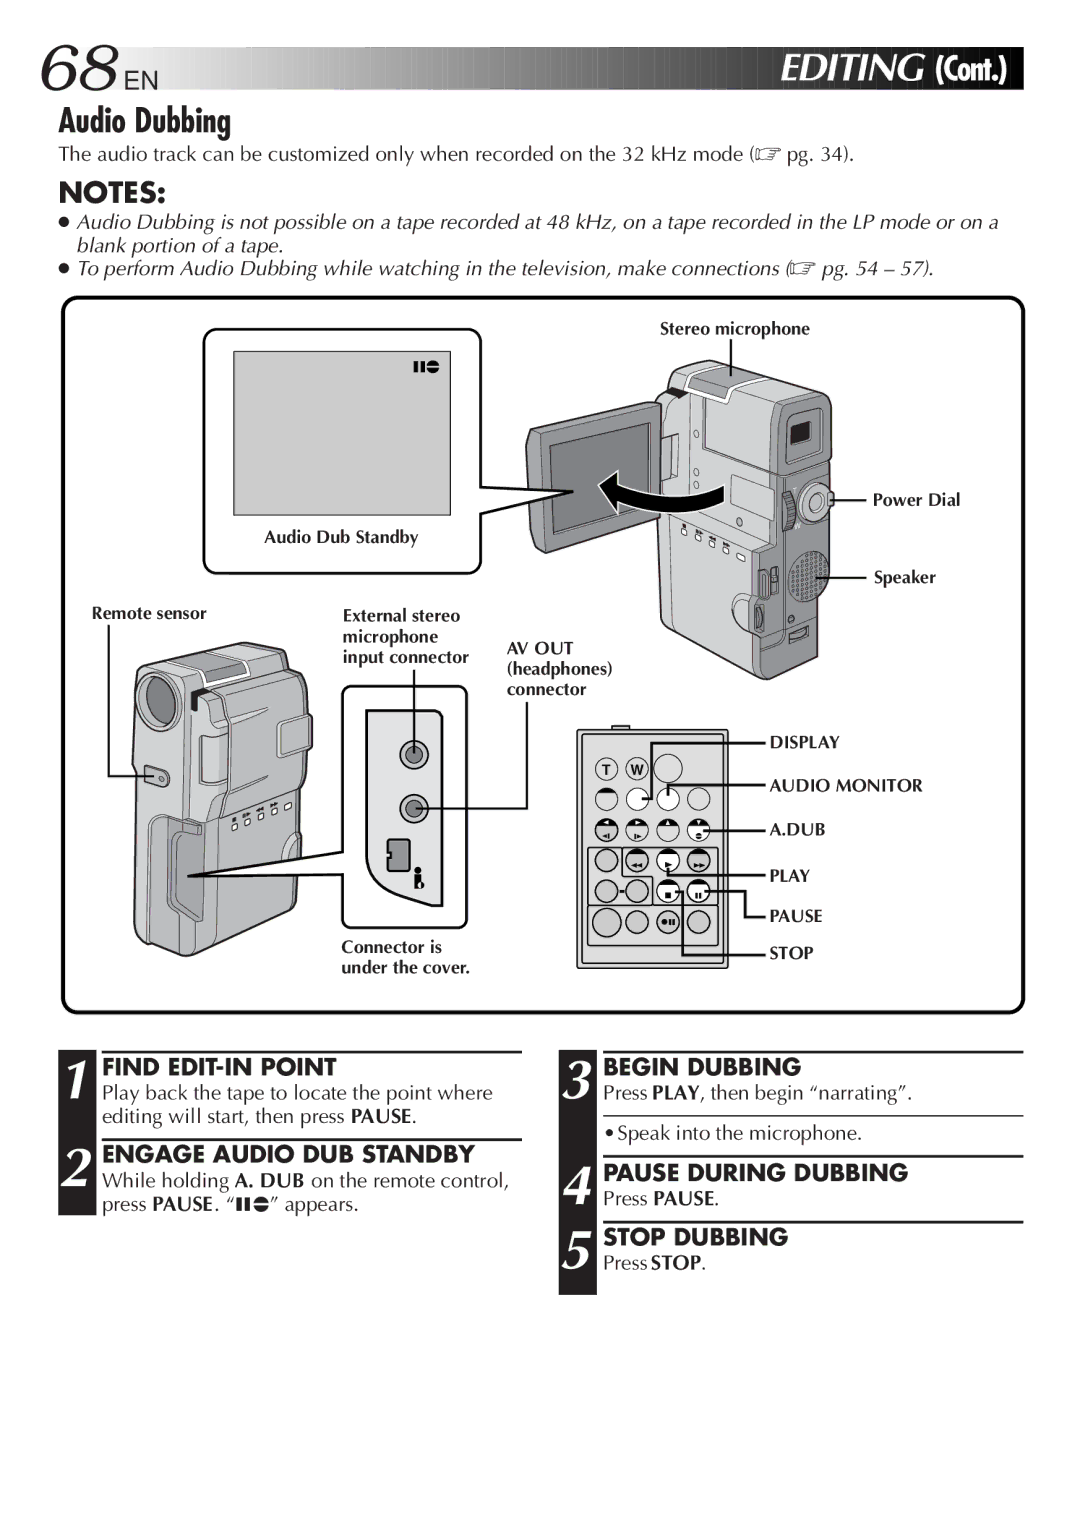
Audio Dubbing
The audio track can be customized only when recorded on the 32 kHz mode (☞ pg. 34).
NOTES:
●Audio Dubbing is not possible on a tape recorded at 48 kHz, on a tape recorded in the LP mode or on a blank portion of a tape.
●To perform Audio Dubbing while watching in the television, make connections (☞ pg. 54 – 57).
Stereo microphone
6e
| Audio Dub Standby |
|
Remote sensor | External stereo |
|
| microphone | AV OUT |
| input connector | |
| (headphones) | |
|
| |
|
| connector |
T W
Connector is under the cover.
![]()
![]()
![]() Power Dial
Power Dial
![]()
![]()
![]() Speaker
Speaker
DISPLAY
![]() AUDIO MONITOR
AUDIO MONITOR
A.DUB
PLAY
![]() PAUSE
PAUSE
STOP
1 FIND EDIT-IN POINT
Play back the tape to locate the point where editing will start, then press PAUSE.
2 ENGAGE AUDIO DUB STANDBY While holding A. DUB on the remote control, press PAUSE. “6e” appears.
3 BEGIN DUBBING
Press PLAY, then begin “narrating”.
•Speak into the microphone.
4 PAUSE DURING DUBBING
Press PAUSE.
5 STOP DUBBING
Press STOP.