EN 59

NOTES:

When editing onto a tape that was recorded at

12-bit, the old and new soundtracks are recorded separately.

If you dub onto a blank space on the tape, the sound may be disrupted. Make sure you only edit recorded areas.

If feedback or howling occurs during TV playback, move the camcorder’s microphone away from the TV, or turn down the TV’s volume.

If you change from 12-bit to 16-bit in mid- recording and then use the tape for Audio Dubbing, it is not effective from the point where 16-bit recording began.

During Audio Dubbing, when the tape moves to scenes recorded in the LP mode, scenes recorded in 16-bit audio or a blank portion, Audio Dubbing stops.

To perform Audio Dubbing while watching on the television, make connections. ( pg. 24)

To perform Audio Dubbing with a video unit connected to the camcorder’s S/AV connector, first set “S/AV INPUT” to “A/V IN” or “S IN” in VIDEO Menu. ( pg. 33, 39)

The “AUX” indication appears instead of “MIC”.

Insert Editing (DV only)

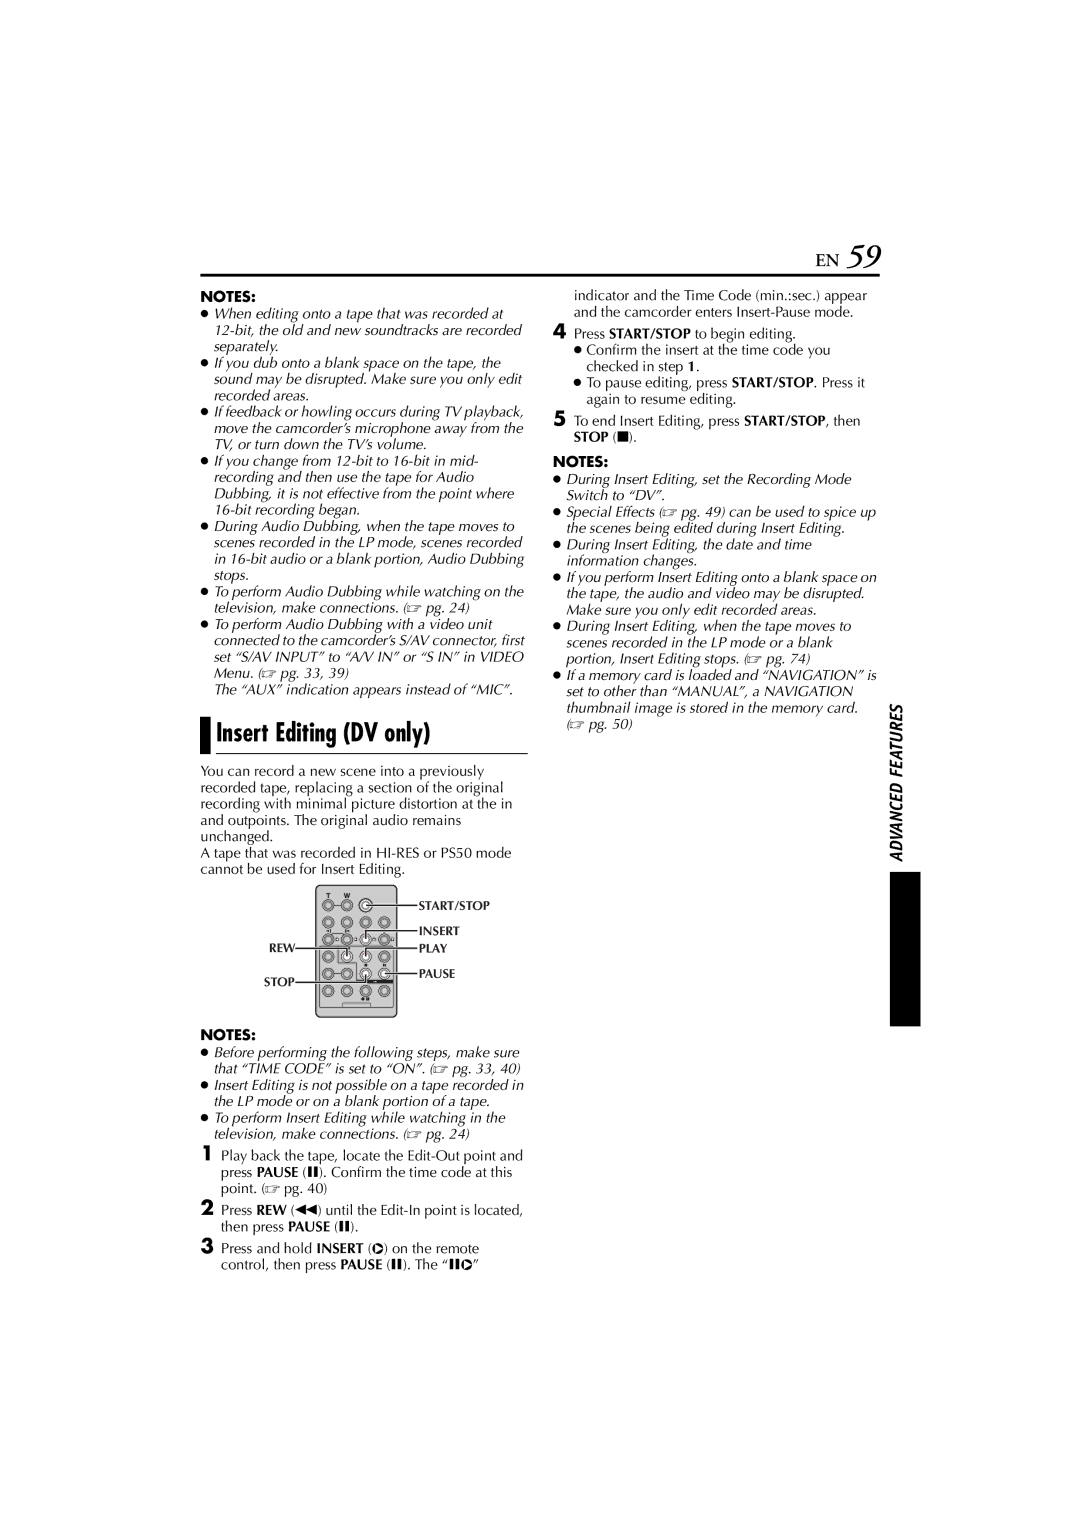
You can record a new scene into a previously recorded tape, replacing a section of the original recording with minimal picture distortion at the in and outpoints. The original audio remains unchanged.

A tape that was recorded in HI-RES or PS50 mode cannot be used for Insert Editing.

START/STOP

INSERT

REW PLAY

indicator and the Time Code (min.:sec.) appear and the camcorder enters Insert-Pause mode.

4Press START/STOP to begin editing.

Confirm the insert at the time code you checked in step 1.

To pause editing, press START/STOP. Press it again to resume editing.

5To end Insert Editing, press START/STOP, then STOP (8).

NOTES:

During Insert Editing, set the Recording Mode Switch to “DV”.

Special Effects ( pg. 49) can be used to spice up the scenes being edited during Insert Editing.

During Insert Editing, the date and time information changes.

If you perform Insert Editing onto a blank space on the tape, the audio and video may be disrupted. Make sure you only edit recorded areas.

During Insert Editing, when the tape moves to scenes recorded in the LP mode or a blank portion, Insert Editing stops. ( pg. 74)

If a memory card is loaded and “NAVIGATION” is set to other than “MANUAL”, a NAVIGATION thumbnail image is stored in the memory card. ( pg. 50)

ADVANCED FEATURES

STOP

PAUSE

NOTES:

Before performing the following steps, make sure that “TIME CODE” is set to “ON”. ( pg. 33, 40)

Insert Editing is not possible on a tape recorded in the LP mode or on a blank portion of a tape.

To perform Insert Editing while watching in the television, make connections. ( pg. 24)

1Play back the tape, locate the Edit-Out point and press PAUSE (9). Confirm the time code at this point. ( pg. 40)

2Press REW (3) until the Edit-In point is located, then press PAUSE (9).

3Press and hold INSERT (I) on the remote control, then press PAUSE (9). The “9I”

Page 59
Image 59
JVC LYT1193-001A, GR-PD1 manual Insert Editing DV only, During Insert Editing, set the Recording Mode Switch to DV

GR-PD1, LYT1193-001A specifications

The JVC LYT1193-001A, GR-PD1 is a compact and innovative camcorder that embodies the convergence of advanced technology and user-friendly design. Known for its robust build and high-quality video recording capabilities, this device has gained popularity among amateur filmmakers and casual videographers alike.

One of the main features of the GR-PD1 is its ability to record high-resolution video in various formats. With its progressive scan technology, it captures smooth and detailed footage that rivals more expensive models in the market. This camcorder supports various recording modes, allowing users to choose between standard, high-definition, or even specific frame rates to suit their filming needs.

The camcorder's optical zoom capability is another standout characteristic. Equipped with a high-quality lens, the GR-PD1 offers impressive zoom range while maintaining clarity and detail. This allows users to film subjects from a distance without compromising on image quality. The lens is complemented by a digital stabilizer that helps to reduce the effects of shake, providing steady shots even in challenging conditions.

An intuitive LCD touchscreen interface adds to the user-friendliness of the JVC LYT1193-001A. The screen allows for easy navigation through menu settings, making it simple to adjust various parameters on the fly. This is crucial for those who need to make quick changes while shooting, ensuring that they capture the perfect moment without technical delays.

In terms of connectivity, the GR-PD1 is designed to interface seamlessly with other devices. It includes USB and HDMI outputs, allowing for quick transfer of videos to computers or direct streaming to televisions. This versatility enables users to edit and share their content with ease, enhancing the overall experience of digital content creation.

Battery life is another essential aspect of the GR-PD1, and JVC has equipped this model with a long-lasting power source. This feature ensures that users can shoot for extended periods without worrying about frequent recharging, making it ideal for events, travels, and spontaneous filming opportunities.

Overall, the JVC LYT1193-001A, GR-PD1 is a remarkable camcorder that combines advanced technologies with ease of use, making it suitable for both novices and experienced videographers. Its blend of image quality, zoom capabilities, user interface, connectivity options, and battery life makes it a versatile choice for anyone looking to capture high-quality video.