14 EN GETTING STARTED
Power |
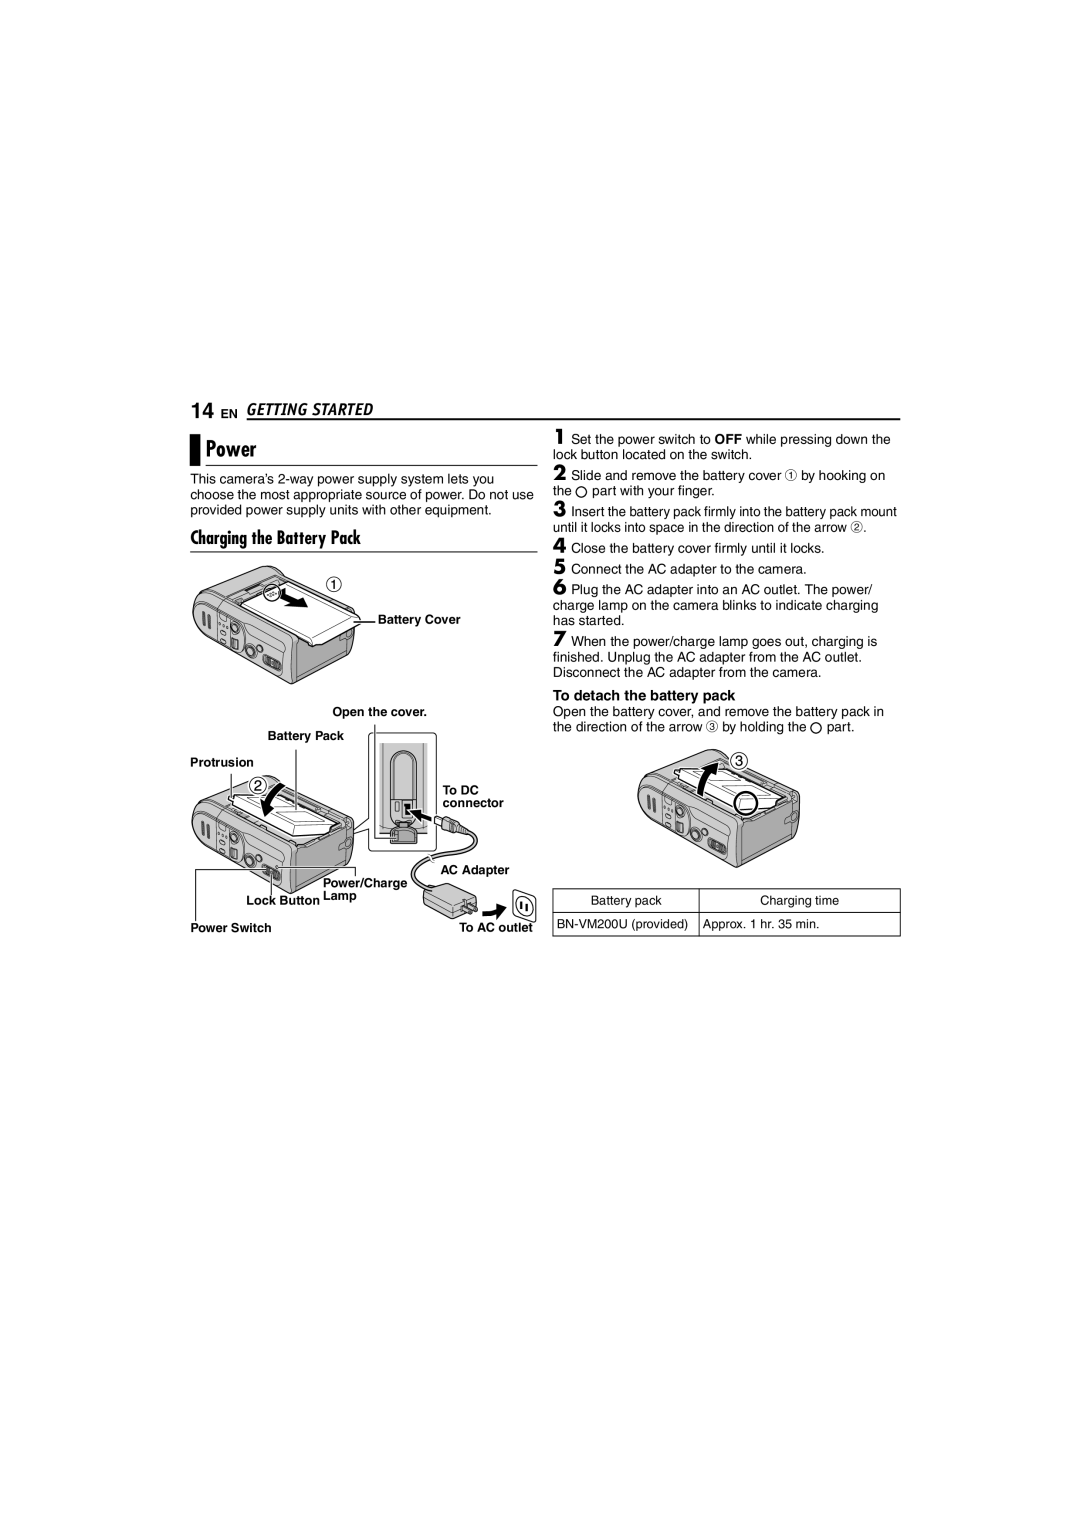
| 1 Set the power switch to OFF while pressing down the | |
| lock button located on the switch. | ||
This camera’s | 2 Slide and remove the battery cover A by hooking on | ||
choose the most appropriate source of power. Do not use | the part with your finger. | ||
provided power supply units with other equipment. | 3 Insert the battery pack firmly into the battery pack mount | ||
Charging the Battery Pack |
| until it locks into space in the direction of the arrow B. | |
| 4 Close the battery cover firmly until it locks. | ||
|
| ||
|
| 5 Connect the AC adapter to the camera. | |
|
| 6 Plug the AC adapter into an AC outlet. The power/ | |
Battery Cover | charge lamp on the camera blinks to indicate charging | ||
has started. |
| ||
|
| 7 When the power/charge lamp goes out, charging is | |
|
| finished. Unplug the AC adapter from the AC outlet. | |
|
| Disconnect the AC adapter from the camera. | |
|
| To detach the battery pack | |
Open the cover. |
| Open the battery cover, and remove the battery pack in | |
Battery Pack |
| the direction of the arrow C by holding the part. | |
|
|
| |
Protrusion |
|
|
|
| To DC |
|
|
| connector |
|
|
Power/Charge | AC Adapter |
|
|
|
|
| |
Lock Button Lamp |
| Battery pack | Charging time |
Power Switch | To AC outlet | Approx. 1 hr. 35 min. | |