6EN

INITIALSETTINGS(cont.)

If both auto channel set and auto clock set have been performed successfully:

1 Perform "Video Channel Set" on page 8.

2 Turn on the TV and select its VIDEO channel or AV mode, then make sure that all necessary stations have been stored in the recorder's memory by using the TV PROG button(s).

If station names (ID — pg. 46) have also been stored in the recorder's memory, the station name will be displayed at the top left corner of the screen for about 5 seconds when the recorder is tuned to a different station.

If you want to set the tuner manually such as to add or skip channels, to change channel positions, or to set or change station names, see pages 44 – 45.

3 Perform "SHOWVIEW Setup" on page 10 to check if the Guide Program numbers have been set correctly.

If auto channel set has succeeded but auto clock set has not:

1 Perform "Video Channel Set" on page 8.

2 Turn on the TV and select its VIDEO channel or AV mode, then make sure that all necessary stations have been stored in the recorder's memory by using the TV PROG button(s).

If station names (ID — pg. 46) have also been stored in the recorder's memory, the station name will be displayed at the top left corner of the screen for about 5 seconds when the recorder is tuned to a different station.

If you want to set the tuner manually such as to add or skip channels, to change channel positions, or to set or change station names, see pages 44 – 45.

3 Perform "Clock Set" on page 47, then "SHOWVIEW Setup" on page 10 to check if the Guide Program numbers have been set correctly.

If both auto channel set and auto clock set have failed:

1 Make sure the TV aerial cable is connected properly to the recorder and turn off the recorder power once, then turn the recorder power back on again.

The Country Set display appears on the front display panel and/or on the screen; perform steps 2 and 4 on pages 4 – 5 again.

IMPORTANT

Depending on the reception conditions, the station names may not be stored correctly, and auto Guide Program Number Set may not work properly. If the Guide Program numbers are not set properly, SHOWVIEW timer recording (pg. 28) will not work correctly; be sure to check if the Guide Program numbers have been set correctly (pg.10, "SHOWVIEW Setup").

Since your video recorder memorizes all detected stations even if the reception condition is poor, some of those stored stations may produce a noisy picture. To delete those stations, "Delete A Channel" on page 44.

INFORMATION

Language for the on-screen display

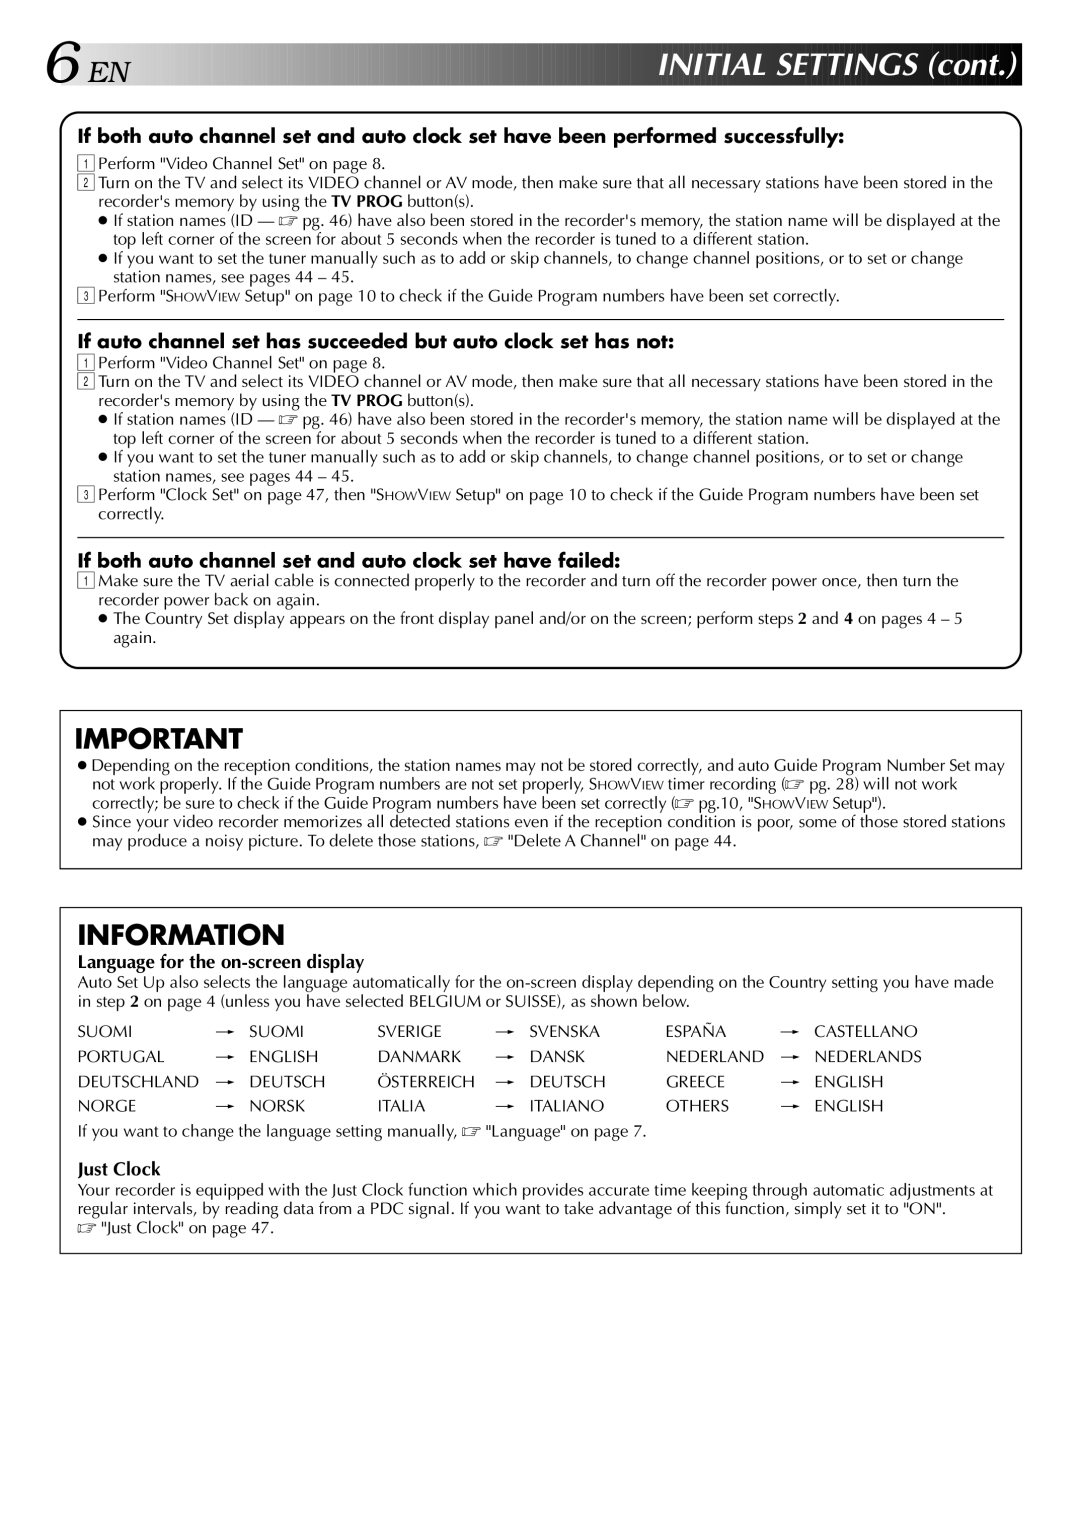
Auto Set Up also selects the language automatically for the on-screen display depending on the Country setting you have made in step 2 on page 4 (unless you have selected BELGIUM or SUISSE), as shown below.

SUOMI

[ SUOMI

SVERIGE

[ SVENSKA

ESPAÑA

[ CASTELLANO

PORTUGAL

[ ENGLISH

DANMARK

[ DANSK

NEDERLAND

[ NEDERLANDS

DEUTSCHLAND

[ DEUTSCH

ÖSTERREICH

[ DEUTSCH

GREECE

[ ENGLISH

NORGE

[ NORSK

ITALIA

[ ITALIANO

OTHERS

[ ENGLISH

If you want to change the language setting manually, "Language" on page 7.

Just Clock

Your recorder is equipped with the Just Clock function which provides accurate time keeping through automatic adjustments at regular intervals, by reading data from a PDC signal. If you want to take advantage of this function, simply set it to "ON".

"Just Clock" on page 47.

Page 6
Image 6
JVC HR-DD848E specifications Initial Settings, If both auto channel set and auto clock set have failed, Just Clock on

HR-DD848E specifications

The JVC HR-DD848E is a notable video cassette recorder (VCR) that emerged as a significant device in the late 1990s. It is particularly known for its advanced features and technological advancements that set it apart from conventional VCRs of its time. As part of JVC's esteemed line of video equipment, the HR-DD848E stands out for its ability to deliver high-quality playback and recording, marking it a favorite among enthusiasts and casual users alike.

One of the main features of the HR-DD848E is its Dual Play capability, allowing users to play back different formats without the need for additional equipment. The device supports both standard VHS tapes as well as the more advanced S-VHS format. S-VHS, known for its superior resolution and video quality compared to standard VHS, is complemented by the VCR’s built-in digital noise reduction and picture enhancement technology. This ensures that the playback experience is crisp and clear, regardless of tape quality.

Another distinguishing characteristic of the JVC HR-DD848E is its user-friendly interface. The device features straightforward controls and an intuitive on-screen menu, making it easy for individuals of all ages to operate. The included remote control also contributes to the user's convenience, providing access to various functionalities such as fast-forward, rewind, and pause.

The HR-DD848E is equipped with several advanced recording features. The Time Base Corrector (TBC) and the LP (Long Play) mode enhance the recording quality, allowing for longer playtime with satisfactory image clarity. The device also supports programming capabilities, enabling users to set timers for recordings, ensuring that they never miss their favorite shows, even during busy times.

Moreover, it features an AV input/output, enabling connectivity with other devices, such as cameras or additional video sources, making it versatile for various multimedia applications.

In summary, the JVC HR-DD848E is a remarkable VCR that encapsulates the technological innovations of its era. With features that enhance playback and recording quality, user-friendly operation, and the ability to connect with other devices, it represents a significant leap forward in home video technology. Whether for casual viewing or archiving cherished memories, the HR-DD848E remains a memorable part of video recording history.