10![]()
![]()
![]() EN
EN![]()
![]()
![]()
![]()
![]()
![]()
![]()
![]()
![]()
![]()
![]()
![]()
![]()
![]()
![]()
![]()
![]()
![]()
![]()
![]()
![]()
![]()
![]()
![]()
![]()
![]()
![]()
![]()
![]()
![]()
![]()
![]()
![]()
![]()
![]()
![]()
![]()
![]()
![]()
![]()
![]()
![]()
![]()
![]()
![]()
![]()
![]()


 INITIAL
 SETTINGS
 (cont.)


On-Screen Displays
Turn on the TV and select the VIDEO channel (or AV mode).
1 2 3
2
4 5 6
7 8 9
0 4
1
OK
MENU
PUSH JOG
You can choose whether or not to have various operational indicators appear on screen, by setting this function ON or OFF.
TURN ON THE RECORDER
1 Press |
|
|
| . |
|
| |
|
|
|
| ||||
| ACCESS MAIN MENU |
| |||||
| SCREEN |
|
| ||||
2 Press MENU. |
|
| |||||
3 | ACCESS MODE SET SCREEN | ||||||
Place the pointer next to "MODE SET" by pressing |
| ||||||
PUSH JOG %Þ, then press OK or PUSH JOG%. |
| ||||||
| ENABLE/DISABLE |
| |||||
|
|
| |||||
| The default setting is | MODE SET |
| ||||
| “ON”, so if you want on- |
| |||||
| O. S. D. | ON | |||||
4 screen displays, leave the | |||||||
|
|
|
|
|
| AUTO TIMER | OFF |
| setting as it is and go to | B. E. S. T. | ON | ||||
| step 5. If you don’t want | AUTO SP=LP TIMER | OFF | ||||
| the displays to appear, | COLOUR SYSTEM PAL/NTSC | |||||
| press PUSH JOG %Þto |
|
| ||||
| place the pointer next to | [5°] = |
| ||||
| "O.S.D." and press OK or |
| |||||
| [MENU] : EXIT |
| |||||
| PUSH JOG%to set to |
|
| ||||
| "OFF". |
|
| ||||
●"AUTO SP→LP TIMER" appears only with the
RETURN TO NORMAL
5 Press MENU.
NOTES:
● When you use this recorder as the player for editing, be sure to set "O.S.D." to "OFF" before starting.
● During playback, the operation mode indicators may be disturbed depending on the type of tape being used.
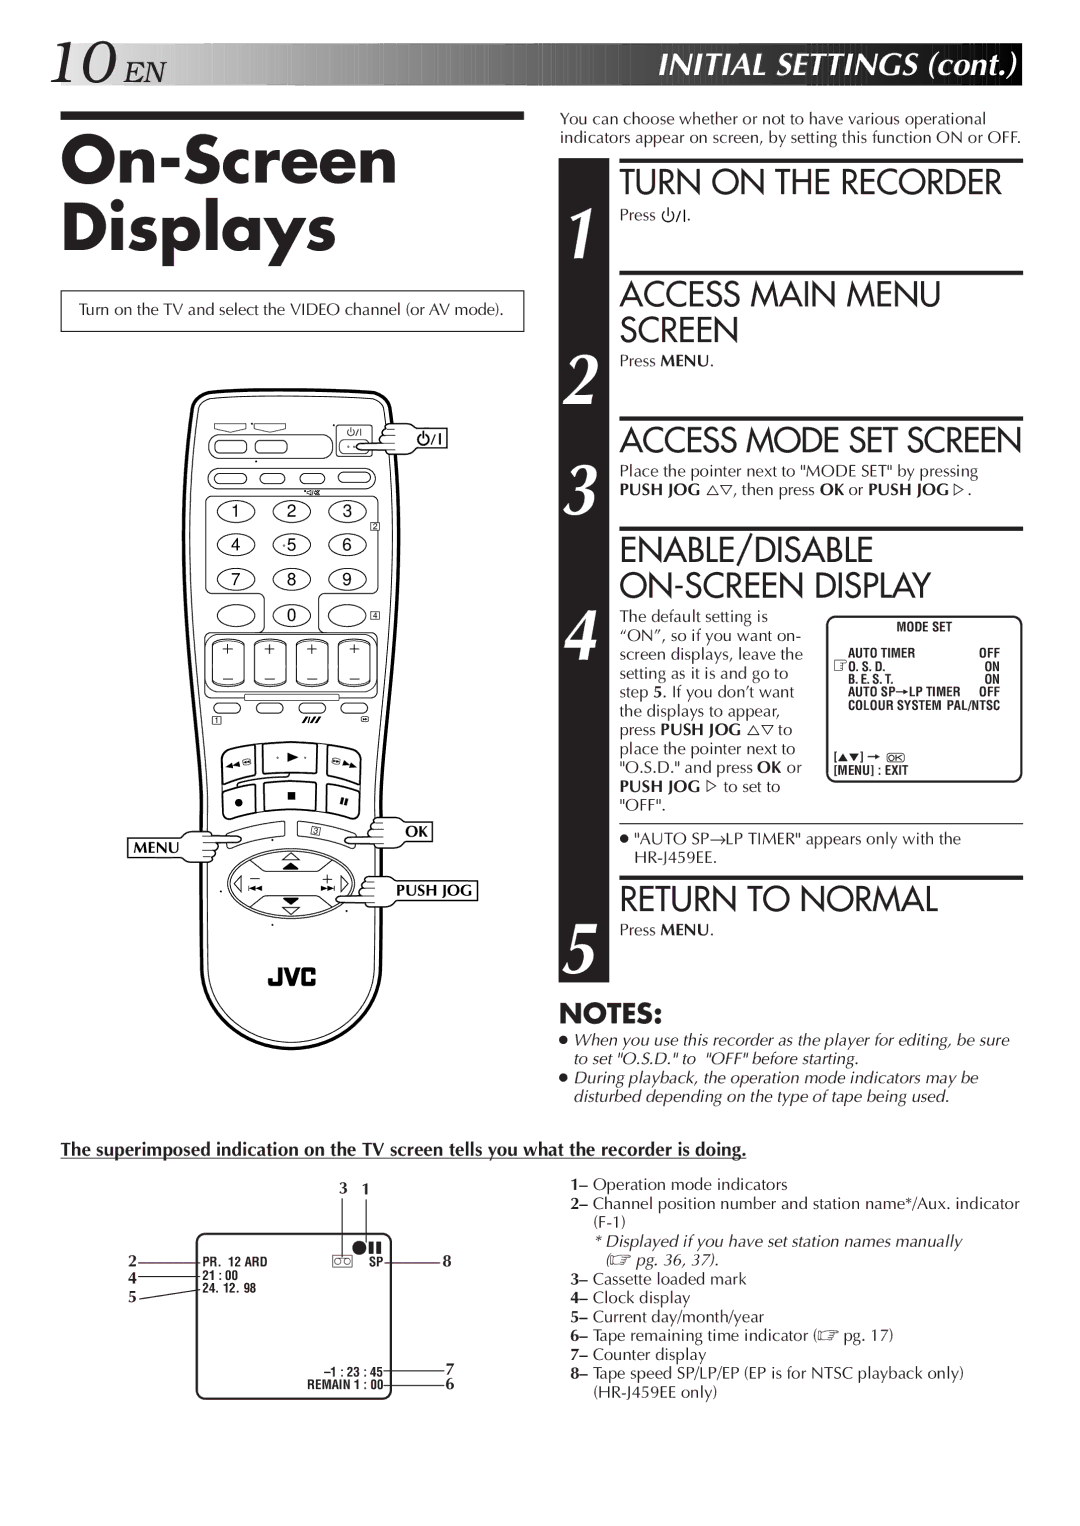
The superimposed indication on the TV screen tells you what the recorder is doing.
|
|
| 3 | 1 |
|
| ||
|
|
|
|
|
|
|
|
|
2 |
| PR. 12 ARD |
|
| q6 |
| 8 | |
| ] SP |
| ||||||
|
| |||||||
421 : 00
524. 12. 98
: 45 |
| 7 | |
| |||
REMAIN 1 | : 00 |
| 6 |
|
1– Operation mode indicators
2– Channel position number and station name*/Aux. indicator
*Displayed if you have set station names manually (☞ pg. 36, 37).
3– Cassette loaded mark 4– Clock display
5– Current day/month/year
6– Tape remaining time indicator (☞ pg. 17) 7– Counter display
8– Tape speed SP/LP/EP (EP is for NTSC playback only)