Resetting Menu Items

The values for particular parameters can be reset individually. This allows you to restore the default setting if you are unsatisfied with the adjusted values.

Some parameters are shared between features and, if reset in one area, will be reset in all areas that share that parameter.

To reset individual menu items:

1.Select the menu for the value you wish to reset.

2.Double press the knob associated with the value.

Restoring to Factory Defaults

You can restore your switcher to the factory default settings. You may wish to do this when troubleshooting problems with your switcher.

Restoring to factory defaults resets the entire switcher. Save any configuration information to a memory register if you wish to re-load it after performing the factory default.

To restore factory defaults:

1

4


2 3

1.Press MENU.

2.Press the RESET Wipe Pattern button.

3.Press NEXT.

4.Press the Factry Reset knob.

5.Press the Confrm knob to perform the reset. Press the Cancel knob to cancel the reset.

USB Storage

You can use the USB port to:

Save and load memory sets to a USB drive

Perform software upgrades

These files and settings can be copied and backed-up on a standard computer.

Note:

Wait 5 seconds after inserting a USB drive into the USB port before using it.

For More Information on...

performing software upgrades, refer to the section “Software Upgrades” on page 29.

Saving Memory Banks and Registers

You can save up to 9 sets of up to 100 memory registers on a USB drive.

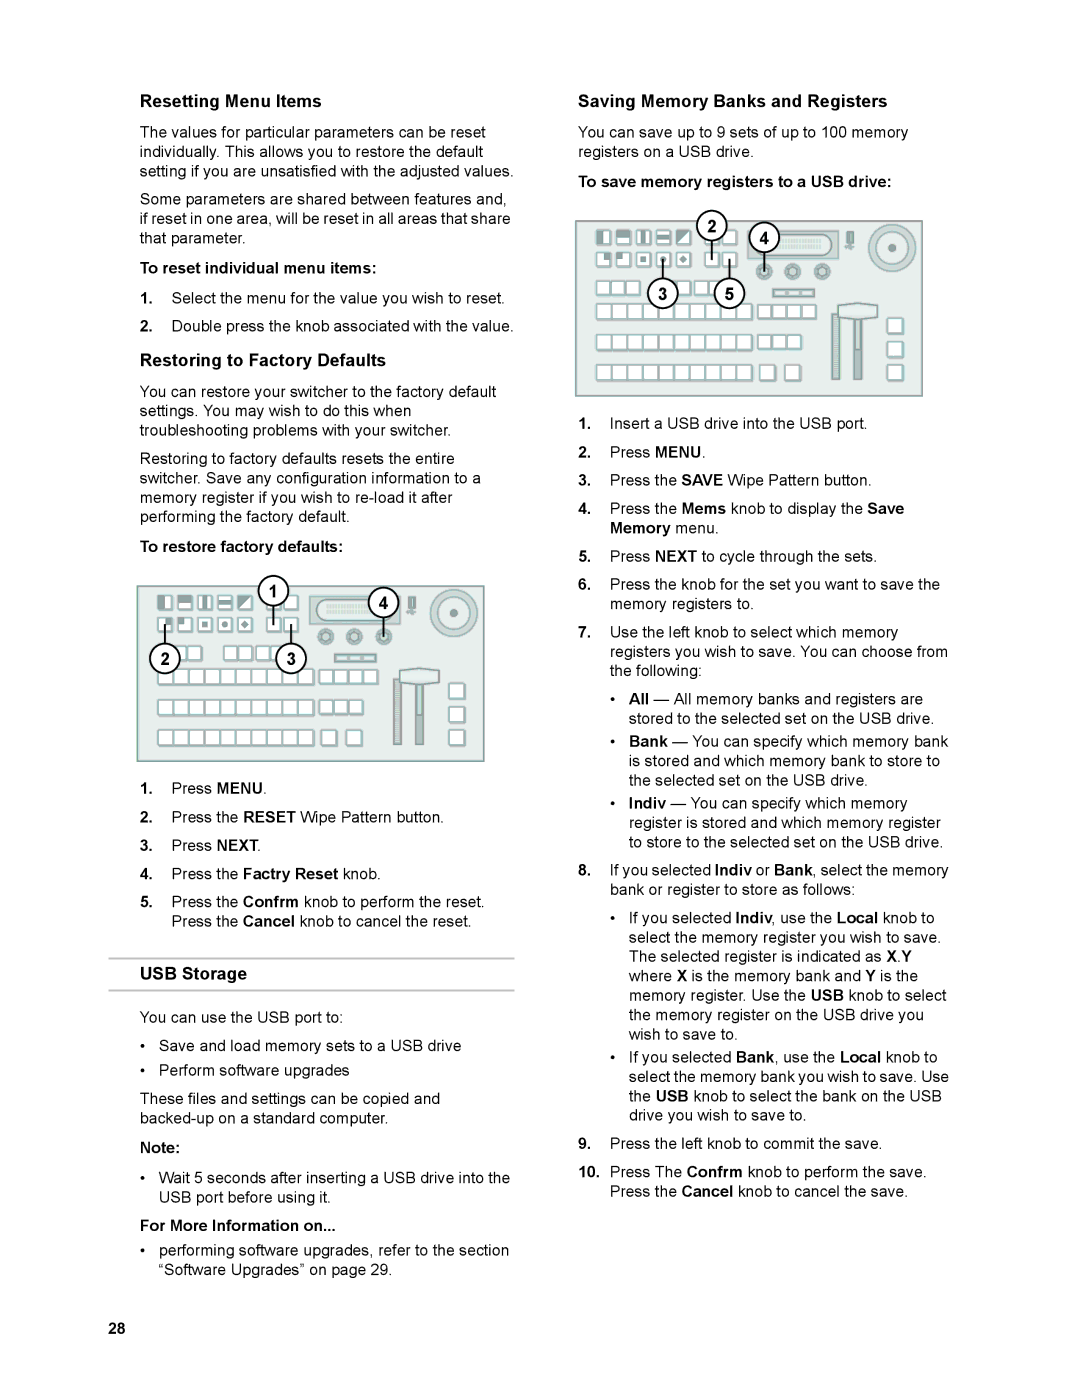
To save memory registers to a USB drive:

2 4

3 5

1.Insert a USB drive into the USB port.

2.Press MENU.

3.Press the SAVE Wipe Pattern button.

4.Press the Mems knob to display the Save Memory menu.

5.Press NEXT to cycle through the sets.

6.Press the knob for the set you want to save the memory registers to.

7.Use the left knob to select which memory registers you wish to save. You can choose from the following:

All — All memory banks and registers are stored to the selected set on the USB drive.

Bank — You can specify which memory bank is stored and which memory bank to store to the selected set on the USB drive.

Indiv — You can specify which memory register is stored and which memory register to store to the selected set on the USB drive.

8.If you selected Indiv or Bank, select the memory bank or register to store as follows:

If you selected Indiv, use the Local knob to select the memory register you wish to save. The selected register is indicated as X.Y where X is the memory bank and Y is the memory register. Use the USB knob to select the memory register on the USB drive you wish to save to.

If you selected Bank, use the Local knob to select the memory bank you wish to save. Use the USB knob to select the bank on the USB drive you wish to save to.

9.Press the left knob to commit the save.

10.Press The Confrm knob to perform the save. Press the Cancel knob to cancel the save.

28

Page 34
Image 34
JVC KM-H2500E manual Resetting Menu Items, Restoring to Factory Defaults, USB Storage, Saving Memory Banks and Registers

KM-H2500, KM-H2500U, KM-H3000U, KM-H2500E, KM-H3000E specifications

The JVC KM-H3000E, KM-H2500E, KM-H3000U, KM-H2500U, and KM-H2500 are professional video production switchers designed to meet the demands of live broadcasting, events, and production environments. These switchers are renowned for their robust construction, intuitive operation, and advanced features that cater to a wide range of workflow requirements.

The KM-H3000E and KM-H3000U are high-end models, offering extensive capabilities for complex productions. Both units feature a 1 M/E switcher configuration, enabling seamless switching between multiple video sources. The KM-H3000 series supports HD and SD formats, ensuring compatibility with various input signals. One of its significant characteristics includes a large-scale multi-viewer output, which provides operators with the ability to monitor multiple sources on a single screen, enhancing the efficiency of live production.

In terms of connectivity, the KM-H3000 series equipped with extensive I/O options, allowing for flexible integration with other broadcast equipment. It also supports external keyers, picture-in-picture effects, and advanced chroma keying, creating dynamic live content that captivates audiences. Additionally, the user interface is designed for quick and intuitive operation, featuring customizable buttons and clear labeling that streamline the switching process.

On the other hand, the KM-H2500E and KM-H2500U serve as mid-range alternatives, suitable for smaller operations without compromising functionality. These models maintain a compact design while still offering an impressive array of features. The KM-H2500 series includes 1 M/E switcher capabilities and supports multiple HD/SD formats, similar to its higher-end counterpart, but with slightly reduced input options.

One notable feature of the KM-H2500 is its cost-effectiveness, making it an attractive choice for educational institutions, small production houses, and local broadcasters. It supports simple transitions, effects, and basic keying, enabling users to produce quality content without the complexity of more advanced systems.

In summary, JVC's KM-H series offers versatile solutions for video production, whether it's high-end broadcasting or smaller-scale operations. With their robust feature sets, ease of use, and flexible connectivity, the KM-H3000E, KM-H2500E, KM-H3000U, KM-H2500U, and KM-H2500 are exceptional choices for any production environment. These switchers exemplify JVC's commitment to quality and innovation in the realm of professional video equipment.