Note:
•Copy the upgrade file to the root level of the USB drive. Do not copy the upgrade file into a folder.
•Upgrades can take several minutes to complete.
Do not turn the switcher power off during the upgrade.
•If CRITICAL UPGRADE is displayed, the switcher is performing an upgrade that includes
Completing a Software Upgrade
When the software upgrade is complete, the menu displays a message indicating the software upgrade was successful, the Upgrade LED on the rear of the switcher turns off, and the switcher performs an automatic restart.
Once the switcher restarts, it is ready to use. You can safely remove the USB drive.
Note:
•If you are upgrading a switcher as a result of a corrupt configuration or a previously failed upgrade, you may need to reconfigure the network address and reload switcher memories.
Advanced Keying
Keys can be modified to give them more distinct qualities and personalize your images.
Modifying Keys
All key types have the following parameters that can be modified:
•Transparency
•Mask
The Transparency function allows you to adjust the transparency of the key from completely opaque to completely transparent. As the level of transparency is adjusted, the graphic in the menu changes to represent the current percentage of transparency.
A mask is a keying technique in which a pattern is combined with the key source to block out unwanted portions of the key source. Mask modifiers are:
•Force
•Invert
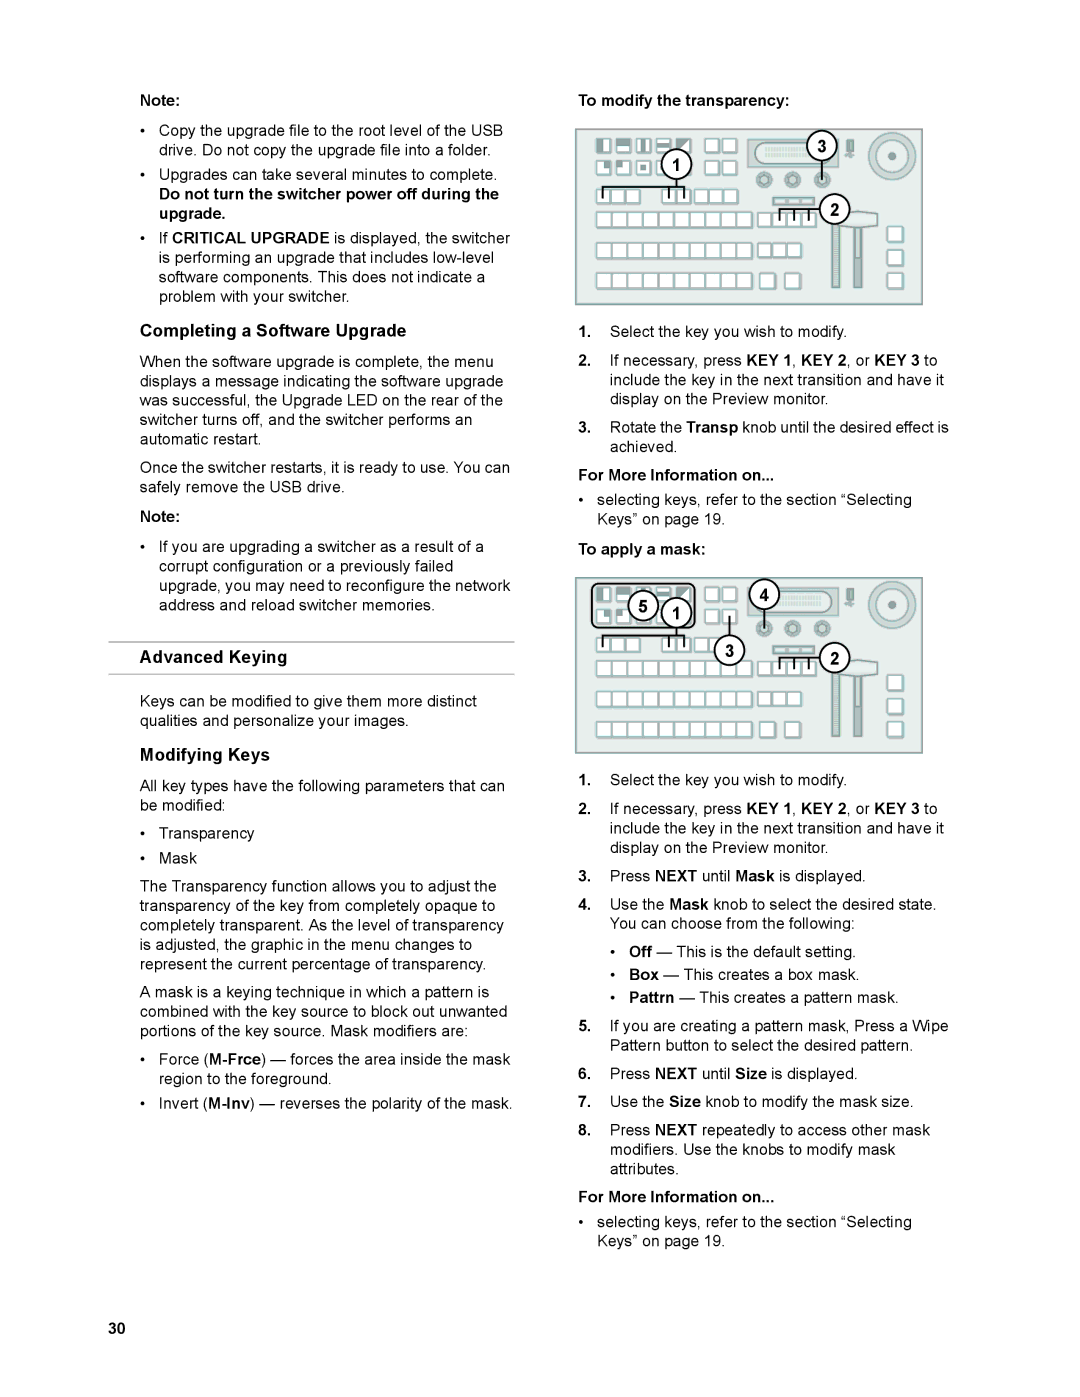
To modify the transparency:
![]()
![]()
![]()
![]()
![]()
![]()
![]()
![]()
![]()
![]()
![]()
![]()
![]()
![]()
![]()
![]()
![]()
![]()
![]()
![]()
![]()
![]()
![]()
![]()
![]()
![]() 3
3 ![]()
![]()
![]()
![]() 1
1![]()
![]()
![]()
![]()
![]()
![]()
![]()
![]()
![]()
![]()
![]()
![]()
![]()
![]()
![]()
![]()
![]()
![]()
![]()
![]()
![]()
![]()
![]()
2
1.Select the key you wish to modify.
2.If necessary, press KEY 1, KEY 2, or KEY 3 to include the key in the next transition and have it display on the Preview monitor.
3.Rotate the Transp knob until the desired effect is achieved.
For More Information on...
•selecting keys, refer to the section “Selecting Keys” on page 19.
To apply a mask:
5 | 1 | 4 |
| ||
|
| |
| 3 | 2 |
|
|
1.Select the key you wish to modify.
2.If necessary, press KEY 1, KEY 2, or KEY 3 to include the key in the next transition and have it display on the Preview monitor.
3.Press NEXT until Mask is displayed.
4.Use the Mask knob to select the desired state. You can choose from the following:
•Off — This is the default setting.
•Box — This creates a box mask.
•Pattrn — This creates a pattern mask.
5.If you are creating a pattern mask, Press a Wipe Pattern button to select the desired pattern.
6.Press NEXT until Size is displayed.
7.Use the Size knob to modify the mask size.
8.Press NEXT repeatedly to access other mask modifiers. Use the knobs to modify mask attributes.
For More Information on...
•selecting keys, refer to the section “Selecting Keys” on page 19.
30
