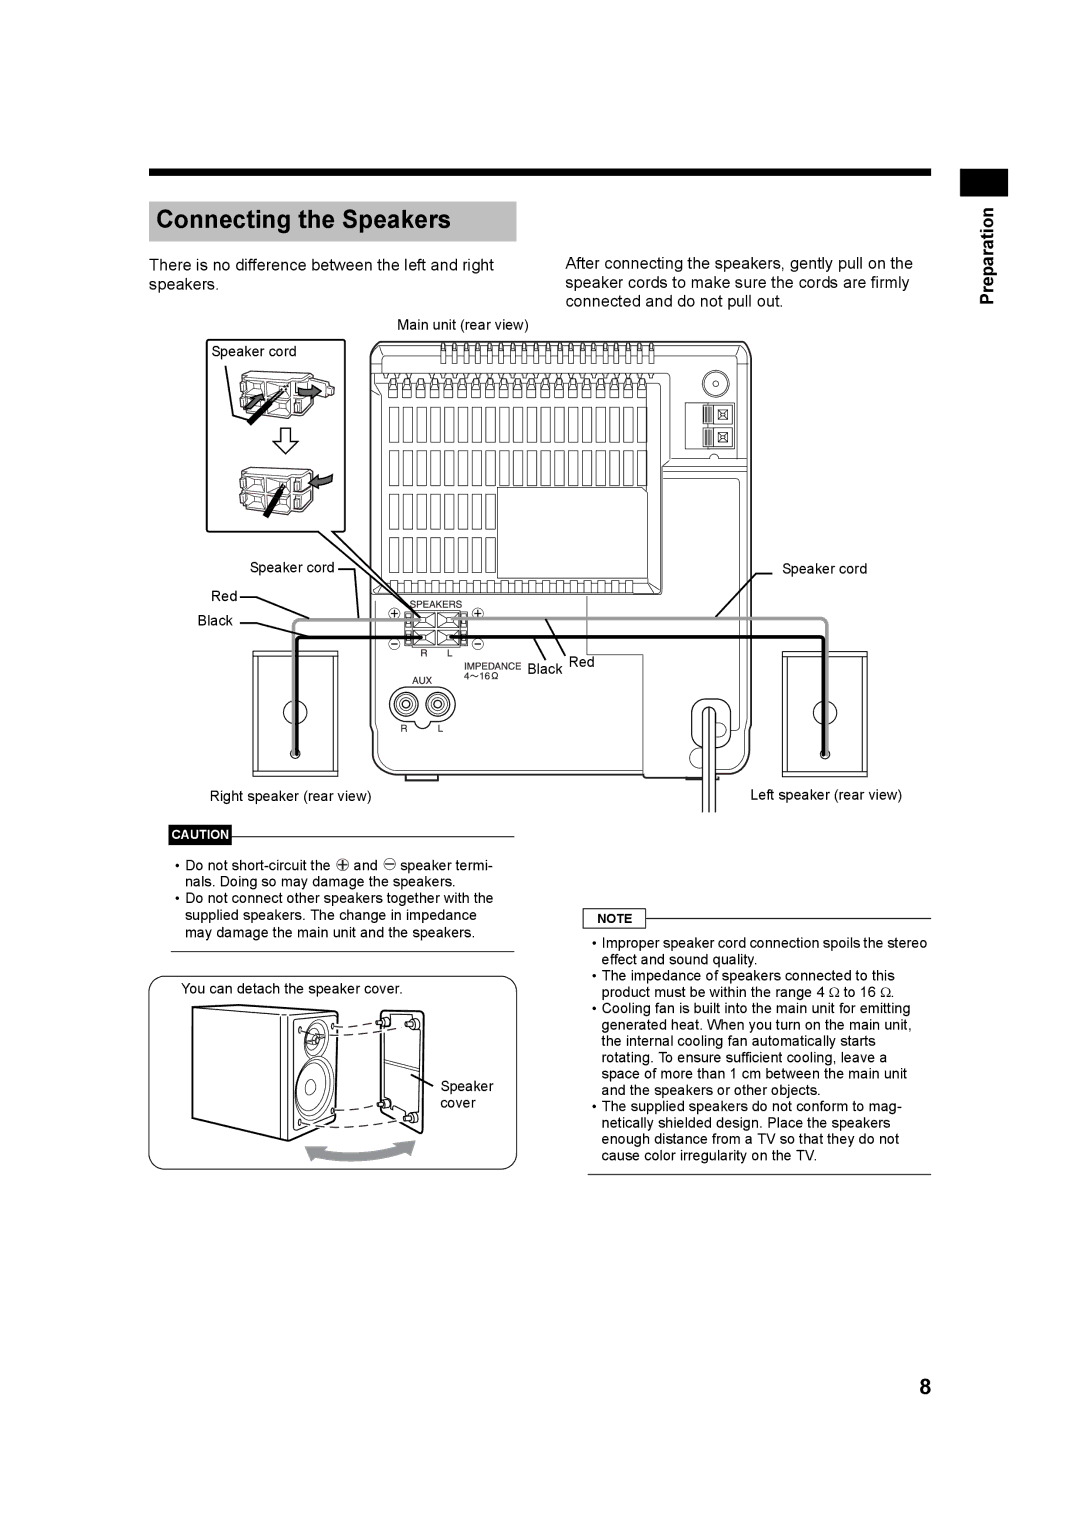
UX-Q3S, CA-UXQ3S, LVT1218-005A specifications
The JVC UX-Q3S, also known by its model number LVT1218-005A and code CA-UXQ3S, represents a compact audio system that combines impressive functionality with elegant design, making it an ideal choice for music lovers seeking versatility and quality. This system is designed to cater to various audio needs while not compromising on style or performance.One of the primary features of the JVC UX-Q3S is its high-quality audio playback capability. It supports multiple audio formats, allowing users to enjoy their favorite tracks from CDs, USB drives, and even FM radio. The system is equipped with a powerful dual speaker setup that produces rich and balanced sound, enhancing the listening experience whether it's for music or movies.
In terms of connectivity, the JVC UX-Q3S offers Bluetooth technology, enabling wireless streaming from smartphones, tablets, and other compatible devices. This feature promotes convenience, allowing users to seamlessly connect and control their music directly from their mobile devices without the need for physical cables.
The UX-Q3S also includes an intuitive interface with a user-friendly LCD display, making navigation through different functions and tracks straightforward. The remote control adds further convenience, allowing users to adjust settings from a distance.
Moreover, the system is designed with a sleek and modern aesthetic, making it suitable for various home decors. Its compact size ensures it can fit comfortably on a shelf or side table, while still delivering powerful sound performance.
The JVC UX-Q3S is complemented by a range of sound-enhancing technologies that cater to audiophiles. It features a built-in equalizer, allowing users to customize audio settings according to their preferences. This adaptability ensures that whether it's classical music, rock, or jazz, users can enjoy an optimized listening experience tailored to the genre.
In summary, the JVC UX-Q3S, with the part number LVT1218-005A and code CA-UXQ3S, is a versatile audio system that fuses quality sound engineering with sleek design. Its range of features, including Bluetooth connectivity, multiple playback options, and customizable audio settings, caters to a diverse audience, making it an excellent choice for anyone looking to enhance their audio experience at home. Whether for casual listening or dedicated listening sessions, the JVC UX-Q3S stands out as a reliable and stylish audio solution.