8![]()
![]()
![]() EN
EN![]()
![]()
![]()
![]()
![]()
![]()
![]()
![]()
![]()
![]()
![]()
![]()
![]()
![]()
![]()
![]()
![]()
![]()
![]()
![]()
![]()
![]()
![]()
![]()
![]()
![]()
![]()
![]()
![]()
![]()
![]()
![]()
![]()
![]()


 GETTING S
 TARTED (cont.)
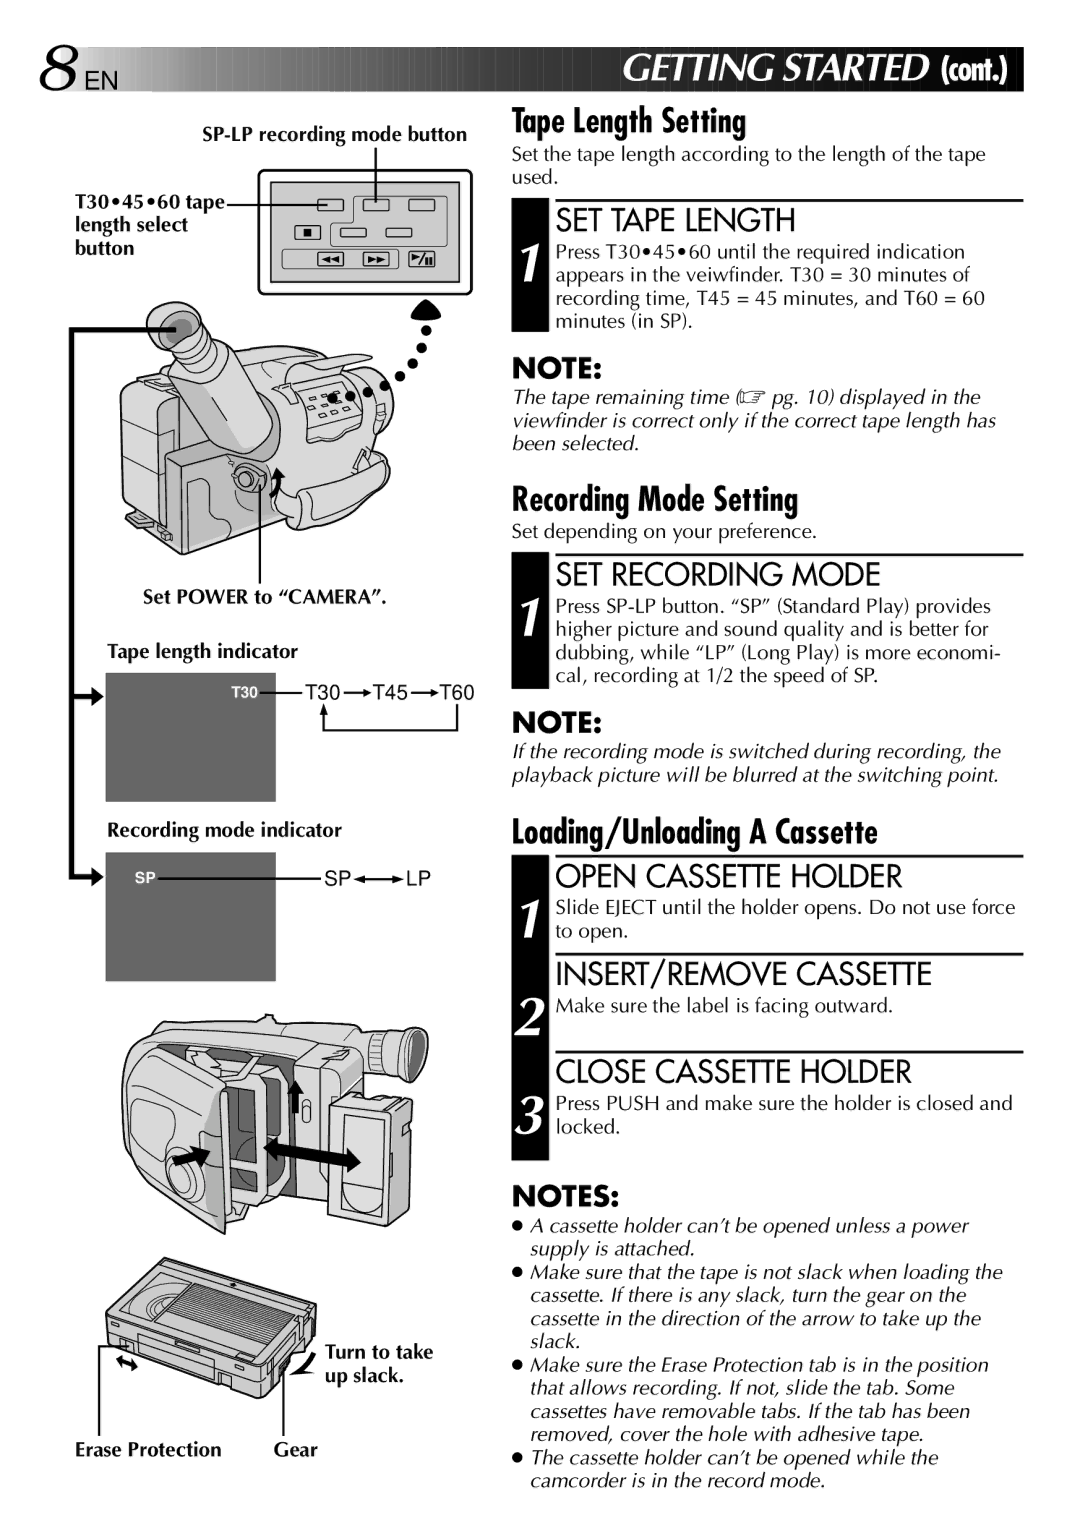
T30•45•60 tape |
length select |
button |
Set POWER to “CAMERA”.
Tape length indicator
T30 |
|
| T30 |
| T45 |
| T60 | ||
|
|
|
| ||||||
|
|
|
|
|
|
|
|
|
|
|
|
|
|
|
|
|
|
|
|
|
|
|
|
|
|
|
|
|
|
Tape Length Setting
Set the tape length according to the length of the tape used.
SET TAPE LENGTH
1 Press T30•45•60 until the required indication appears in the veiwfinder. T30 = 30 minutes of recording time, T45 = 45 minutes, and T60 = 60 minutes (in SP).
NOTE:
The tape remaining time (☞ pg. 10) displayed in the viewfinder is correct only if the correct tape length has been selected.
Recording Mode Setting
Set depending on your preference.
SET RECORDING MODE
1 Press
NOTE:
If the recording mode is switched during recording, the playback picture will be blurred at the switching point.
Recording mode indicator
SP |
|
| SP |
| LP |
|
|
| |||
|
|
|
|
|
|
| Turn to take |
| up slack. |
Erase Protection | Gear |
Loading/Unloading A Cassette
OPEN CASSETTE HOLDER
1 Slide EJECT until the holder opens. Do not use force to open.
INSERT/REMOVE CASSETTE
2 Make sure the label is facing outward.
CLOSE CASSETTE HOLDER
3 Press PUSH and make sure the holder is closed and locked.
NOTES:
●A cassette holder can’t be opened unless a power supply is attached.
●Make sure that the tape is not slack when loading the cassette. If there is any slack, turn the gear on the cassette in the direction of the arrow to take up the slack.
●Make sure the Erase Protection tab is in the position that allows recording. If not, slide the tab. Some cassettes have removable tabs. If the tab has been removed, cover the hole with adhesive tape.
●The cassette holder can’t be opened while the camcorder is in the record mode.