44


 USING
USING R
R
 EMO
EMO T
T E
E
 CONTROL
 UN
UN IT (cont.)
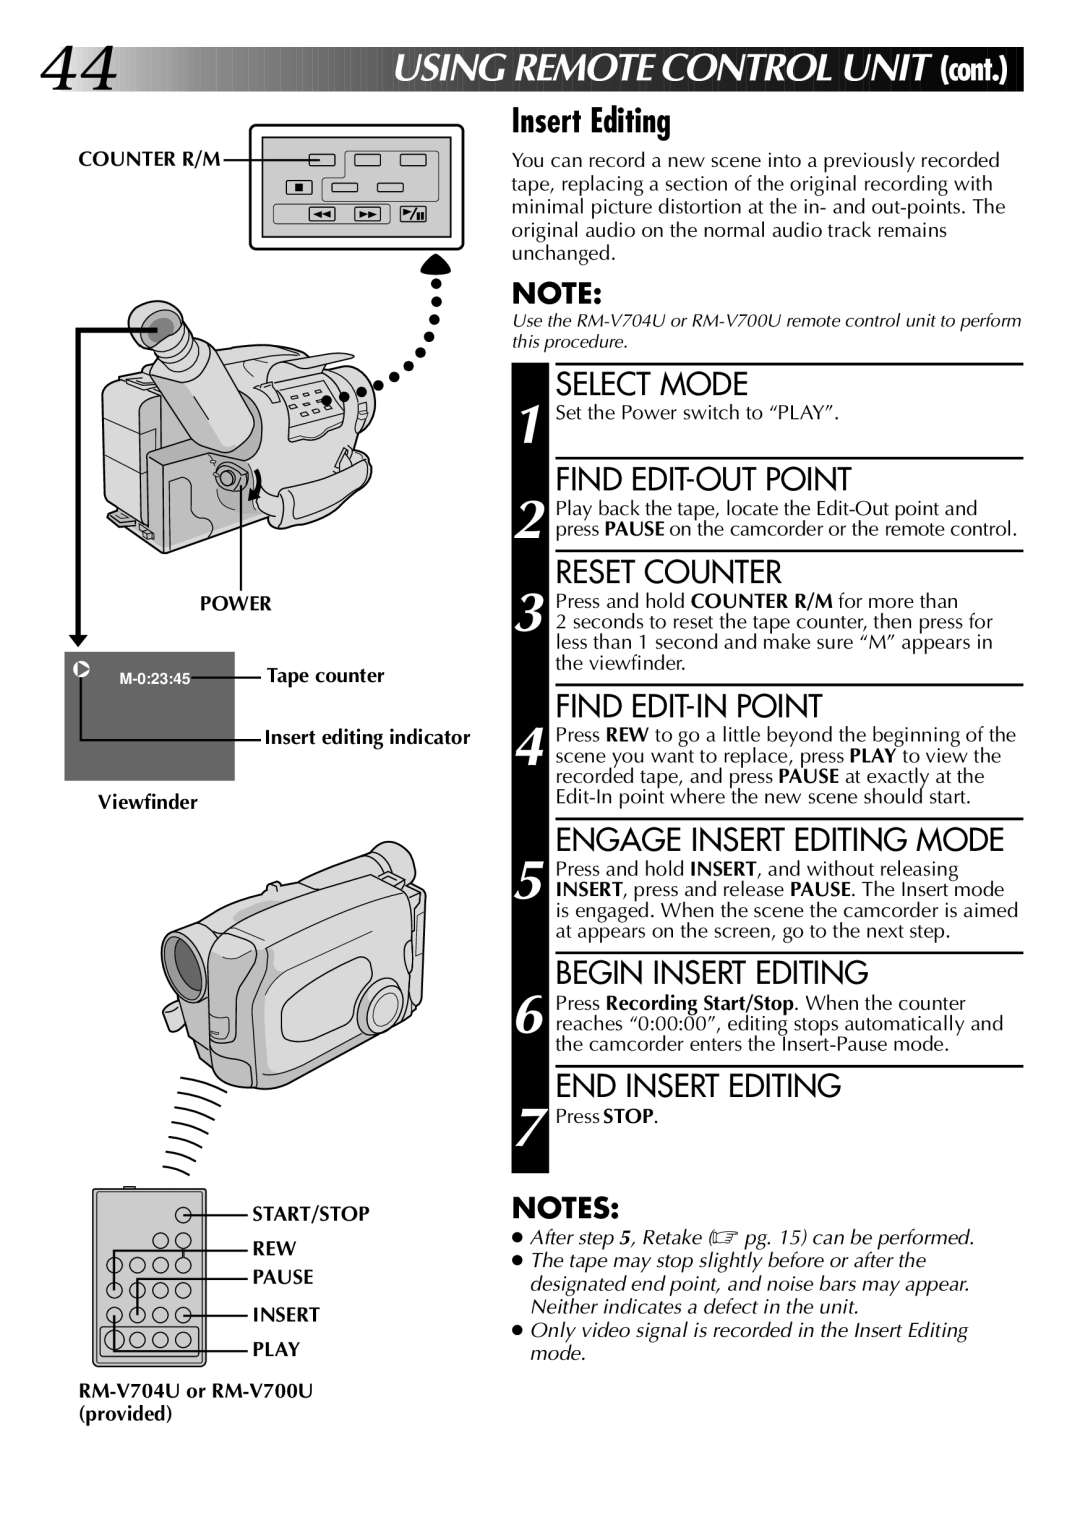
COUNTER R/M |
Insert Editing
You can record a new scene into a previously recorded tape, replacing a section of the original recording with minimal picture distortion at the in- and
POWER
| Tape counter | |
|
Insert editing indicator
Viewfinder
 START/STOP
REW
PAUSE


 INSERT
PLAY
RM-V704U or RM-V700U (provided)
NOTE:
Use the
SELECT MODE
1 Set the Power switch to “PLAY”.
FIND EDIT-OUT POINT
2 Play back the tape, locate the
RESET COUNTER
3 Press and hold COUNTER R/M for more than
2 seconds to reset the tape counter, then press for less than 1 second and make sure “M” appears in the viewfinder.
FIND EDIT-IN POINT
4 Press REW to go a little beyond the beginning of the scene you want to replace, press PLAY to view the recorded tape, and press PAUSE at exactly at the
ENGAGE INSERT EDITING MODE
5 Press and hold INSERT, and without releasing INSERT, press and release PAUSE. The Insert mode is engaged. When the scene the camcorder is aimed at appears on the screen, go to the next step.
BEGIN INSERT EDITING
6 Press Recording Start/Stop. When the counter reaches “0:00:00”, editing stops automatically and the camcorder enters the
END INSERT EDITING
7 Press STOP.
NOTES:
●After step 5, Retake (☞ pg. 15) can be performed.
●The tape may stop slightly before or after the designated end point, and noise bars may appear. Neither indicates a defect in the unit.
●Only video signal is recorded in the Insert Editing mode.