10![]()
![]()
![]()
![]()
![]()
![]()
![]()
![]()
![]()
![]()
![]()
![]()
![]()
![]()
![]()
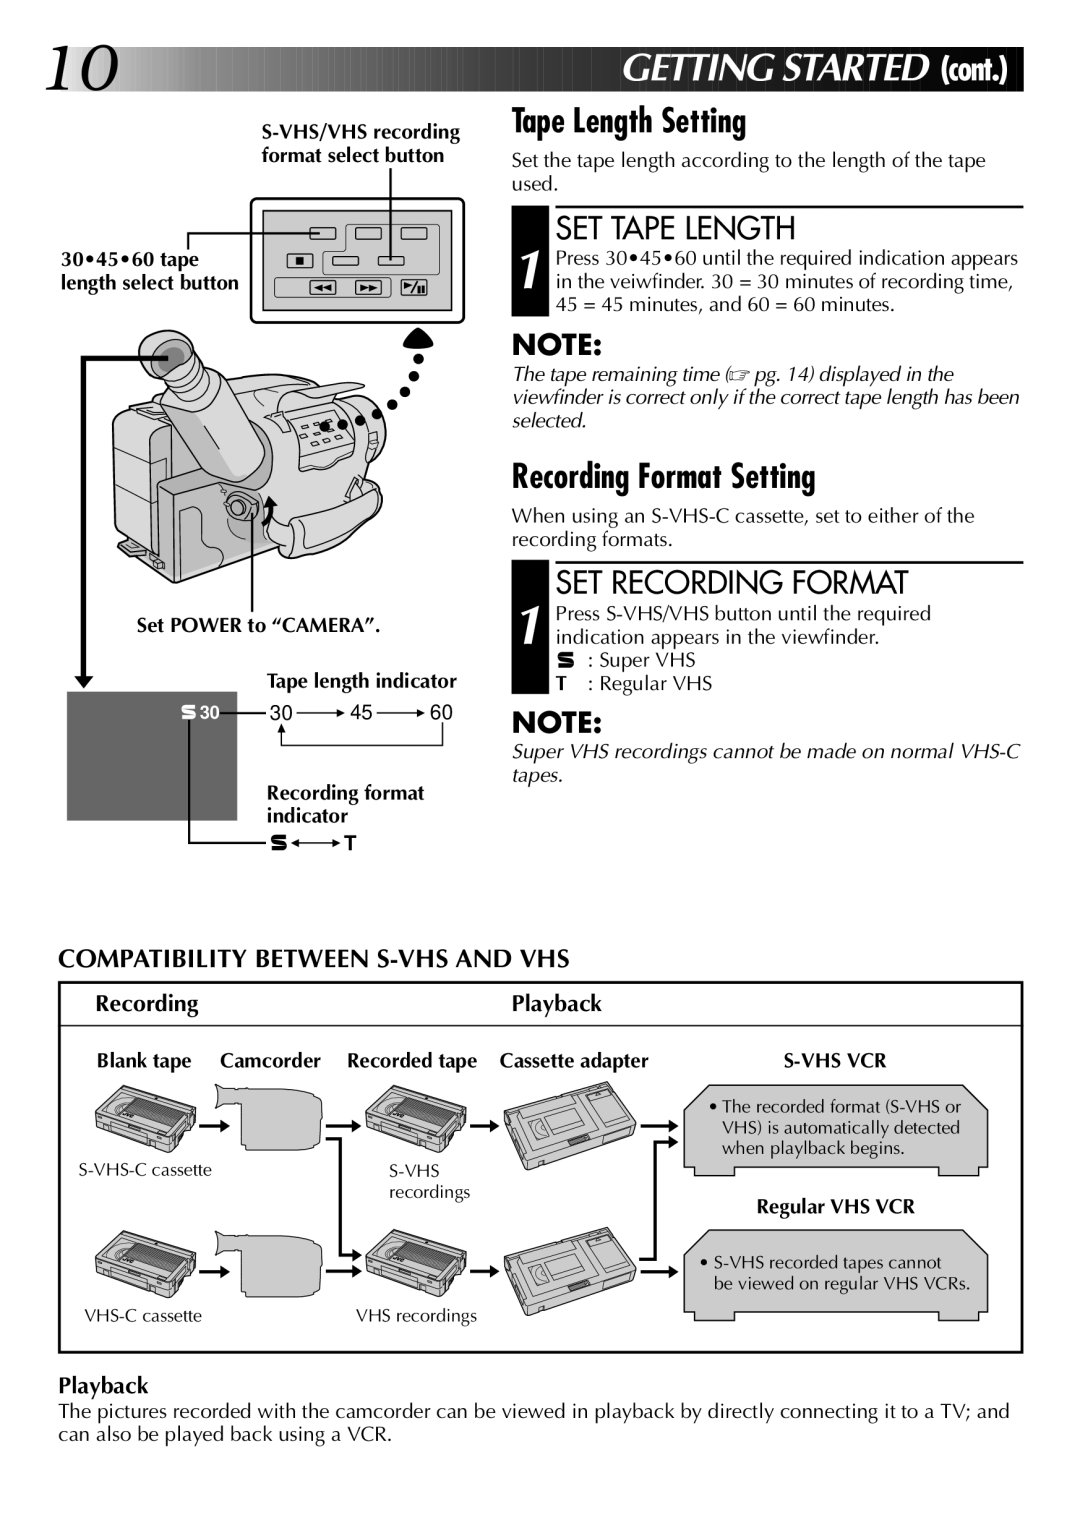
30•45•60 tape length select button


 GETTING S
 TARTED (cont.)
Tape Length Setting
Set the tape length according to the length of the tape used.
SET TAPE LENGTH
1 Press 30•45•60 until the required indication appears in the veiwfinder. 30 = 30 minutes of recording time, 45 = 45 minutes, and 60 = 60 minutes.
Set POWER to “CAMERA”.
Tape length indicator
![]() 30 30
30 30 ![]() 45
45 ![]() 60
60
Recording format indicator
![]() T
T
NOTE:
The tape remaining time (☞ pg. 14) displayed in the viewfinder is correct only if the correct tape length has been selected.
Recording Format Setting
When using an
SET RECORDING FORMAT
1 Press
: Super VHS
T: Regular VHS
NOTE:
Super VHS recordings cannot be made on normal
COMPATIBILITY BETWEEN S-VHS AND VHS
Recording | Playback |
|
|
|
|
Blank tape | Camcorder Recorded tape Cassette adapter |
|
VHS recordings
•The recorded format
Regular VHS VCR
•
be viewed on regular VHS VCRs.
Playback
The pictures recorded with the camcorder can be viewed in playback by directly connecting it to a TV; and can also be played back using a VCR.