English

Recording

IMPORTANT:

It may be unlawful to record or play back copyrighted material without the consent of the copyright owner.

The recording level is automatically set correctly, so it is not affected by the VOLUME control. Thus, during recording you can adjust the sound you are actually listening to without affecting the recording level.

While recording, you can hear sound modes and/or the Signal Adaptive Bass effect through the speaker or headphones. However, the sound is recorded without these effect (see page 8).

If recording you have made have excesssive noise or static, the unit may be too close to a TV. Increase the distance between the TV and the unit.

You can use type I and II tapes for recording.

To protect your recording Cassettes have two small tabs on

the back to protect unexpected erasure or re-recording.

To protect your recording, remove these tabs.

To re-record on a protected tape, cover the holes with adhesive tape. When using type II tape, be careful not to cover the holes used to detect the tape type.

To keep the best recording and playback sound quality

If the heads, capstant, and pinch rollers of the cassette decks become dirty, the following will occur:

Impaired sound quality

Discontinuous sound

Fading

Incomplete erasure

Difficulty in recording

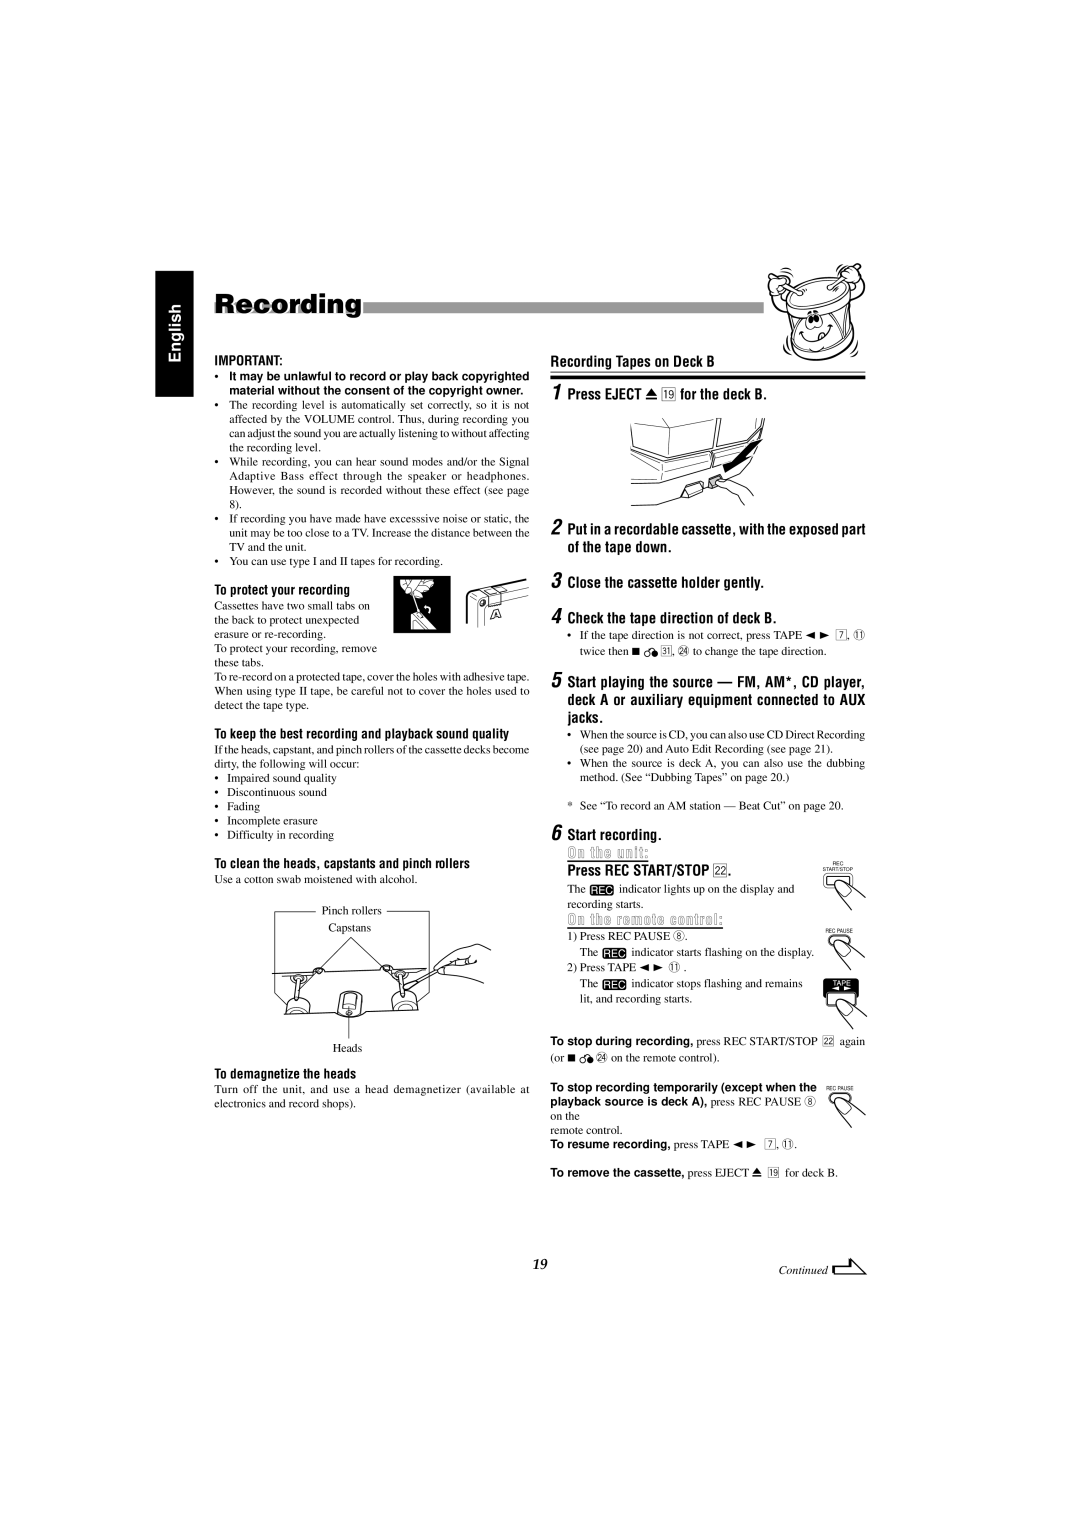
To clean the heads, capstants and pinch rollers

Use a cotton swab moistened with alcohol.

Pinch rollers

Capstans

Heads

To demagnetize the heads

Turn off the unit, and use a head demagnetizer (available at electronics and record shops).

Recording Tapes on Deck B

1 Press EJECT 0o for the deck B.

2 Put in a recordable cassette, with the exposed part of the tape down.

3 Close the cassette holder gently.

4 Check the tape direction of deck B.

If the tape direction is not correct, press TAPE 2 3 7, - twice then 7 z, _ to change the tape direction.

5 Start playing the source — FM, AM*, CD player, deck A or auxiliary equipment connected to AUX jacks.

When the source is CD, you can also use CD Direct Recording (see page 20) and Auto Edit Recording (see page 21).

When the source is deck A, you can also use the dubbing method. (See “Dubbing Tapes” on page 20.)

* See “To record an AM station — Beat Cut” on page 20.

6 Start recording. On the unit:

Press REC START/STOP s.

REC

START/STOP

The

indicator lights up on the display and


recording starts.


On the remote control:

REC PAUSE

1) Press REC PAUSE 8.


The

indicator starts flashing on the display.


2) Press TAPE 2 3 - .


The

indicator stops flashing and remains


lit, and recording starts.


To stop during recording, press REC START/STOP s again (or 7 _ on the remote control).

To stop recording temporarily (except when the REC PAUSE playback source is deck A), press REC PAUSE 8 on the

remote control.

To resume recording, press TAPE 2 3 7, -.

To remove the cassette, press EJECT 0 o for deck B.

19

Continued


Page 24
Image 24
JVC MX-J585V Recording, Press REC START/STOP s, To clean the heads, capstants and pinch rollers, To demagnetize the heads

MX-J555V, MX-J585V specifications

The JVC MX-J555V and MX-J585V are compact audio systems that blend modern design with powerful audio performance, making them ideal choices for music enthusiasts who seek both functionality and aesthetic appeal. These systems are equipped with a range of features that enhance the listening experience and cater to diverse audio needs.

One of the standout characteristics of the JVC MX-J555V and MX-J585V is their robust sound quality. Both models are designed to deliver high-fidelity audio, with built-in speakers and powerful amplifiers that ensure clear, resonant sound across a wide range of frequencies. The systems also feature a subwoofer output, allowing users to connect an external subwoofer for even deeper bass response.

These audio systems incorporate advanced technologies to improve playback and connectivity options. The MX-J555V and MX-J585V support CD playback, with CD-R/RW compatibility, enabling users to enjoy their favorite CDs as well as customized playlists. Additionally, both models come equipped with AM/FM radio tuners, allowing for easy access to a variety of radio stations, making it perfect for those who enjoy live broadcasts.

Another impressive feature is the versatile connectivity options available on these models. Equipped with USB ports, users can connect their digital devices, enabling playback of MP3 files directly through the audio system. This makes it easy to enjoy a personal music library without the need for additional equipment. The systems also feature analog audio inputs, allowing for connections to other devices like smartphones and tablets.

A noteworthy highlight of the JVC MX-J555V and MX-J585V is their user-friendly design. The systems come with intuitive controls and an easy-to-read display, making operation seamless for users of all ages. The inclusion of remote controls further enhances convenience, allowing users to adjust settings from a distance.

Moreover, the sleek design of both models fits seamlessly into any home décor, providing an elegant look while maintaining a compact footprint. The portability of these audio systems ensures that they can be easily moved from one room to another, making them ideal for both home use and gatherings.

In conclusion, the JVC MX-J555V and MX-J585V are powerful and versatile audio systems that offer outstanding sound quality, a range of connectivity options, and an elegant design. With their combination of technology and user-friendly features, they serve as excellent choices for anyone looking to elevate their listening experience.