3 ![]()
![]()
![]() Basic Operation
Basic Operation
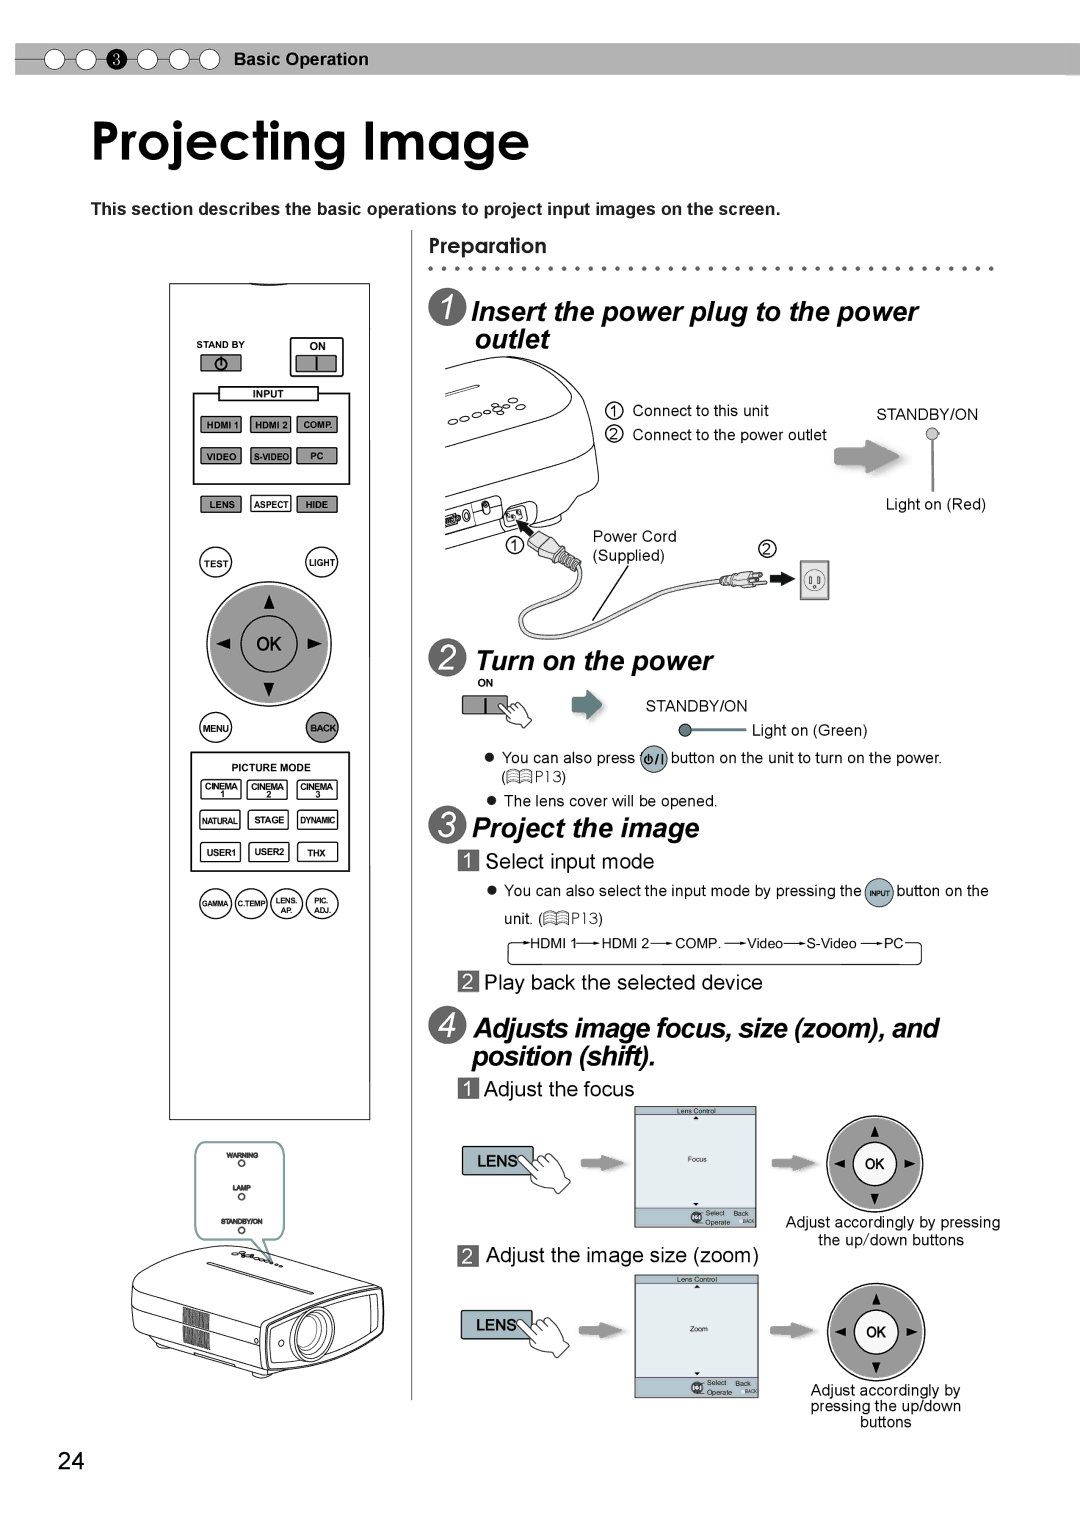
Projecting Image
This section describes the basic operations to project input images on the screen.
STAND BY | ON |
| INPUT |
|
HDMI 1 | HDMI 2 | COMP. |
VIDEO | PC |
LENS ASPECT HIDE
TESTLIGHT
MENUBACK
PICTURE MODE
CINEMA | CINEMA | CINEMA |
1 | 2 | 3 |
NATURAL | STAGE | DYNAMIC |
USER1 USER2 THX
GAMMA C.TEMP LENS. PIC.
AP. ADJ.
Preparation
1 Insert the power plug to the power outlet
| 1 | Connect to this unit | STANDBY/ON | |
| 2 | Connect to the power outlet |
| |
|
|
|
| Light on (Red) |
1 | Power Cord | 2 |
| |
(Supplied) |
| |||
|
|
| ||
2 Turn on the power
ON
STANDBY/ON
![]() Light on (Green)
Light on (Green)
● You can also press t![]() h
h![]()
![]() e
e![]() button on the unit to turn on the power. (
button on the unit to turn on the power. (![]() P13)
P13)
● The lens cover will be opened.
3 Project the image
1Select input mode
●You can also select the input mode by pressing the INPU![]()
![]() T button on the unit. (
T button on the unit. (![]() P13)
P13)
![]() HDMI 1
HDMI 1![]() HDMI 2
HDMI 2![]() COMP.
COMP. ![]() Video
Video![]() S-Video
S-Video![]() PC
PC
2Play back the selected device
4 Adjusts image focus, size (zoom), and position (shift).
WARNING
LAMP
STANDBY/ON
1Adjust the focus
LENS


Lens Control
Focus
Select Back
Operate ![]() BACK
BACK
Adjust accordingly by pressing the up/down buttons
2Adjust the image size (zoom)
| Lens Control |
LENS | Zoom |
Select Back
Operate ![]() BACK
BACK
Adjust accordingly by pressing the up/down buttons
24