CLOCK ADJUSTMENT
(USING THE REMOTE CONTROL UNIT)
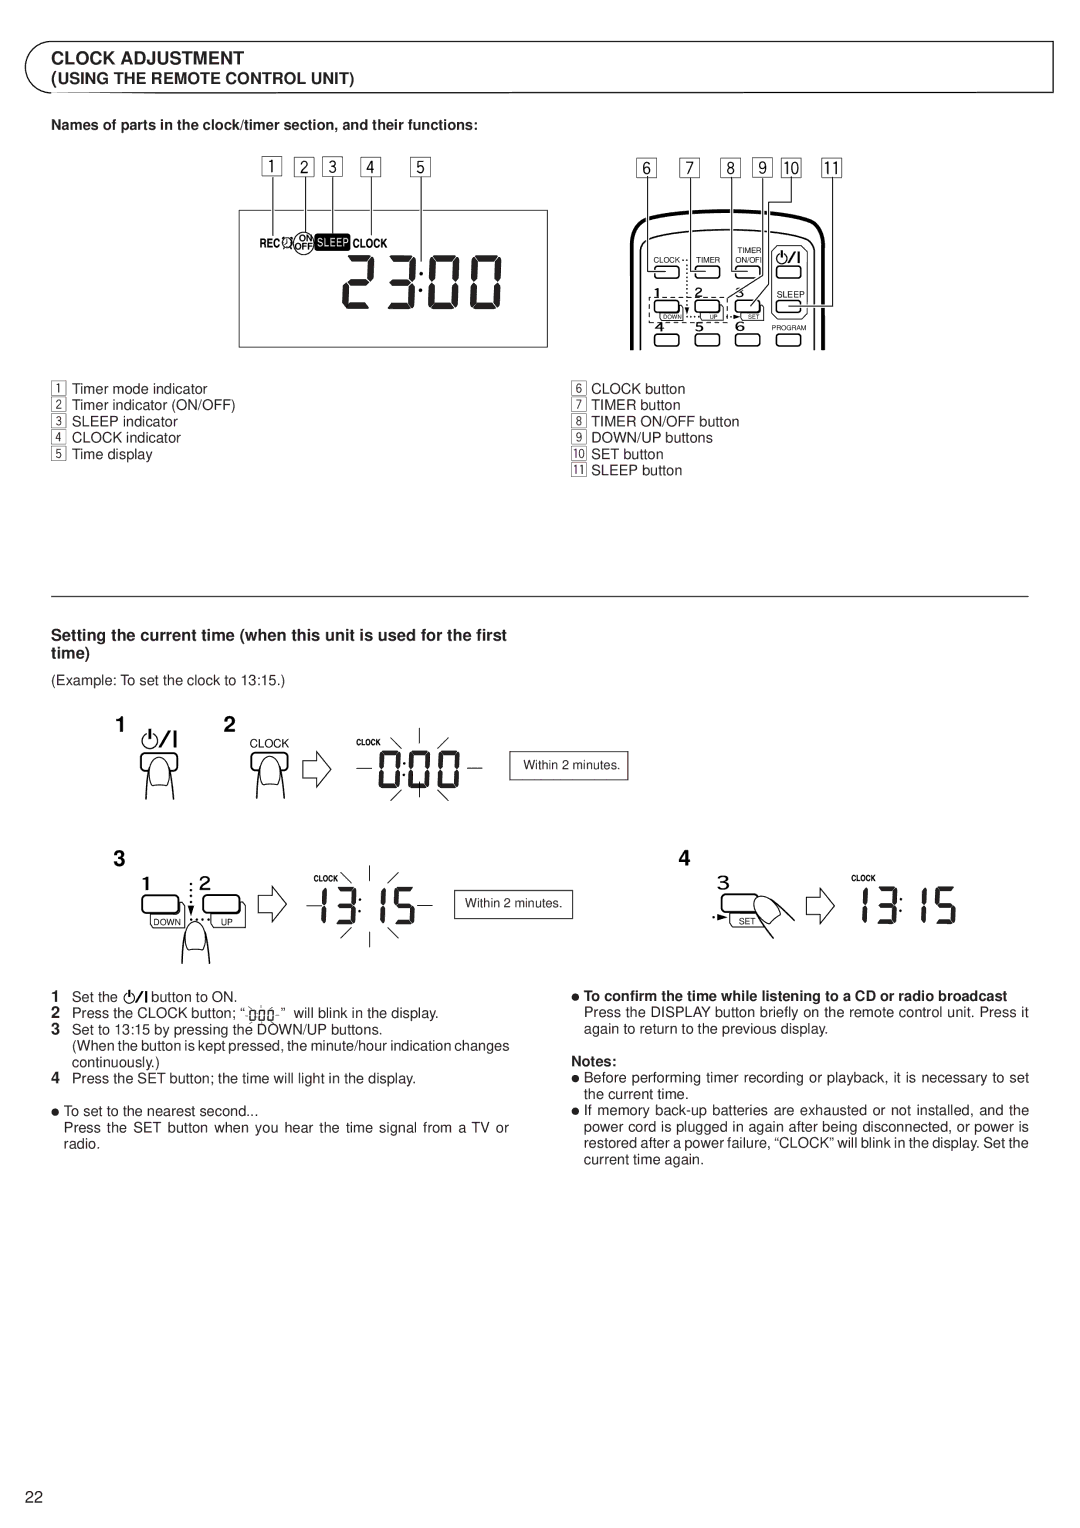
Names of parts in the clock/timer section, and their functions:
1 2 3 4 5
ON
![]() OFF
OFF
1Timer mode indicator
2 Timer indicator (ON/OFF)
3 SLEEP indicator
4 CLOCK indicator
5 Time display
6 7 8 9 p q
|
|
|
| TIMER | |
CLOCK | TIMER | ON/OFF | |||
|
|
|
|
|
|
|
| SLEEP |
DOWN | UP | SET |
|
| PROGRAM |
6CLOCK button
7 TIMER button
8 TIMER ON/OFF button
9 DOWN/UP buttons p SET button
q SLEEP button
Setting the current time (when this unit is used for the first time)
(Example: To set the clock to 13:15.)
1
2
CLOCK
Within 2 minutes.
3 | 4 |
DOWN ![]()
![]()
![]() UP
UP
Within 2 minutes.
SET
1Set the ![]()
![]() button to ON.
button to ON.
2Press the CLOCK button; “ ![]()
![]()
![]()
![]()
![]()
![]() ” will blink in the display.
” will blink in the display.
3Set to 13:15 by pressing the DOWN/UP buttons.
(When the button is kept pressed, the minute/hour indication changes continuously.)
4Press the SET button; the time will light in the display.
ÖTo set to the nearest second...
Press the SET button when you hear the time signal from a TV or radio.
ÖTo confirm the time while listening to a CD or radio broadcast Press the DISPLAY button briefly on the remote control unit. Press it again to return to the previous display.
Notes:
ÖBefore performing timer recording or playback, it is necessary to set the current time.
ÖIf memory
22